The plastic strip at the bottom of a glass shower door has one job: keep water inside the shower where it belongs. Unfortunately, it also has a secret second job: collecting soap scum, hard-water minerals, shampoo residue, body oils, mildew, and the mysterious gray gunk that makes homeowners question every life choice that led to owning a glass shower door.
The good news? Cleaning the plastic shower door strip, also called a shower door sweep, bottom seal, drip rail, or vinyl seal, is not complicated. You do not need industrial-strength fumes, a hazmat suit, or a Saturday sacrificed to the bathroom gods. With white vinegar, dish soap, baking soda, an old toothbrush, and a little patience, you can make that cloudy, slimy strip look dramatically better. In some cases, you can even remove it, soak it, scrub it, and slide it back on like a tiny, clean little bathroom miracle.
This guide explains how to clean the plastic strip at the bottom of a glass shower door, how to remove stubborn mildew and hard-water buildup, how to prevent grime from returning, and when the smarter move is to replace the strip instead of scrubbing it like you are trying to erase history.
What Is the Plastic Strip at the Bottom of a Shower Door?
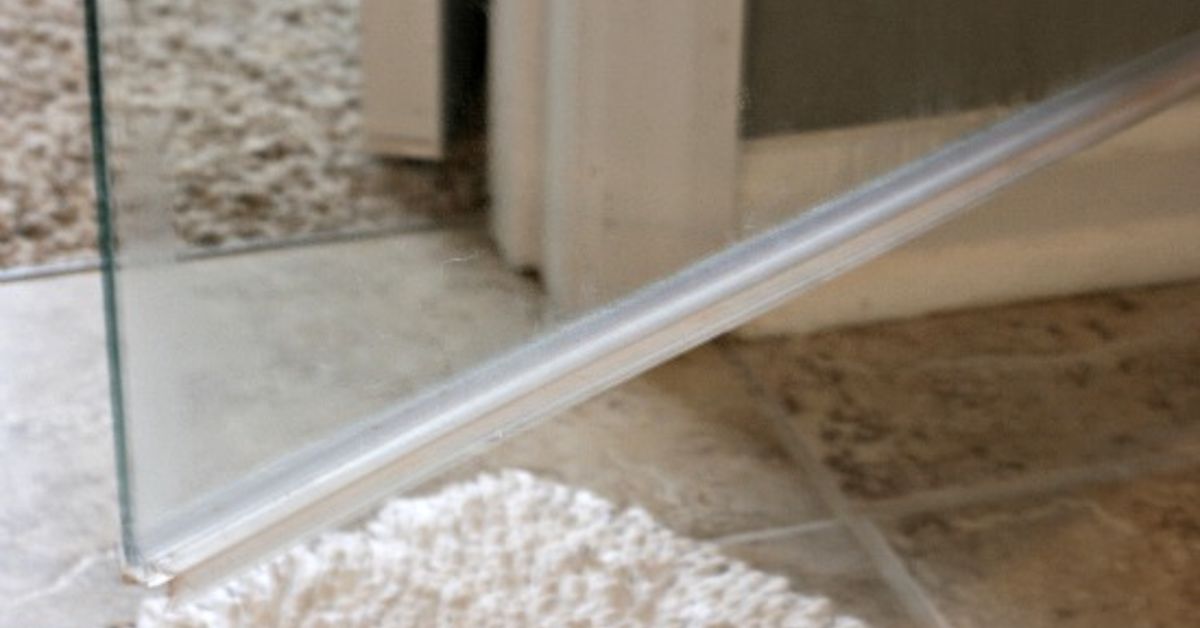
The plastic strip along the bottom edge of a glass shower door is usually a clear vinyl, PVC, or polycarbonate sweep. It may have a flat channel that grips the glass and one or more flexible fins that direct water back into the shower. On some frameless glass shower doors, the sweep simply slides onto the bottom of the door. On framed or semi-frameless doors, it may fit into a metal track, drip rail, or channel.
Its purpose is simple: reduce leaks, control splashing, and help the shower door close neatly. Because it sits at the wettest, lowest part of the door, it is also one of the first places to develop grime. Water runs down the glass, settles in the seal, and leaves behind minerals. Soap and shampoo cling to the flexible fins. If the bathroom stays humid, mildew can join the party. Nobody invited mildew, but mildew rarely waits for an invitation.
Why the Bottom Shower Door Strip Gets So Dirty
The bottom strip gets dirty faster than the rest of the door because it lives in the splash zone. Every shower sends water, soap, conditioner, shaving cream, and body oils down the glass. The strip catches much of that residue. Over time, the buildup can look white, yellow, gray, pink, orange, brown, or black depending on what is causing it.
Common Causes of Buildup
Soap scum: This forms when soap residue combines with minerals in water. It often creates a cloudy, waxy film that sticks to glass and plastic.
Hard-water deposits: Calcium and magnesium minerals can leave white, chalky crust around the strip and shower door edge.
Mildew and mold stains: Dark spots often appear when moisture sits in hidden grooves. The strip’s folds and fins are perfect hiding places.
Pink residue: Pink or orange slime in showers is often a bacterial biofilm that feeds on moisture and soap residue. It is common in bathrooms and should be cleaned regularly.
Trapped debris: Hair, dust, lint, and dried product residue can collect inside the channel where the strip grips the glass.
Supplies You Will Need
Before you start, gather your tools. The goal is to clean thoroughly without scratching the glass or damaging the plastic seal.
- Distilled white vinegar
- Warm water
- Mild dish soap
- Baking soda
- Spray bottle
- Old toothbrush or small soft cleaning brush
- Microfiber cloths
- Cotton swabs
- Paper towels
- Plastic bowl, bucket, or sink for soaking
- Rubber gloves
- Non-scratch sponge
- Optional: hydrogen peroxide or a bathroom cleaner labeled safe for plastic
Avoid steel wool, metal scrapers, abrasive powders, acetone, harsh solvents, and aggressive scouring pads. They can scratch glass, cloud plastic, damage protective coatings, or weaken the flexible sweep.
Safety First: Do Not Mix Cleaning Products
Before we get into the scrubbing, here is the bathroom-cleaning rule that deserves its own spotlight: never mix bleach with vinegar, ammonia, hydrogen peroxide, or other cleaners. Mixing products can create dangerous fumes. If you use bleach for a separate disinfecting step, rinse the area thoroughly first, use it only as directed on the label, ventilate the bathroom, and do not combine it with anything else.
For most shower door strips, you can start with dish soap, vinegar, and baking soda. These are effective for everyday grime, soap scum, and mineral buildup. If you see heavy mold growth spreading beyond the strip, address moisture and ventilation too. Cleaning the strip is helpful, but if the bathroom stays damp around the clock, the gunk will treat your shower like a vacation home.
Method 1: Clean the Plastic Strip Without Removing It
If your shower door strip is only mildly dirty or you are not sure whether it can be removed, start with this method. It is simple, quick, and safer for older strips that may crack if pulled too hard.
Step 1: Rinse the Area
Run warm water over the bottom of the glass shower door and the plastic strip. This loosens surface residue and softens soap scum. Wipe the strip with a damp microfiber cloth to remove loose grime.
Step 2: Spray With Vinegar Solution
Mix equal parts distilled white vinegar and warm water in a spray bottle. For heavier soap scum, add a few drops of mild dish soap. Spray the solution generously along the strip, especially underneath the fins and into any grooves. Let it sit for 10 to 15 minutes.
Vinegar helps loosen mineral deposits and soap residue. Dish soap helps break up oily buildup from body wash, shampoo, and conditioner. Together, they make a humble but hardworking cleaner. Basically, they are the bathroom version of a buddy-cop movie.
Step 3: Scrub With a Toothbrush
Use an old toothbrush to scrub along the top, front, back, and underside of the plastic strip. Pay special attention to the inner channel where the strip meets the glass. Move slowly and use light pressure. Cotton swabs are helpful for tight corners and the narrow spaces between flexible fins.
Step 4: Use Baking Soda for Stubborn Spots
If you still see cloudy residue, sprinkle a little baking soda on a damp sponge or toothbrush and gently scrub the plastic. Baking soda provides mild abrasion, which can lift residue without the harshness of a scratchy pad. Do not grind it into coated glass or delicate finishes. Gentle is the strategy. This is not a wrestling match.
Step 5: Rinse and Dry Completely
Rinse the strip thoroughly with warm water. Wipe it with a clean microfiber cloth, then dry the bottom edge of the glass and the plastic sweep. Drying matters because leftover moisture is exactly what encourages mildew and mineral spots to return.
Method 2: Remove and Deep Clean the Shower Door Sweep
If the strip is very dirty, yellowed, slimy, or filled with black residue inside the channel, removing it can make cleaning much easier. Many frameless shower door sweeps slide off from one end. Some are tight, and some are held by adhesive, screws, or a metal drip rail. Check how yours is attached before pulling.
Step 1: Inspect the Strip
Open the shower door and look closely at the bottom edge. If the strip appears to be a slide-on seal, grip one end and gently wiggle it loose. If it is attached to a metal rail, look for screws or clips. If it is glued or sealed with silicone, removal may require more care, and replacement may be easier than cleaning.
Step 2: Slide the Strip Off
Wear gloves and place a towel under the door. Gently pull or slide the plastic strip away from the glass. Be prepared: trapped water and grime may come out. This is the moment when many people discover that their “slightly dirty” strip was actually running a tiny swamp internship.
Step 3: Soak in Warm Soapy Water
Fill a sink, bucket, or plastic tub with warm water and a few drops of dish soap. Place the strip in the water and let it soak for 20 to 30 minutes. For mineral buildup, add one cup of white vinegar to the soak. Do not use boiling water, which can warp or soften some plastic seals.
Step 4: Scrub the Channel and Fins
After soaking, scrub the strip with a toothbrush. Clean inside the channel, along the outside edges, and between any flexible fins. Cotton swabs can help remove black residue from narrow grooves. For stubborn patches, make a paste with baking soda and water, apply it to the dirty areas, wait five minutes, then scrub gently.
Step 5: Rinse, Dry, and Clean the Glass Edge
Rinse the strip thoroughly. Set it on a towel and dry it completely. While it dries, clean the bottom edge of the glass door with vinegar solution or mild glass cleaner. Remove any old soap scum or residue before reinstalling the sweep. If the glass edge is dirty, the clean strip will slide right back onto a problem.
Step 6: Reinstall the Strip
Once everything is dry, slide the strip back onto the bottom of the glass door. Make sure any drip edge or angled fin faces the inside of the shower so water is directed inward. Open and close the door carefully to confirm the strip does not drag, fold, or block the door from sealing properly.
How to Remove Black Mold or Mildew Stains From the Strip
Black staining on a shower door strip is usually mildew, mold staining, or deeply embedded grime. Start with cleaning, not panic. Remove the strip if possible, soak it in warm soapy water, and scrub it thoroughly. Then apply a fresh vinegar solution or a paste of baking soda and water. Let it sit for several minutes, scrub again, rinse, and dry.
If dark stains remain after cleaning, they may have penetrated or permanently discolored the plastic. Clear vinyl shower sweeps can become stained over time, especially if they have been exposed to moisture for years. At that point, replacement is usually the best option. A new shower door sweep is often inexpensive compared with the time required to scrub an old one into looking “almost okay if you squint.”
When Should You Replace the Plastic Shower Door Strip?
Cleaning works well when the strip is dirty but still flexible and intact. Replacement is better when the strip is damaged, brittle, cracked, warped, permanently yellowed, or no longer sealing properly.
Replace the Strip If You Notice:
- Cracks or splits in the plastic
- Hard, brittle, or curled edges
- Persistent leaks at the bottom of the door
- Black stains that do not lift after deep cleaning
- A loose fit on the glass
- Missing or torn flexible fins
- A sour or musty smell that returns quickly
To replace it, measure the thickness of the glass and the length of the existing strip. Shower door sweeps are made for different glass thicknesses, so do not guess. Remove the old one, clean and dry the glass edge, cut the new strip to size if needed, and slide it into place with the drip edge facing the shower interior.
How to Keep the Shower Door Strip Clean Longer
The easiest strip to clean is the one that never gets disgusting in the first place. Prevention takes less than a minute after each shower and can save you from the dreaded deep-cleaning session later.
Use a Squeegee After Every Shower
Run a squeegee down the glass door after showering. This removes water before it can carry soap residue into the bottom strip. It also helps prevent hard-water spots on the glass.
Dry the Bottom Edge
Keep a small microfiber cloth nearby and wipe the plastic strip once or twice a week. Focus on the underside and the edge where the strip meets the glass. Moisture left in that groove is the beginning of the problem.
Improve Bathroom Ventilation
Run the bathroom fan during and after showers. Leave the shower door open when possible so air can circulate. Mold and mildew love trapped humidity; ventilation is how you make the room less hospitable.
Use a Weekly Vinegar Spray
Once a week, spray the strip with a 50/50 mix of white vinegar and water, let it sit for a few minutes, then rinse and dry. Do not use vinegar on natural stone surfaces such as marble, travertine, or limestone because acid can damage stone. If your shower has stone nearby, use mild dish soap and water instead.
Switch to Liquid Body Wash or Rinse More Thoroughly
Traditional bar soap often contributes more soap scum than liquid body wash. You do not have to banish bar soap forever, but rinsing the door and strip well after each shower can reduce buildup.
Common Mistakes to Avoid
Using harsh abrasives: Scratches make plastic and glass harder to clean because grime settles into the marks.
Forgetting the underside: The visible front of the strip may look fine while the underside is hosting a full grime convention.
Leaving the strip wet: Cleaning without drying invites the same problem back.
Mixing chemicals: More products do not equal more clean. Sometimes they equal dangerous fumes.
Scrubbing a strip that needs replacing: If the plastic is cracked, warped, or permanently stained, replace it and reclaim your afternoon.
Best Cleaning Schedule for a Shower Door Bottom Strip
For most homes, a simple schedule works best. After each shower, squeegee the glass. Once or twice a week, wipe the bottom strip dry. Once a week, spray it with a gentle cleaner and scrub lightly with a toothbrush. Once a month, inspect the underside and channel. Every few months, remove and soak the strip if it slides off easily.
If you have hard water, a busy household, or a bathroom with poor ventilation, clean more often. A five-minute weekly scrub is much easier than a one-hour rescue mission involving gloves, regret, and three toothbrushes that have seen too much.
Real-World Experience: What Actually Works When the Strip Looks Hopeless
Anyone who has cleaned the plastic strip at the bottom of a glass shower door knows there is a big difference between “theoretical cleaning” and “standing barefoot in the bathroom wondering why a clear piece of plastic has turned the color of old tea.” In real life, the strip usually looks worse once you start cleaning it. That is normal. The first wipe often pulls out hidden gray residue from inside the channel, and the underside may reveal buildup you could not see from above.
The most useful lesson from real-world cleaning is this: remove the strip if you safely can. Cleaning it while attached is fine for maintenance, but removal gives you access to the grime trapped inside the channel. When the strip slides off, you can soak it, flex it gently, scrub the fins from both sides, and clean the bottom glass edge properly. That glass edge is important. If you reinstall a clean sweep onto a dirty door edge, the strip will quickly look dirty again.
Another practical discovery is that soaking beats aggressive scrubbing. Warm water, dish soap, and vinegar do most of the early work. After 20 to 30 minutes, soap scum softens and mineral crust becomes easier to loosen. A toothbrush can then reach into the corners without damaging the plastic. If you start by attacking dry buildup with force, you may scratch or deform the seal before the grime has a chance to release.
Baking soda is helpful, but it should be used like a gentle polish, not like sandpaper. A small amount on a damp toothbrush can remove cloudy residue from the strip. For narrow grooves, cotton swabs are surprisingly effective. They are not glamorous, but neither is bathroom sludge. Keep several nearby because one cotton swab will not survive the whole job with dignity.
The most frustrating experience is cleaning an old strip that remains yellow or blotchy no matter what you do. That does not always mean you failed. Plastic can stain permanently, especially when mildew, minerals, and soap scum have sat for months or years. If the strip is still flexible and seals well, a little discoloration may be only cosmetic. But if it smells musty, leaks, curls, or has black stains embedded in the plastic, replacement is the cleaner and saner solution.
A final tip from experience: once the strip is clean, treat it like a kitchen counter, not a forgotten plumbing part. Wipe it regularly. Dry it after heavy use. Keep the shower door open for airflow. A clear shower door sweep can stay clean for a long time, but only if it is not left soaking in soap water day after day. Prevention may not be exciting, but neither is meeting the same mildew colony again next month.
Conclusion
Cleaning the plastic strip at the bottom of a glass shower door is a small job with a big payoff. That little strip affects how clean the whole shower looks, how well the door seals, and how fresh the bathroom feels. Start with a gentle vinegar and dish soap solution, scrub with a toothbrush, use baking soda for stubborn residue, and dry everything thoroughly. If the strip is removable, soak it for a deeper clean and clean the glass edge before reinstalling it.
Most importantly, know when to stop scrubbing and replace the strip. If it is cracked, warped, permanently stained, or leaking, a new shower door sweep may be the best cleaning hack of all. Your shower will look better, smell fresher, and stop quietly judging you every time you reach for the shampoo.