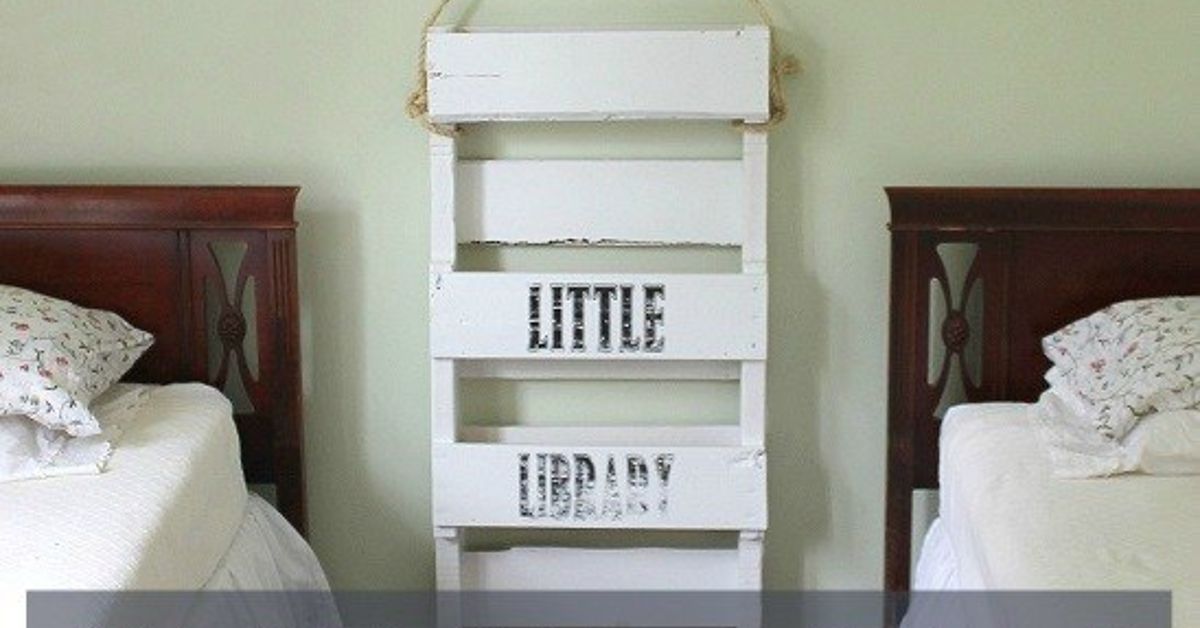
A kid’s room can collect books the way a couch collects crumbs: mysteriously, constantly, and somehow overnight. One minute there are three bedtime stories on the floor; the next, an entire library has formed under the bed, behind the toy basket, and inside a dinosaur slipper. A DIY pallet bookshelf for kids is a charming, budget-friendly way to rescue those books from the carpet kingdom while adding a warm, handmade touch to a nursery, playroom, classroom corner, or bedroom.
Better yet, pallet wood has personality. It comes with knots, grain, little dents, and a rustic “I have lived a life” attitude that brand-new boards sometimes lack. But because this project is for children, cuteness is not enough. The shelf must be smooth, sturdy, properly anchored, and made from safe pallet wood. This guide walks you through choosing the right pallet, planning a child-friendly design, building a simple wall-mounted book ledge, finishing it safely, and styling it so kids actually use it. Yes, the dream is possible: books standing upright, covers facing forward, and fewer bedtime negotiations involving “just one more” book from a pile of twenty-seven.
Why Build a Pallet Bookshelf for Kids?
A kids bookshelf should do more than hold books. It should invite reading. Traditional deep bookcases are useful, but young children often choose books by the cover, not the spine. That is why front-facing shelves, book ledges, and shallow wall shelves work so well in playrooms and bedrooms. When a picture book cover is visible, it becomes a tiny billboard for story time. Suddenly, the book about trucks, frogs, or a bear who refuses pajamas looks far more exciting than a row of thin spines packed together like a tiny tax document archive.
A pallet book shelf also fits beautifully into small spaces. Because the design is shallow, it can sit behind a bedroom door, above a reading nook cushion, beside a crib, or near a homeschool table. You can build one long ledge, stack three shorter ledges vertically, or create a mini library wall where books become part of the decor. Pallet wood also keeps costs low. In many cases, the main material is free or inexpensive, leaving your budget for screws, sandpaper, finish, and maybe a celebratory coffee for the adult who successfully removed the first pallet nail without saying anything too colorful.
Safety First: Choosing the Right Pallet
Before you grab the first pallet behind a warehouse and call it “rustic farmhouse chic,” pause. Not every pallet belongs in a child’s room. Pallets are shipping materials, which means some have carried food, chemicals, oils, garden products, or mystery cargo that should remain a mystery far away from your child’s bedtime books.
Look for a clean pallet with an IPPC stamp. The most DIY-friendly marking is usually HT, which means heat-treated. Avoid pallets marked MB, because that indicates methyl bromide fumigation. Also skip pallets with oily patches, odd smells, dark stains, mold, excessive splintering, or colored paint from pallet pooling companies. If the pallet looks like it has survived a pirate shipwreck and a motor oil convention, let it retire with dignity.
For a kids project, the best pallet is dry, untreated-looking, odor-free, structurally sound, and easy to inspect. If you cannot identify the pallet’s history or treatment mark, use new pine boards instead. A DIY project should save money, not introduce questionable wood into a room where kids read, play, nap, and occasionally lick things for reasons science has not fully explained.
Quick Pallet Safety Checklist
- Choose heat-treated pallet wood marked HT.
- Avoid MB marked pallets.
- Reject pallets with chemical smells, greasy stains, mold, or heavy dirt.
- Do not use painted mystery pallets for children’s furniture.
- Remove or bury every nail, staple, and sharp metal fragment.
- Sand until the wood is smooth enough for small hands.
Best Design for a Kids Pallet Bookshelf
The easiest and safest design is a wall-mounted pallet book ledge. Think of it as a shallow trough: a back board, a bottom shelf, and a front lip that keeps books from sliding out. This design is ideal for picture books because the covers face forward. It is also easier to build than a tall freestanding bookshelf, and when installed correctly into wall studs, it avoids the wobble problem that can turn furniture into a toddler climbing challenge.
A practical size for one shelf is 24 to 36 inches wide, 4 to 5 inches deep, and 3 to 5 inches tall at the front. If you build multiple shelves, space them about 12 to 15 inches apart so picture books fit comfortably. For toddlers and preschoolers, keep the lowest shelf within easy reach, around 16 to 20 inches from the floor. The highest shelf should still be accessible without climbing. Children are creative problem-solvers, which is lovely until the problem is “How do I scale this furniture like a cheerful raccoon?”
Three Layout Ideas
1. Reading nook wall: Install three short pallet shelves above a floor cushion, beanbag, or small chair. Add a soft lamp nearby and you have a cozy corner that says, “Please read here,” instead of “Please scatter books across the hallway.”
2. Nursery display shelf: Use one or two ledges to display board books, keepsakes, and bedtime favorites. Keep the installation low enough for grown-ups to grab books easily while holding a baby.
3. Playroom library zone: Build several shelves in a row, label them by theme, and rotate books weekly. Dinosaurs this week, outer space next week, emotional-support trucks forever.
Tools and Materials
You do not need a full professional workshop to build a reclaimed wood bookshelf, but you do need basic tools and a patient approach. Pallet wood can be stubborn. It cracks, splits, hides nails, and occasionally behaves as though it has signed a contract never to come apart. Go slowly, use safety gear, and do not rush the prep work.
Materials
- One clean heat-treated pallet or pallet boards
- 1×4 board for shelf bottoms, if pallet boards are too rough or uneven
- Wood screws, preferably 1 1/4-inch for assembly and 2 1/2-inch to 3-inch for wall mounting
- Wood glue
- Wood filler
- Sandpaper in 80, 120, 180, and 220 grit
- Low-VOC paint, stain, or water-based clear topcoat
- Felt pads or rubber bumpers for the back of the shelf
Tools
- Safety glasses and dust mask
- Work gloves
- Hammer, pry bar, or pallet buster
- Circular saw, jigsaw, or handsaw
- Drill and drill bits
- Sander or sanding block
- Clamps
- Stud finder
- Level and measuring tape
Step-by-Step: How to Build a DIY Pallet Bookshelf for Kids
Step 1: Clean and Inspect the Pallet
Brush off loose dirt, check for stains, and inspect every board. Remove visible nails, staples, and broken bits. If the pallet has a strong odor, sticky residue, black mold, or oily areas, do not use it. A children’s bookshelf should begin with wood you trust.
Step 2: Decide Where to Cut
Many pallets already have a shape that works well for book ledges. If you cut across one end of the pallet, you can often create a ready-made shelf section with a back and side support. A single pallet may provide two shelf sections, one from each end. If you prefer a cleaner look, disassemble the pallet and build each ledge from individual boards.
Step 3: Disassemble Carefully
Use a pry bar or pallet buster to remove boards slowly. Pallet boards split easily, especially near nails. If a nail refuses to come out, cut the board section shorter or use a nail punch to sink the nail below the surface. Never leave sharp nail ends exposed. Children have a magical ability to find the one sharp spot you missed.
Step 4: Build the Shelf Trough
For each ledge, use one board as the back, one board as the bottom, and one narrower board or strip as the front lip. Apply wood glue along the joint, clamp the pieces, drill pilot holes, and drive screws through the back and bottom. The front lip only needs to be high enough to hold books in place. For board books and picture books, a 2-inch to 3-inch lip usually works well.
Step 5: Round the Corners
Sharp corners and children are not a great partnership. Use sandpaper, a sanding block, or a router with a round-over bit if you have one. Soften every edge: the front lip, side corners, top edge, bottom edge, and screw holes. Run your hand slowly across the wood. If it catches your skin, it can catch a child’s finger.
Step 6: Sand Like You Mean It
Start with 80-grit sandpaper to remove roughness, then move to 120, 180, and finally 220 grit for a smoother finish. Pallet wood can be dry and splintery, so do not treat sanding as a quick decorative step. For a kids bookshelf, sanding is safety work. The finished shelf should feel pleasant to touch, not like a tiny wooden cactus.
Step 7: Fill Holes and Gaps
Use wood filler for deep cracks, nail holes, and rough voids. Let it dry, then sand again. Some rustic texture is fine, but avoid gaps big enough to pinch fingers or trap crumbs, crayons, or the world’s smallest toy parts.
Step 8: Paint, Stain, or Seal
For a natural look, use a clear water-based topcoat. For a cheerful kids room, try soft white, sage green, sky blue, warm beige, or a rainbow set of shelves. Choose low-VOC products and let the finish cure fully according to the manufacturer’s instructions before placing the shelf in a child’s room. If you are painting over older wood or using salvaged painted materials, be especially careful with lead-safe practices. For children’s spaces, fresh low-VOC paint on clean, bare, safe wood is usually the smarter route.
Step 9: Mount the Shelf Securely
Use a stud finder to locate wall studs. Mark the stud positions, hold the shelf level, drill pilot holes, and screw through the back board directly into studs with long wood screws. If you cannot hit studs, use hardware rated for the shelf’s loaded weight, but studs are strongly preferred for kids spaces. For extra security, add small L-brackets beneath the shelf or inside the trough where they are less visible.
Step 10: Load It the Smart Way
Place heavier books on lower shelves and lighter paperbacks or display books higher up. Do not store toys, candy, electronics, or other “must climb now” treasures on high shelves. The goal is to encourage reading, not to create a training wall for future mountaineers.
Finishing Ideas That Look Adorable Without Trying Too Hard
A DIY kids bookshelf can match almost any room style. For a farmhouse look, leave the pallet grain visible and seal it with a matte clear coat. For a Montessori-inspired playroom, keep the wood natural, low, and simple. For a bright preschool corner, paint each ledge a different color and organize books by theme. If the room already has a lot going on, white or natural wood keeps things calm.
You can also add small labels such as “Bedtime,” “Animals,” “Adventure,” or “Favorites.” Use vinyl decals, wooden tags, or painted lettering. Avoid dangling cords, heavy decorations, glass items, or anything breakable. A bookshelf for kids should be charming, but it should also survive enthusiastic book grabbing, accidental bumps, and the occasional stuffed animal traffic jam.
Fun Custom Touches
- Add a painted name across the top shelf.
- Use removable decals for stars, clouds, animals, or alphabet letters.
- Install a small reading light nearby, safely out of reach of toddlers.
- Line the bottom of the ledge with felt to protect book covers.
- Create seasonal book rotations for holidays, birthdays, and school themes.
Common Mistakes to Avoid
The first mistake is using the wrong pallet. If the pallet is stained, smelly, chemically treated, or unmarked, skip it. The second mistake is under-sanding. Pallet wood may look rustic, but splinters in small fingers are not part of the aesthetic. The third mistake is mounting the shelf only into drywall without proper support. Books are heavier than they look, especially when your child decides every hardcover dinosaur encyclopedia belongs on one ledge.
Another common mistake is building the shelf too high. Adults often install shelves at adult-eye level, then wonder why kids ignore them. A child-friendly bookshelf should meet kids where they are: lower to the floor, easy to see, easy to reach, and simple to tidy. Finally, avoid overloading the shelf. A few beautiful, visible books are more inviting than a packed ledge where everything leans like a tired marching band.
Maintenance: Keeping the Bookshelf Safe Over Time
Once the shelf is installed, check it regularly. Every month or so, give it a gentle tug, inspect the screws, and feel for rough areas. Wood moves slightly with humidity, and kids are not exactly gentle product testers. Tighten hardware if needed, touch up finish when scratches appear, and remove any shelf from use if it becomes loose or cracked.
Cleaning is simple. Dust with a dry cloth or wipe with a lightly damp cloth. Avoid soaking pallet wood, especially if it has a rustic finish. If the shelf is in a playroom, expect fingerprints, sticker attempts, and possibly a crayon autograph. That is not damage; that is provenance.
Experience Notes: What This Project Feels Like in Real Life
Building a DIY pallet bookshelf for kids is one of those projects that sounds tiny until the pallet enters your life. At first, you feel like a genius. Free wood! Rustic charm! A custom shelf! Then you meet the nails. Pallet nails are not ordinary nails. They are tiny metal goblins with a deep emotional attachment to their boards. The first real lesson is patience. If you rush disassembly, the wood splits. If you slow down, wiggle the boards, and work from both ends, you save more usable pieces.
The second lesson is that sanding takes longer than expected, but it is also the moment the project changes from “old shipping wood” to “actual furniture.” Rough gray boards become warm, textured, and surprisingly pretty. This is where the bookshelf earns its place in a child’s room. I like to use the “sweater test”: if the wood would snag a sweater, it needs more sanding. For kids, I go even further. I check with the palm of my hand, then the back of my hand, then along every edge where a child might grab. It sounds fussy, but a smooth shelf is the difference between a project you admire and a project you trust.
The third lesson is that front-facing shelves really do change how kids interact with books. When books sit with their covers out, children browse them like little bookstore customers. They point, choose, rearrange, and rediscover old favorites. A book that was ignored on a regular shelf suddenly becomes “the one with the moon bunny” or “the red truck book.” In a playroom, this can make cleanup easier too. Instead of tossing books into a bin, kids can slide them back behind the front lip. Is every book perfectly straight? Absolutely not. But the floor is clearer, and that counts as a domestic victory.
The fourth lesson is to install the shelf lower than your adult brain thinks looks balanced. Children use furniture differently. A low shelf lets them participate without dragging over a chair, toy box, or suspiciously unstable stack of stuffed animals. It also helps build independence. They can choose a book, return it, and feel ownership of their reading corner. For parents, that means fewer requests that begin with “Can you get…” during the exact moment dinner needs attention.
The final lesson is that imperfect wood makes a better story. A little knot, a weathered mark, or a slightly uneven grain pattern gives the piece character. Once the shelf is finished, filled with books, and placed near a cozy blanket, the small flaws stop looking like flaws. They look handmade. They look loved. And when a child pulls down a favorite book for the hundredth time, the whole project feels bigger than a shelf. It becomes part of a reading habit, a room memory, and maybe even a family joke about the day a pallet became a library.
Conclusion
A DIY pallet bookshelf for kids is affordable, practical, and full of personality. It turns reclaimed wood into useful playroom storage, encourages children to choose books independently, and adds a cozy handmade detail to the room. The key is to treat the project as both a design project and a safety project. Choose clean heat-treated pallet wood, avoid questionable materials, sand every surface thoroughly, use child-safe finishes, and mount the shelf securely to wall studs.
With a simple ledge design, you do not need advanced carpentry skills or expensive materials. You need careful prep, steady measuring, patient sanding, and a healthy respect for the fact that children will test your work like tiny quality-control inspectors with jam on their hands. Build it well, keep it low, rotate the books often, and your pallet bookshelf may become one of the most-used pieces in the room.