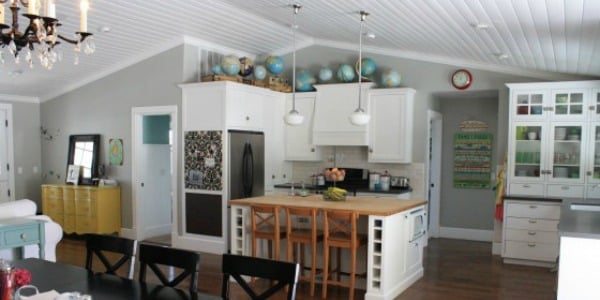
A tired kitchen has a special talent: it can make perfectly good cabinets look gloomy, countertops look suspicious, and Tuesday-night pasta feel like it was prepared inside a storage unit. Fortunately, improving the room does not require a demolition crew, a six-figure renovation loan, or three months of washing dishes in the bathtub.
The smartest budget kitchen project ideas focus on what you already have. Instead of changing the entire layout, you improve the surfaces, lighting, storage, and small details people notice first. Paint can rescue dated cabinetry. New hardware can modernize doors and drawers. Better task lighting can make a dark counter useful again. Even clearing visual clutter can produce a surprisingly dramatic before-and-after moment.
This guide covers affordable kitchen upgrades for homeowners and renters, including cabinet makeovers, backsplash projects, storage improvements, countertop refreshes, lighting updates, and practical ways to divide a limited remodeling budget.
Start With a Budget, Not a Sledgehammer
Before buying paint or emotionally committing to a farmhouse sink, decide how much you can comfortably spend. A budget kitchen makeover can cost a few hundred dollars for cosmetic improvements or several thousand dollars when appliances, flooring, or professional labor enter the picture.
Create three lists: what must be repaired, what would improve function, and what is purely decorative. A leaking faucet belongs in the first category. A pull-out trash system belongs in the second. A collection of handmade ceramic mushroom knobs belongs in the third, no matter how strongly the mushrooms speak to you.
Whenever possible, preserve the existing kitchen layout. Moving plumbing, gas lines, walls, and major electrical connections can quickly turn an affordable project into a full-scale renovation. Consumer Reports and other remodeling authorities consistently recommend retaining a functional layout when controlling costs is the priority.
Set aside approximately 10% to 15% of your project budget for surprises. Once work begins, you may discover damaged drywall, a leaking shutoff valve, missing trim, or an electrical outlet that appears to have been installed during the age of pirates.
High-Impact Budget Kitchen Project Ideas
1. Paint the Kitchen Cabinets
Cabinet painting is one of the most effective low-cost kitchen projects because cabinetry occupies so much visual space. If the cabinet boxes are structurally sound and the existing layout works, paint can provide the appearance of a major renovation without the cost of replacement.
Successful cabinet painting depends more on preparation than artistic talent. Remove the doors, drawers, and hardware. Label every piece so reassembly does not become an advanced puzzle. Degrease the surfaces, repair dents, sand or degloss the finish, apply a suitable primer, and use durable cabinet-grade paint.
Do not paint over grease and hope optimism will serve as primer. Kitchen residue can prevent proper adhesion, leading to peeling around handles and frequently touched areas. Allow each coat to cure according to the manufacturer’s instructions before reinstalling the doors.
Painting, refinishing, or refacing existing cabinets is widely recommended as a lower-cost alternative to replacing otherwise usable cabinetry.
2. Replace Knobs and Drawer Pulls
New cabinet hardware is the kitchen equivalent of changing glasses and getting a haircut. Nothing structural has changed, yet everyone assumes something important happened.
Measure the distance between the screw holes on existing pulls before shopping. Choosing replacements with matching center-to-center measurements avoids drilling new holes or filling old ones. For a coordinated appearance, repeat one finish across cabinet hardware, lighting, and the faucet, but do not become obsessed with perfect matching. Mixed metals can look intentional when one finish is dominant and another is used as an accent.
For the lowest possible cost, clean and repaint existing hardware with a surface-appropriate spray finish. Replace stripped screws and damaged hinges while everything is removed. Major home-improvement guides recommend hardware replacement as one of the easiest ways to update cabinetry, especially when the new pieces fit the existing holes.
3. Refresh the Walls With Paint
A fresh wall color can make the kitchen feel cleaner, brighter, and more deliberate. Warm whites can soften cool gray counters, while muted greens, blues, and earthy neutrals add personality without overpowering a small room.
Use a washable finish suitable for busy interiors. Kitchens collect steam, fingerprints, cooking splatter, and mysterious marks that nobody in the household remembers creating. A durable eggshell, satin, or comparable scrubbable finish is generally more practical than flat paint.
For extra impact, paint the island or a single wall in an accent color. This requires less material than repainting every surface and gives the room a focal point. Paint-based updates remain among the most frequently recommended weekend kitchen projects because they can affect walls, cabinets, islands, furniture, and even some properly prepared backsplashes.
4. Install a Budget-Friendly Backsplash
A backsplash introduces color, pattern, and texture without covering an enormous area. Affordable options include standard ceramic subway tile, beadboard, peel-and-stick panels, painted designs, or a short backsplash limited to the range and sink zones.
Traditional tile can be economical when you select an in-stock product and install it yourself. Keep the pattern simple to reduce waste and complicated cuts. Straight stacked or running-bond layouts are more beginner-friendly than intricate mosaics that require the patience of a watchmaker.
Renters can use removable peel-and-stick materials, provided the product is suitable for the surface and placed away from unsafe heat exposure. Test a small hidden area first. Removable backsplash products and contact papers have been used successfully in many low-cost rental makeovers, although careful surface preparation and slow application are essential for a smooth finish.
5. Add Under-Cabinet Lighting
A kitchen may have enough ceiling light to illuminate the floor while still leaving the actual food-preparation area in shadow. Under-cabinet lighting solves this problem by placing light directly above the counter.
Plug-in and battery-powered LED bars are generally easier for a beginner than hardwired fixtures. Choose a consistent color temperature so the kitchen does not look warm and cozy on one side and vaguely medical on the other. Conceal cords where possible and position fixtures near the front edge of upper cabinets for more even countertop illumination.
Under-cabinet lighting is frequently included in budget makeover guidance because it improves both function and atmosphere without requiring new cabinetry or countertops.
6. Upgrade a Dated Ceiling Fixture
An old fluorescent box or builder-grade dome light can make the entire kitchen appear dated. Replacing it with a clean flush-mount fixture, pendant, or track system can modernize the room immediately.
The fixture should fit the kitchen’s proportions and provide useful illumination rather than simply looking attractive in a product photo. Pendants work well over islands and peninsulas, while flush-mount fixtures are practical in rooms with low ceilings.
Electrical work must be handled safely and in accordance with local codes. Kitchens contain water, grounded appliances, and high-demand circuits. The U.S. Consumer Product Safety Commission recommends appropriate ground-fault protection in areas where electricity may be used near water. Hire a qualified electrician when wiring needs to be added, repaired, or brought up to code.
7. Create Open Shelving Without Removing Every Cabinet
Open shelving can visually expand a small kitchen, but you do not need to tear down all the upper cabinets. Remove the doors from one carefully selected cabinet, fill the hinge holes, and paint or line the interior. The result resembles built-in display shelving while preserving the cabinet box.
Use open storage for attractive everyday items such as bowls, glasses, cookbooks, or matching containers. Avoid using it to display an archaeological collection of takeout lids. If you install new shelves, anchor them securely and confirm that the wall and brackets can support the intended load.
Design sources often recommend selectively removing cabinet doors or replacing a small number of uppers with shelves as an economical way to lighten the room.
8. Improve Storage Inside Existing Cabinets
Sometimes a kitchen feels outdated because it functions badly, not because its finishes are unattractive. Before replacing cabinets, improve what happens inside them.
Add tiered shelf risers, drawer dividers, vertical tray storage, door-mounted racks, lazy Susans, or pull-out baskets. A basic rollout shelf can make a deep lower cabinet far easier to use. Tension rods can organize cutting boards or sheet pans, while adhesive hooks can hold measuring spoons and lightweight tools.
Measure every cabinet opening before ordering organizers. Pay attention to hinges, pipes, and door frames that reduce usable clearance. A storage product that is half an inch too wide is not “almost perfect.” It is a future garage item.
9. Build a Freestanding Kitchen Island
A freestanding island can provide extra workspace and storage without modifying the permanent layout. Repurpose a sturdy table, rolling cart, base cabinet, dresser, or workbench-style frame. Add locking casters if the island needs to move.
The top should be durable, easy to clean, and properly secured. Butcher block, sealed hardwood, and some prefabricated countertop remnants work well. Maintain comfortable walking space around the island and make sure doors, drawers, dishwashers, and ovens can open fully.
Do not force an island into a room that is too narrow. A kitchen island should improve traffic flow, not create a daily obstacle course between the refrigerator and the coffee maker.
10. Refresh the Countertops Without Replacing Everything
If the counters are structurally sound but visually dated, several lower-cost options may postpone full replacement. Depending on the material and condition, you might use a countertop refinishing kit, apply a specialty coating, replace only one damaged section, or install a new surface on the island while keeping perimeter counters.
Contact paper can provide a temporary cosmetic change for renters or extremely tight budgets, but it should not be treated like stone. Protect it from hot cookware, standing water, sharp knives, and aggressive cleaning products. Follow the product instructions and seal vulnerable edges where appropriate.
When replacement is necessary, compare laminate, butcher block, prefabricated sections, remnants, and entry-level solid-surface materials. Using premium material on a small focal area and a more economical option elsewhere can create a high-end appearance while controlling costs. This “mix and prioritize” approach is also recommended for cabinetry and other major kitchen components.
11. Replace or Update the Faucet
A new faucet can improve both appearance and daily convenience, especially when the old one leaks, has poor reach, or fights you every time you rinse a large pot.
Before purchasing, check the sink’s mounting-hole configuration, available clearance, water-line connections, and the position of nearby windows or shelves. A tall pull-down faucet may look wonderful until it prevents the window from opening.
If the existing faucet works well, clean mineral deposits, replace the aerator, and consider updating nearby accessories instead. Plumbing connections should be leak-tested carefully. Call a plumber when valves are corroded, pipes are damaged, or the installation requires more than a straightforward fixture swap.
12. Shop Reuse Stores and Salvage Sources
Secondhand building-material stores can be excellent sources for cabinet boxes, lighting, unopened tile, sinks, shelving, and countertop remnants. Habitat for Humanity ReStores, for example, commonly carry new and gently used cabinets, appliances, flooring, fixtures, and building supplies at prices below typical retail. Inventory varies, so flexibility is part of the adventure.
Bring measurements, photographs, finish samples, and a tape measure. Inspect used cabinetry for water damage, odors, broken joints, missing pieces, and unusual dimensions. A $30 cabinet is not a bargain if getting it home requires renting a truck, removing a door frame, and reconsidering every decision that led to this moment.
Three Sample Kitchen Makeover Budgets
Around $300: The Cosmetic Refresh
- Paint one wall or the kitchen island
- Replace cabinet knobs or repaint existing hardware
- Add peel-and-stick backsplash accents
- Install battery-powered under-cabinet lights
- Use matching containers and organizers to reduce visual clutter
This plan works best when the kitchen is functional and the main problem is appearance. Concentrate spending on one visible finish and support it with smaller coordinated details.
Around $1,000: The Weekend Transformation
- Paint cabinet doors and frames
- Install new hardware
- Replace the faucet
- Add simple backsplash tile or panels
- Improve task lighting and cabinet organization
Labor is the deciding factor at this level. Careful DIY work can stretch the budget, but specialized electrical, plumbing, and structural tasks should still be assigned to qualified professionals.
Around $3,000: The Strategic Mini-Remodel
- Refinish or selectively reface cabinets
- Replace one countertop area or install an island top
- Upgrade lighting and the faucet
- Install durable backsplash tile
- Purchase one priority appliance or storage feature
When replacing an appliance, compare lifetime operating costs as well as the purchase price. ENERGY STAR provides product information and a ZIP-code rebate finder for qualifying refrigerators, dishwashers, and other efficient products. Local rebates can sometimes make a more efficient model competitive with a cheaper standard option.
Common Budget Kitchen Makeover Mistakes
Starting Too Many Projects at Once
Finish one zone before dismantling another. A kitchen with missing doors, unfinished paint, disconnected plumbing, and tile adhesive setting beside the toaster is not a renovation plan. It is a cry for help.
Buying Materials Before Measuring
Measure openings, walls, hardware spacing, appliance clearances, and countertop depths at least twice. Record the dimensions in one place and bring them when shopping.
Choosing the Cheapest Product Automatically
Low price and good value are not always the same thing. Spend more on items exposed to heavy use, moisture, heat, or repeated movement. Save on decorative accessories that can be replaced easily.
Ignoring Preparation
Most failed paint, tile, and adhesive projects begin with an improperly cleaned or poorly prepared surface. Read the manufacturer’s directions, use compatible materials, and respect curing times. “Dry to the touch” does not necessarily mean “ready for a family of five to attack it.”
Doing Unsafe Work to Save Labor Costs
Painting, organizing, installing hardware, and assembling shelving may be reasonable DIY projects. Moving gas lines, modifying circuits, relocating plumbing, removing structural walls, and correcting code violations require appropriate expertise, permits, or inspections.
A Composite Homeowner Experience: What a Budget Kitchen Project Really Feels Like
Consider a typical small kitchen with sturdy oak cabinets, beige laminate counters, limited lighting, and hardware that has survived several decorating eras without choosing a side. The homeowners have a modest budget and decide that replacing everything is unnecessary. Their original plan sounds simple: paint the cabinets, replace the knobs, add a backsplash, and finish by Sunday evening.
The first useful lesson arrives on Saturday morning. Removing and labeling the cabinet doors takes longer than expected, but the labels prevent confusion later. The couple writes numbers on painter’s tape and creates a quick diagram showing where each door belongs. Without that step, the final installation would probably involve thirty minutes of arguing about whether two nearly identical doors have secretly changed dimensions.
Cleaning also becomes a larger part of the project than anticipated. The cabinets do not look particularly dirty until degreaser touches the surfaces. Areas above the range and around frequently used handles require multiple passes. This is not glamorous work, but it becomes the difference between a finish that lasts and one that begins peeling during the first holiday dinner.
They test three paint colors on removable sample boards rather than directly on the cabinets. The bright white that looked perfect online appears cold under the kitchen lighting. A softer warm white coordinates better with the existing countertops and floor. That small test prevents them from spending the weekend painting the entire kitchen in a color they would dislike by Monday.
The new drawer pulls create the first genuine “this was worth it” moment. Because the homeowners measured the existing holes, installation requires only a screwdriver. The visual difference is immediate, and the matching finish on the faucet makes the combination look planned rather than randomly assembled.
The backsplash teaches another practical lesson: start in the least visible corner. Their first few cuts are technically acceptable but unlikely to receive fan mail. By the time they reach the area behind the range, their measurements and spacing are more consistent. They also discover that buying an extra box of tile was wise. Several pieces break, and a few have color variations they prefer not to use in prominent locations.
The under-cabinet lighting may be the least dramatic purchase in photographs, yet it becomes the most useful improvement in daily life. The counters are easier to clean, chopping vegetables is more comfortable, and the kitchen feels warmer in the evening without turning on the overhead fixture.
By the end, the project takes two weekends rather than one. The final cost is slightly higher than planned because of additional sandpaper, primer, caulk, and replacement hinges. However, the basic layout remains intact, the cabinet boxes avoid the landfill, and the room feels brighter and more functional.
The most important experience is not that every DIY step goes perfectly. It is that careful preparation, limited scope, and a few coordinated changes can outperform a collection of expensive but unrelated purchases. The homeowners do not end up with a brand-new kitchen. They end up with a better version of the kitchen they already ownand without spending the next decade paying for a decorative pot-filler they rarely use.
Conclusion: Small Kitchen Projects Can Deliver a Major Change
The best budget kitchen project ideas are not simply the cheapest projects. They are the improvements that solve visible problems, make everyday tasks easier, and work with the kitchen’s existing strengths.
Begin with repairs and functional needs. Preserve the layout when possible. Refresh sound cabinets instead of automatically replacing them. Use lighting, hardware, paint, storage, and a focused backsplash to create a coordinated transformation. Shop reuse stores and clearance sections, but measure carefully and avoid buying materials solely because they are discounted.
A successful affordable kitchen makeover may not produce a dramatic television reveal with slow-motion reactions and suspiciously clean children. It can still create a room that feels brighter, works better, and makes cooking more enjoyable. That is a worthwhile renovationeven when the budget has fewer zeros than the dream kitchen.