Paper tusks can transform a mask, costume, classroom animal model, or fantasy display without the weight and expense of wood, resin, or hard plastic. This guide uses a hollow paper armature, masking tape, and optional papier-mâché to create elephant tusks, walrus teeth, boar fangs, troll accessories, and creatures zoology has not yet had the courage to name.
Choose the Right Paper-Tusk Design
Decide how the tusks will be used. Wearable versions should be short, light, blunt, and forgiving; display tusks can be longer and more rigid.
Common Shapes
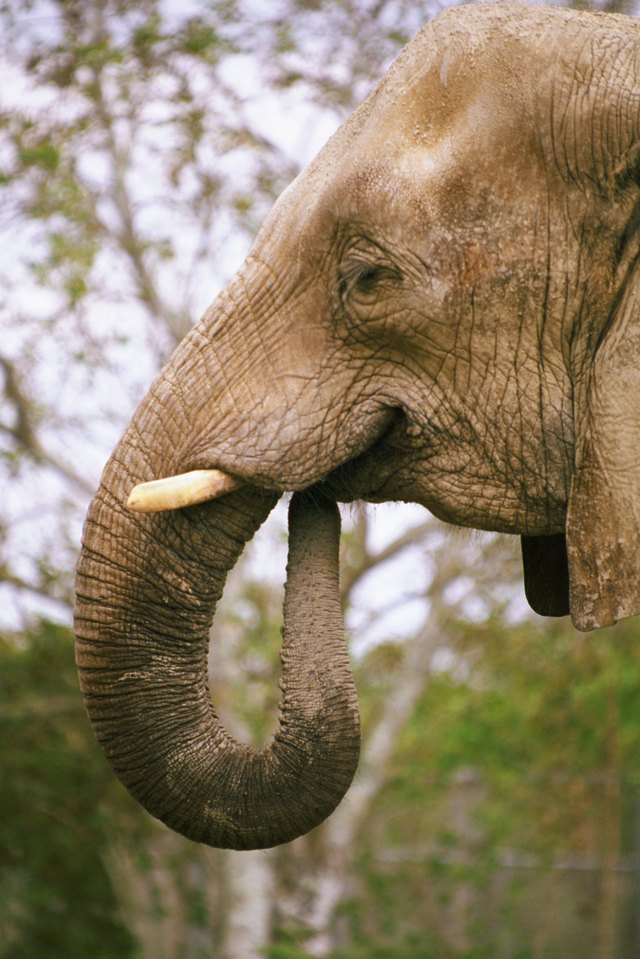
- Elephant-style tusks: Long, smooth, gently curved, and widest at the base.
- Walrus tusks: Straighter, slightly flattened, and usually hung downward.
- Boar or orc tusks: Shorter, thicker, and curved upward from the mouth.
- Fantasy tusks: Ridged, cracked, spiraled, weathered, or painted in colors that nature would consider showing off.
Sketch the side profile at full size, marking the base, thickest point, curve, and rounded tip. A wearable prop around 6 to 12 inches is generally easier to balance than a movie-monster version. Trace one template twice, reversing it for the second tusk.
Materials and Tools
Basic Supplies
- Printer paper, kraft paper, newspaper, or pages from a paper grocery bag
- Lightweight cardstock or thin cereal-box cardboard for the bases
- Masking tape or painter’s tape
- Scissors
- Pencil and ruler
- White school glue or decoupage medium
- Water and a mixing bowl, if diluting glue
- Paper strips for papier-mâché
- Acrylic craft paint in ivory, tan, brown, gray, or fantasy colors
- Paintbrushes
Optional Finishing and Mounting Supplies
- Acrylic gesso or lightweight modeling paste
- Fine-grit sandpaper
- Matte acrylic sealer or decoupage finish
- Elastic, hook-and-loop tape, ribbon, or fabric tabs
- Low-temperature glue gun, used with adult supervision
- Foam, felt, or cotton padding for a soft base
Choose age-appropriate art materials. For children’s projects, look for the ACMI Approved Product seal, keep craft knives and hot-glue tools in adult hands, and ventilate the work area while painting or sealing.
How to Make Paper Tusks Step by Step
Step 1: Create a Full-Size Template
Draw one tusk in profile. Keep the base fairly straight and increase the bend near the final third rather than drawing a perfect banana curve. Round the point, cut out the template, and flip it when tracing the second tusk. For a mask, include a base circle or oval matching the mounting area.
Step 2: Roll the Paper Into a Tapered Tube
Place a sheet of paper diagonally and begin rolling from one corner. Keep one end loose and wide while tightening the opposite end into a narrow tip. This creates a tapered cone without complicated geometry. Secure the seam with small pieces of masking tape.
For extra thickness, roll two sheets together or nest one cone inside another. Keep the form hollow so it remains easy to wear, attach, and repair.
Step 3: Build the Curve
Gently bend the paper tube along the template. If it resists, make two or three shallow compression folds on the inside of the curve. Cover each fold with masking tape. Another method is to cut a small wedge from the inside curve, overlap the cut edges, and tape them closed.
Work gradually. One heroic bend creates one heroic crease. Compare both pieces after each adjustment so one does not become an elegant tusk while the other turns into a question mark.
Step 4: Shape and Soften the Tip
Twist the narrow end gently, trim excess paper, and fold the last quarter inch inward. Cover it with tape to make a rounded cap. For a very soft costume tip, place a tiny piece of cotton, tissue, or foam over the end before taping.
Add small paper scraps beneath the tape wherever the surface looks flat or dented. At this stage, a strong silhouette matters more than perfect smoothness.
Step 5: Make a Strong Base
Trace the wide end onto thin cardboard. Cut out the shape and attach it to the opening with masking tape, leaving the tusk hollow. If you need a tab for mounting, cut the cardboard base larger than the opening and leave two flaps extending beyond it.
Reinforce the first 1 to 2 inches with an extra paper wrap. Most failures occur at the basethe ankles of the operation, unnoticed until they give out.
Step 6: Cover the Form With Papier-Mâché
Tear paper into narrow strips about half an inch wide. Torn edges blend more smoothly than sharply cut edges. Mix white school glue with a small amount of water until it brushes easily, or use a prepared decoupage medium. Flour-and-water paste can also work, but glue-based paste is generally more convenient for a prop that may be stored.
Brush paste onto each strip, remove the excess, and smooth it lengthwise onto the tusk with slight overlap. Change direction around the base and curves. Two thin layers usually suit a costume piece; a display prop may need three or four. Avoid one thick, soggy coat, and let each layer firm up before adding the next.
Step 7: Dry the Tusks Completely
Support the tusks on a rack, cup, or crumpled foil so air reaches all sides, and rotate them occasionally. Drying may take overnight or longer. The surface should feel hard and dry at the base; a cool or flexible spot may indicate trapped moisture. Painting too soon can create cracksor a biology experiment nobody requested.
Step 8: Smooth the Surface
Leave paper texture visible for a rustic effect, or apply one or two thin coats of gesso for a smoother prop. Sand lightly and fill small dents with thin layers of lightweight modeling paste. Use filler sparingly so the tusk stays light, and remove sanding dust before painting.
Step 9: Paint Realistic Ivory and Age Details
Start with an off-white base rather than brilliant white. Mix ivory from white paint with a tiny amount of yellow ocher, tan, or warm gray. Apply two thin coats for better coverage and fewer brush marks.
To create depth, brush diluted brown or gray paint around the base, into ridges, and along shallow cracks. Quickly wipe the raised areas with a damp cloth. Dry-brush a lighter ivory over the surface afterward. The contrast makes the tusk look worn without requiring museum-grade sorcery.
Add faint curved growth lines near the base and irregular weathering. Evenly spaced stripes tend to look printed rather than organic.
Step 10: Seal the Finished Tusks
When the paint is dry, apply a thin matte acrylic sealer or decoupage finish. Matte usually resembles bone better than gloss. The finish helps with fingerprints and small splashes, but it does not make paper waterproof.
How to Attach Paper Tusks Safely
Attaching Tusks to a Mask
Hold the tusks against the worn mask to mark their angles, then remove the mask before attaching them. Use craft glue, fabric tabs, or hook-and-loop tape and reinforce the inside with cardboard. A detachable connection simplifies storage and may break away during a bump rather than transferring force to the wearer’s face.
Attaching Tusks to a Headband or Hood
Wrap each base in felt or fabric, then stitch or glue the tab to a sturdy headband or hood. Test the balance; if the headpiece tilts, shorten the tusks or move them closer to the sides.
Attaching Tusks to a Display
For wall art, insert a short cardboard tube or dowel at the base and secure it to the display board. Never extend a hard support toward the tip of a wearable prop.
Fast Method: Paper Tusks Without Papier-Mâché
For a one-day school play or photo booth, stop after shaping the paper tube. Cover the entire surface with overlapping strips of white masking tape or paper packing tape. Burnish the tape with a spoon, paint it, and add a matte finish if time permits.
This version is faster and cleaner but shows more seams and dents. It suits small boar tusks, cartoon fangs, and distant stage props; papier-mâché is better for repeated use.
Troubleshooting Common Problems
The Tusks Do Not Match
Compare both pieces with the same reversed template before applying papier-mâché. Minor variation looks organic; major length differences look accidental.
The Surface Is Lumpy
Use narrower strips, less paste, and careful smoothing. After drying, correct bumps with gesso and light sanding rather than another heavy wet layer.
The Tusk Droops at the Base
Add a cardboard collar and extend reinforcement farther up the base. Display pieces may use a short internal support there.
The Paint Cracks
Let the piece dry fully, sand loose paint, apply gesso, and repaint in thin coats.
The Prop Is Too Heavy
Remove excess filler, shorten the design, or use fewer finish coats. Lightweight tusks stay aligned better in motion.
Experiences and Lessons From Making Paper Tusks
The first surprise many makers encounter is that the easiest-looking steprolling a coneis often the one that determines the whole project. A cone rolled too tightly becomes a skinny spike with no believable base. One rolled too loosely resembles a party hat that has made questionable career choices. The useful middle ground is a hollow tube with enough overlap to hold its shape but enough flexibility to bend.
A common first attempt also reveals that curves must be planned in stages. Beginners often grab the tube near the center and bend it once. The result is a sharp elbow rather than a natural tusk. A better experience comes from comparing the form with the paper template, making several small compression folds, taping each one, and checking the silhouette from the front as well as the side. From the side, a tusk may look magnificent; from the front, it may point directly into the wearer’s cheek.
Drying teaches patience more effectively than a motivational poster. A papier-mâché tusk can look dry on top while remaining soft underneath, particularly near the reinforced base. Makers who rush into painting may see bubbles, flexible patches, or later cracking. The reliable approach is to use thin layers, support the piece so air reaches all sides, and allow extra time in humid weather. The project spends less time being repaired and more time looking intentionally prehistoric.
Painting is where modest paper forms suddenly become convincing props. A flat coat of pure white usually looks like rolled office paper, because that is essentially what it is. Off-white paint, a transparent brown-gray wash, and a light dry-brushed highlight create much more depth. The most effective details are usually restrained: a darker base, a few irregular growth lines, and subtle wear near the tip. When every inch receives a dramatic crack, stain, and shadow, the tusk can begin to resemble an antique plumbing fixture.
Mounting provides another practical lesson. Stronger is not always safer. A permanently glued, rigid tusk may survive a collision by transferring the impact to the mask or wearer’s head. A light, padded, detachable connection is often better for costumes. Hook-and-loop tape, stitched fabric tabs, or a reinforced breakaway base makes the prop easier to transport and more forgiving in crowded spaces.
Pairs also benefit from being made together rather than one at a time. Shape the first cone, then immediately shape the second. Apply each layer to both before moving on. Paint both from the same mixed batch of ivory. This parallel workflow reduces mismatched curves and colors. It also prevents the familiar crafting mystery in which the second object somehow becomes cleaner, smoother, and suspiciously more competent than the first.
Finally, paper tusks reward adaptation. A rough surface can become intentional age texture. A slightly uneven curve can suggest organic growth. A dent can be covered with a ridge, wrap, metal-look band, or decorative carving. The project does not demand industrial precision; it asks for a strong silhouette, secure base, complete drying, and thoughtful finishing. Those four priorities produce a prop that reads clearly from across a room while remaining inexpensive enough to remake when a costume evolves.
Conclusion
Learning how to make paper tusks is mostly an exercise in smart structure: begin with a lightweight tapered tube, build the curve gradually, reinforce the base, add thin papier-mâché layers, dry everything completely, and finish with subtle color. The same method can produce realistic elephant tusks, comic boar fangs, walrus teeth, or elaborate fantasy accessories.
Keep wearable props short, blunt, padded, and securely mounted. For displays, experiment with longer curves, carved textures, cracks, bands, or unusual paint effects. Paper may not sound heroic, but with enough tape and patience, it can look ready to charge across a stage.