Note: This article is written for web publishing in standard American English and synthesizes real baking practices from reputable U.S. recipe and culinary sources without inserting source links.
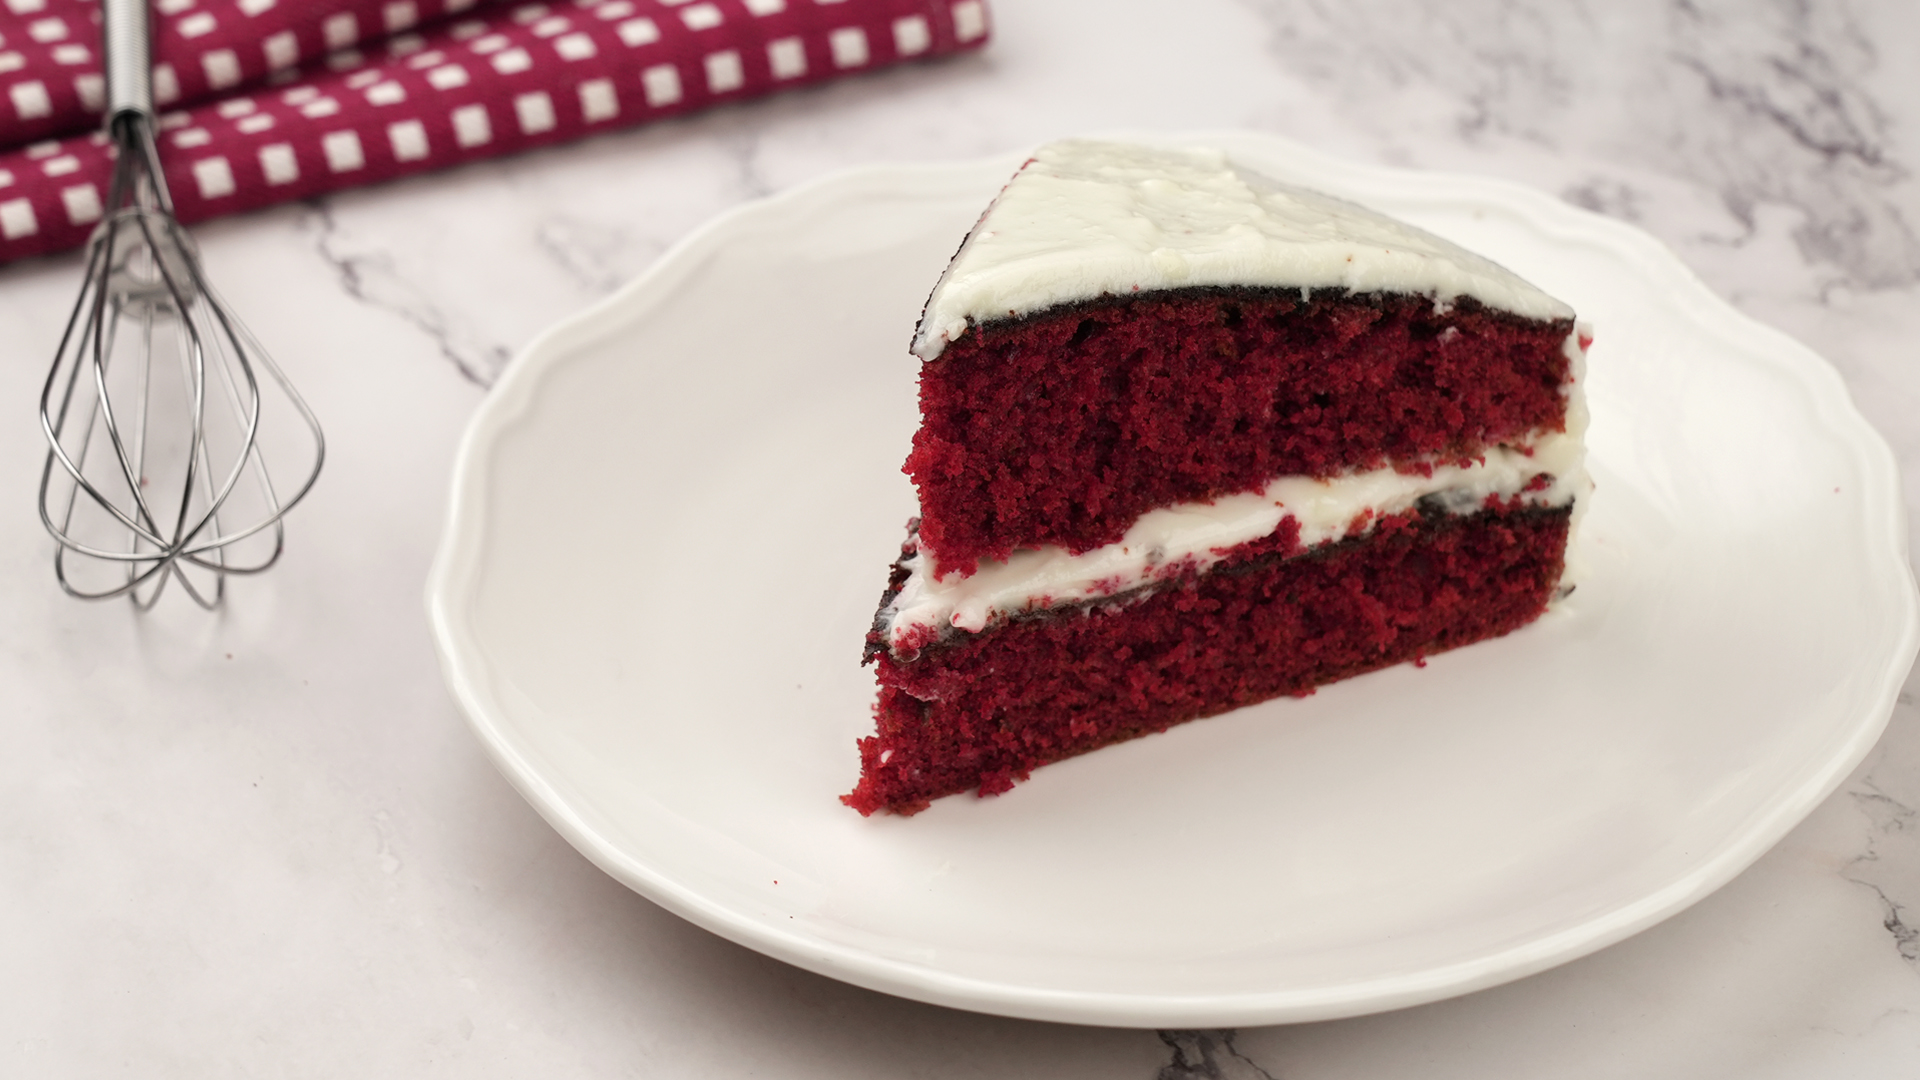
Red velvet cake is the dessert equivalent of walking into a room wearing a perfectly tailored red suit: bold, charming, and impossible to ignore. But here is the delicious secretclassic red velvet cake is not just chocolate cake wearing red lipstick. A true red velvet cake has a tender, velvety crumb, a mild cocoa flavor, a gentle tang from buttermilk and vinegar, and a creamy frosting that makes every forkful feel like a tiny celebration.
If you have ever wondered how to make red velvet cake from scratch, this guide walks you through the ingredients, method, frosting, decorating tips, troubleshooting, storage, and real-life baking experience you need to get it right. Whether you are baking for Valentine’s Day, Christmas, birthdays, weddings, Sunday dinner, or a Tuesday that simply needs cake, this homemade red velvet cake recipe is designed to be rich, moist, dramatic, and surprisingly manageable.
What Makes Red Velvet Cake Different?
Red velvet cake sits somewhere between vanilla cake and chocolate cake, but it is not fully either one. It uses a small amount of unsweetened cocoa powder, enough to create depth without turning the cake into a full chocolate dessert. Buttermilk adds moisture and tang. Vinegar helps activate baking soda and strengthens the classic flavor. Red food coloring gives the cake its famous color, although older versions often had a more natural reddish-brown tone.
The “velvet” part matters. Historically, velvet cakes were known for a finer, softer texture than rougher traditional cakes. In modern baking, that tender texture comes from the right balance of fat, acid, flour, and gentle mixing. In other words, red velvet cake should not taste like a dry cupcake from a gas station bakery case. It should be soft enough to make you pause mid-bite and say, “Okay, who made this?”
Ingredients for Homemade Red Velvet Cake
Before you preheat the oven, gather everything. Cake baking is much easier when your ingredients are ready and your kitchen does not look like a flour tornado moved in.
For the Cake Layers
- 2 1/2 cups cake flour or 2 1/4 cups all-purpose flour
- 2 tablespoons unsweetened natural cocoa powder
- 1 teaspoon baking soda
- 1 teaspoon fine salt
- 1/2 cup unsalted butter, softened
- 1 3/4 cups granulated sugar
- 1/2 cup vegetable oil
- 3 large eggs, room temperature
- 1 tablespoon pure vanilla extract
- 1 tablespoon red gel food coloring or 2 tablespoons liquid red food coloring
- 1 cup full-fat buttermilk, room temperature
- 1 teaspoon white vinegar
For the Cream Cheese Frosting
- 16 ounces full-fat cream cheese, softened
- 1 cup unsalted butter, softened
- 4 to 5 cups powdered sugar, sifted
- 2 teaspoons vanilla extract
- 1/4 teaspoon salt
- 1 to 2 tablespoons heavy cream, optional for texture
Best Tools for Making Red Velvet Cake
You do not need a professional bakery setup, but a few tools make life sweeter. Use two 8-inch or 9-inch round cake pans, parchment paper, mixing bowls, a hand mixer or stand mixer, a whisk, a rubber spatula, a cooling rack, and an offset spatula for frosting. A kitchen scale is helpful if you want extra accuracy, because flour is sneaky. One heavy scoop can turn a plush cake into a doorstop with frosting.
How to Make Red Velvet Cake Step by Step
Step 1: Prepare the Pans
Preheat your oven to 350°F. Grease two round cake pans, line the bottoms with parchment paper, then lightly grease the parchment. This may sound fussy, but parchment paper is the difference between “beautiful cake layer” and “cake archaeology.”
Step 2: Mix the Dry Ingredients
In a medium bowl, whisk together the flour, cocoa powder, baking soda, and salt. Whisking removes lumps and distributes the cocoa and leavening evenly. Red velvet cake uses only a modest amount of cocoa, so even distribution is important for balanced flavor.
Step 3: Cream the Butter and Sugar
In a large bowl, beat the softened butter and sugar until light and fluffy, about 2 to 3 minutes. This step adds air and helps create a softer crumb. Add the oil and beat again until smooth. Butter gives flavor, while oil helps keep the cake moist after baking.
Step 4: Add Eggs, Vanilla, and Color
Add the eggs one at a time, mixing well after each addition. Stir in the vanilla extract and red food coloring. Gel food coloring gives a deeper color without adding too much liquid, but liquid coloring works if that is what you have. The batter should look bright, bold, and slightly theatricallike it is auditioning for Broadway.
Step 5: Alternate Buttermilk and Dry Ingredients
Add the dry ingredients in three additions, alternating with the buttermilk. Start and end with the dry mixture. Mix on low speed and stop as soon as the batter looks combined. Overmixing develops gluten, and gluten is wonderful for bread but not invited to this cake party.
Step 6: Add Vinegar at the End
Stir in the white vinegar gently. The vinegar reacts with baking soda and contributes to the traditional red velvet flavor. Do not worry; the cake will not taste like salad dressing. The vinegar works quietly in the background, like a responsible adult at a birthday party.
Step 7: Bake the Cake Layers
Divide the batter evenly between the prepared pans. Smooth the tops and bake for 28 to 33 minutes, or until a toothpick inserted into the center comes out clean or with a few moist crumbs. Avoid overbaking, because red velvet cake should be moist, not “please pass the milk immediately” dry.
Step 8: Cool Completely
Let the cakes cool in the pans for about 10 to 15 minutes, then turn them out onto wire racks. Remove the parchment and cool completely before frosting. Warm cake plus cream cheese frosting equals a slippery landslide. Delicious, yes. Pretty, not so much.
How to Make Cream Cheese Frosting
Beat the softened cream cheese and butter together until smooth and creamy. Add powdered sugar gradually, about one cup at a time, beating on low speed first so your kitchen does not become a powdered sugar snow globe. Add vanilla extract and salt. Beat until fluffy. If the frosting feels too thick, add a small splash of heavy cream. If it feels too loose, add more powdered sugar or chill it briefly.
The best cream cheese frosting for red velvet cake is tangy, sweet, smooth, and sturdy enough to hold between layers. It should spread easily without sliding off the cake like it has somewhere more important to be.
How to Assemble and Frost Red Velvet Cake
Place one cooled cake layer on a serving plate or cake stand. Spread a generous layer of cream cheese frosting over the top. Add the second cake layer and apply a thin crumb coat over the entire cake. Chill for 20 to 30 minutes, then add the final coat of frosting.
For a clean look, use an offset spatula or bench scraper. For a rustic look, swirl the frosting with the back of a spoon. You can decorate with cake crumbs, chopped pecans, white chocolate curls, fresh berries, or a dramatic red velvet crumb border. The cake does not need to be perfect. It needs to be inviting. Cake perfection is mostly an internet myth with good lighting.
Tips for the Best Red Velvet Cake
Use Buttermilk, Not Plain Milk
Buttermilk gives red velvet cake its signature tang and tender crumb. If you are in a pinch, you can make a substitute by adding 1 tablespoon of vinegar or lemon juice to 1 cup of milk and letting it sit for 5 to 10 minutes. However, real buttermilk gives a better flavor and texture.
Choose Natural Cocoa Powder
Natural unsweetened cocoa powder works best because it has acidity that fits the chemistry of red velvet cake. Dutch-process cocoa is smoother and darker, but it is less acidic and can affect the rise and color.
Do Not Overmix
Mix just until the flour disappears. Overmixing can make the cake dense or rubbery. Red velvet cake should be tender enough to cut cleanly but soft enough to melt on the tongue.
Measure Flour Carefully
Spoon flour into the measuring cup and level it with a knife. Do not scoop directly from the bag unless you enjoy accidentally adding too much flour and blaming the oven. A kitchen scale is even better.
Cool Before Frosting
Patience matters. Frosting a warm cake is like putting sunscreen on a waterfall. Let the layers cool completely, then frost with confidence.
Common Red Velvet Cake Mistakes
One common mistake is using too much cocoa powder. Red velvet cake should have a subtle cocoa taste, not a full chocolate-cake identity crisis. Another mistake is skipping the vinegar or buttermilk, which removes the tang and affects the texture. Overbaking is also a major problem. Check early, because ovens can be dramatic and unreliable, like reality TV contestants.
If your cake turns brown instead of red, you may have used too much cocoa, Dutch-process cocoa, not enough food coloring, or a coloring brand that fades during baking. If your frosting is runny, the butter or cream cheese may have been too warm. Chill it briefly and beat again before frosting.
Can You Make Red Velvet Cake Ahead of Time?
Yes. Red velvet cake is a great make-ahead dessert. You can bake the cake layers one day in advance, wrap them tightly, and store them at room temperature overnight or refrigerate them for longer freshness. Frosted red velvet cake should be refrigerated because cream cheese frosting contains dairy. For the best flavor and texture, let the cake sit at room temperature for about 30 to 60 minutes before serving.
How to Store Red Velvet Cake
Store frosted red velvet cake in an airtight container in the refrigerator for up to 4 or 5 days. You can also freeze unfrosted cake layers for up to 2 months. Wrap each layer tightly in plastic wrap, then foil. Thaw in the refrigerator overnight before frosting. Individual frosted slices can also be frozen, although they may lose a little visual polish. Fortunately, frozen cake still tastes like cake, and cake is rarely rejected on technical grounds.
Red Velvet Cake Variations
Once you master the classic version, you can turn the same flavor into cupcakes, sheet cake, Bundt cake, cake jars, mini cakes, or red velvet cake pops. For cupcakes, bake at 350°F for about 18 to 22 minutes. For a sheet cake, use a 9-by-13-inch pan and bake until the center springs back lightly. For extra Southern flair, sprinkle chopped toasted pecans over the frosting.
If you prefer a less sweet finish, try ermine frosting, also called boiled milk frosting. It is light, fluffy, and old-fashioned. Cream cheese frosting is more popular today, but ermine frosting gives red velvet cake a vintage bakery charm.
What to Serve with Red Velvet Cake
Red velvet cake pairs beautifully with coffee, cold milk, black tea, vanilla ice cream, fresh strawberries, or raspberries. For parties, serve it after a savory meal such as roast chicken, barbecue, pasta, or holiday ham. The cake is rich enough to feel special but balanced enough that guests will still ask for a second slice while pretending they are “just evening out the edge.”
Experience Notes: What I Learned Making Red Velvet Cake
The first thing you learn when making red velvet cake is that confidence matters, but room-temperature ingredients matter more. Cold eggs, cold buttermilk, or stiff cream cheese can make the process clumpy and frustrating. When the butter, eggs, buttermilk, and cream cheese are properly softened, everything blends more smoothly, and the cake batter looks glossy instead of suspicious.
Another experience worth sharing is that color can be surprisingly personal. Some bakers want a bright, fire-engine red cake. Others prefer a deeper burgundy color that looks more classic and less like it came from a cartoon bakery. Gel food coloring gives the most control. Start with a smaller amount, mix well, and add more if needed. The batter usually bakes slightly darker than it looks raw, so do not panic if it seems intense before it goes into the oven.
Texture is the real test. A good red velvet cake should slice neatly but still feel moist. The best results often come from using both butter and oil. Butter brings that rich bakery flavor, while oil keeps the crumb soft for days. This is especially helpful if you are baking ahead for a party. Nobody wants to proudly serve a beautiful cake that chews like a red kitchen sponge.
Frosting is where personality shows. A thick layer of cream cheese frosting makes the cake feel luxurious, but too much powdered sugar can make it taste flat and overly sweet. Adding a pinch of salt and enough vanilla helps balance the tang. If the frosting seems too soft, chilling it for 15 minutes can save the day. If the cake layers are domed, trimming the tops creates a more stable cake. Bonus: the trimmed scraps become “quality control samples,” which is baker language for standing over the counter eating cake bits.
Decorating does not need to be complicated. A simple swirl pattern can look elegant. Cake crumbs pressed around the base look professional with very little effort. Fresh berries add color contrast and make the cake feel festive. The most important lesson is to let the cake chill after the crumb coat. That thin first coat traps loose crumbs and makes the final frosting layer cleaner. Skipping it is possible, but your white frosting may end up looking like it survived a red confetti storm.
Serving temperature also changes the experience. Straight from the refrigerator, red velvet cake can taste slightly firm and muted. After resting at room temperature, the crumb softens, the frosting becomes creamy, and the flavors open up. This small step makes a big difference. If you are serving guests, pull the cake out before dinner so it is ready by dessert.
Finally, red velvet cake is forgiving when treated kindly. Measure carefully, mix gently, bake just until done, cool completely, and frost patiently. It rewards calm bakers. It also rewards bakers who make mistakes but keep going. Even a slightly lopsided red velvet cake has a powerful advantage: it is still red velvet cake.
Conclusion
Learning how to make red velvet cake is really about mastering balance. The best red velvet cake is not too chocolatey, not too sweet, not too dry, and not too heavy. It has a soft crumb, a subtle cocoa flavor, a little tang from buttermilk and vinegar, and a generous layer of cream cheese frosting. With the right ingredients and a few smart techniques, you can make a homemade red velvet cake that looks impressive, tastes bakery-worthy, and disappears slice by slice.
So preheat the oven, soften the cream cheese, and prepare for compliments. Red velvet cake may look fancy, but once you understand the method, it becomes one of the most rewarding cakes to bake from scratch. And if anyone asks for your secret, just smile mysteriously and say, “Velvet.”