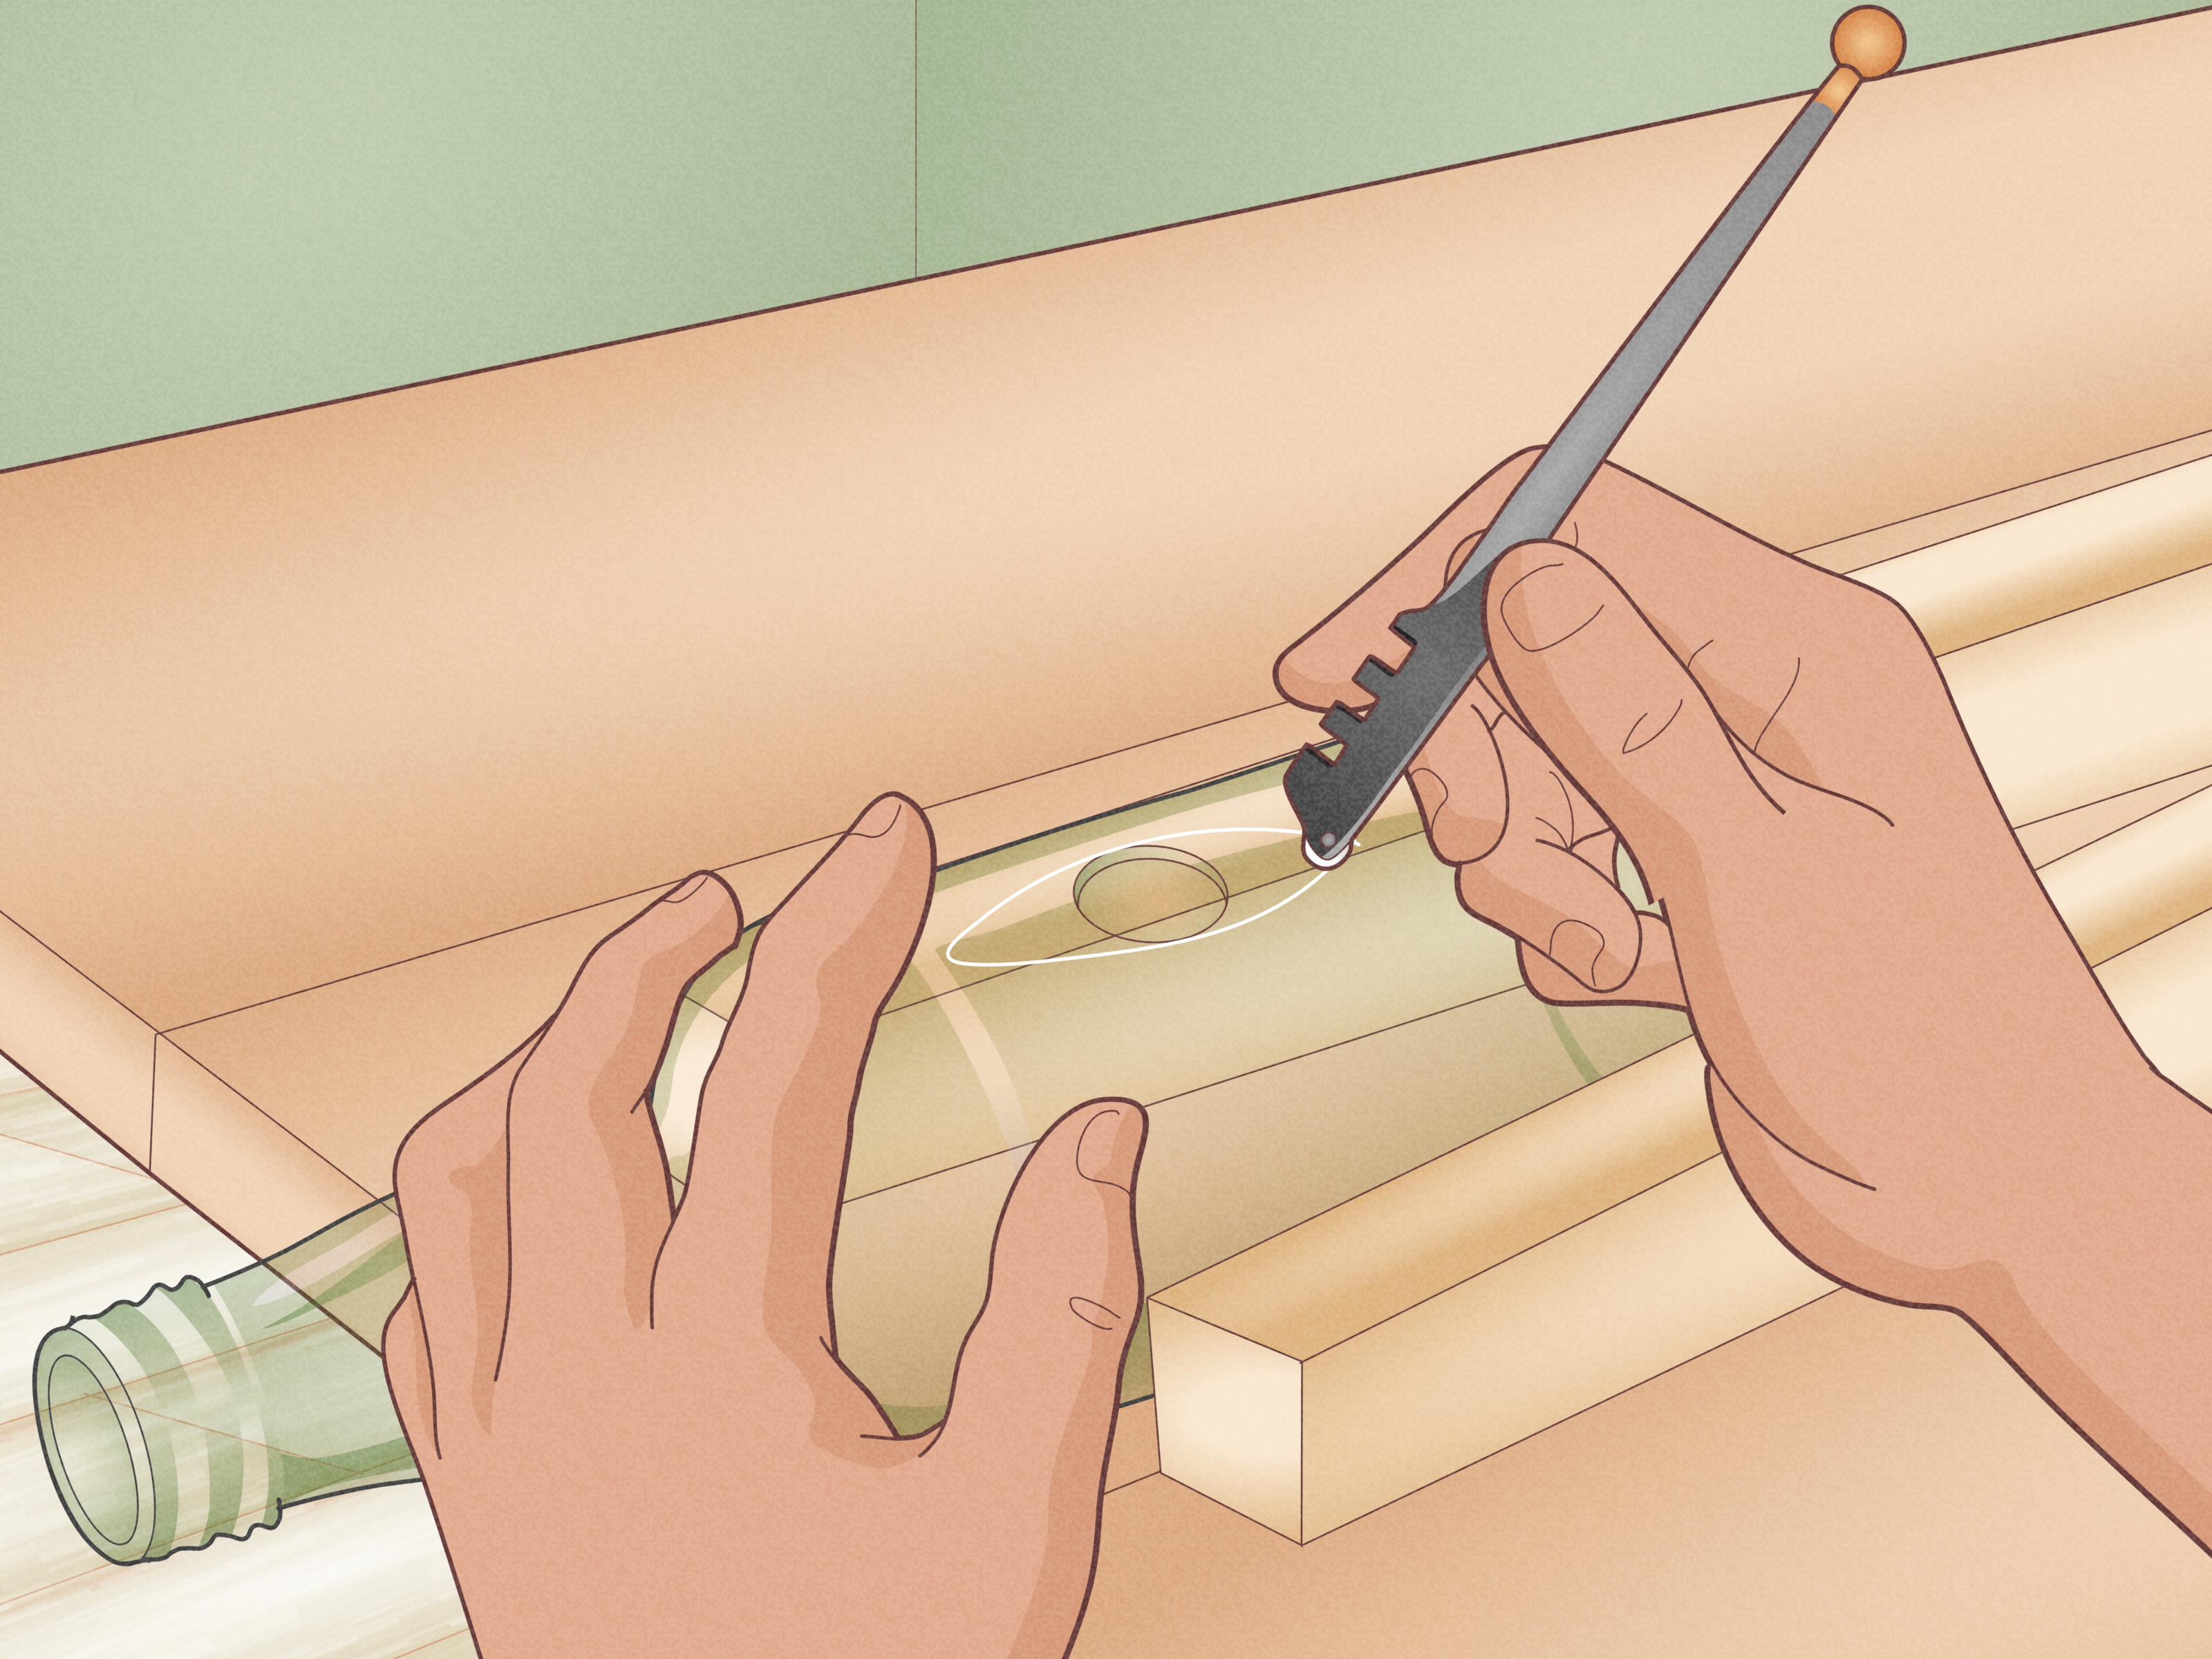
Cutting a glass bottle sounds like one of those craft projects that begins with confidence and ends with someone Googling “urgent care near me.” But with the right setup, steady technique, and a healthy respect for sharp edges, you can turn empty wine, beer, soda, or liquor bottles into candle holders, planters, drinking glasses, lamps, wind chimes, vases, and other upcycled treasures that look like they came from a boutique with suspiciously high prices.
The trick is understanding what you are actually doing. You are not “sawing” the bottle in half like a wooden dowel. Most clean bottle cuts rely on scoring a controlled line, then encouraging the glass to separate along that weakened path using pressure, temperature change, or a cutting wheel. The cleaner the score and the more evenly the bottle is handled, the less drama you get. And in glasswork, less drama is exactly the goal.
This guide explains how to cut a glass bottle with a glass cutter, how to cut a bottle without a glass cutter, how to smooth the edge, and what mistakes to avoid so your project does not become modern art in the form of shattered regret.
Before You Start: Safety Comes First
Glass is beautiful, recyclable, and extremely committed to becoming sharp when offended. Before cutting any bottle, set up your workspace properly.
Essential Safety Gear
Wear safety glasses or goggles, cut-resistant gloves, long sleeves, closed-toe shoes, and a dust mask or respirator if you will be sanding or grinding the edge. Tiny glass particles are not the kind of glitter anyone wants in their lungs, eyes, or skin.
Work over a stable surface, preferably covered with cardboard, a towel, or a rubber mat to keep the bottle from rolling. Keep children, pets, snacks, and your phone away from the work zone. A bottle-cutting project is not the time to multitask with a sandwich.
Choose the Right Bottle
For beginners, wine bottles and straight-sided liquor bottles are usually easier than heavily curved, embossed, or square bottles. A smooth cylinder lets you score one even line. Bottles with thick seams, deep curves, or decorative ridges may crack unpredictably.
Avoid tempered glass, pressurized bottles, cracked bottles, and any container that once held hazardous chemicals. Most beverage bottles are annealed glass, which means they are more suitable for cutting, but if a bottle looks damaged or suspicious, recycle it and choose another.
Tools and Materials You May Need
You do not need every tool on this list. Choose based on the method you plan to use.
- Glass bottle
- Glass bottle cutter or handheld glass cutter
- Permanent marker or painter’s tape
- Container of hot water
- Container of ice water
- Sandpaper in several grits, such as 80, 120, 220, and 400
- Wet/dry sanding sponge
- Rotary tool with diamond wheel or grinding bit
- Wet tile saw with diamond blade
- Cotton string and acetone, if using the fire-and-string method
- Lighter, metal tongs, and fire-safe bucket, if using flame
- Dish soap and warm water for cleaning
Method 1: How to Cut a Glass Bottle With a Glass Cutter
This is the best method for most people. A dedicated glass bottle cutter holds the bottle in place while a small carbide or diamond scoring wheel marks the glass. The goal is to make one smooth, continuous score around the bottle. Not two. Not five. Not a nervous little racetrack. One clean line.
Step 1: Clean the Bottle
Remove labels, glue, dirt, and leftover liquid. Soak the bottle in warm, soapy water for 20 to 30 minutes, then scrape off the label with a plastic scraper. Dry the bottle completely. Any sticky residue can make the cutter bump or slip.
Step 2: Mark the Cut Line
Decide where you want the cut. For drinking glasses, many people cut below the shoulder of a wine bottle, creating a tall tumbler shape. For candle holders, you may want the lower half. For planters, you might cut closer to the middle.
Use painter’s tape as a visual guide if your cutter does not have an adjustable stop. Wrap the tape evenly around the bottle, making sure the ends meet perfectly. If the tape climbs uphill, your cut will too.
Step 3: Score the Bottle
Place the bottle in the cutter. Apply steady, moderate pressure and rotate the bottle one full turn against the scoring wheel. You should hear a consistent scratching sound. That sound is good. It means the wheel is marking the surface.
Do not press so hard that the glass crunches. Do not go around again and again. Multiple score lines confuse the break and often create chips. Think of it as giving the glass one clear instruction: “Separate here, please.”
Step 4: Apply Hot and Cold Water
Hold the bottle over a sink or basin. Slowly pour hot water along the score line while rotating the bottle. Then switch to cold water or ice water along the same line. Repeat the hot-cold cycle several times. The temperature change creates stress along the score, helping the glass crack exactly where you marked it.
After a few cycles, you may hear a quiet pop or crackle. Do not panic. That is the bottle politely resigning from its original shape. Keep rotating evenly until the top and bottom separate.
Step 5: Inspect the Cut
If the cut is mostly clean with a few rough spots, you are in good shape. If it has large jagged cracks running away from the line, retire that piece to the recycling bin. A badly cracked bottle is not worth saving, especially if it will become a drinking glass.
Method 2: How to Cut a Glass Bottle Without a Glass Cutter
No glass cutter? You still have options, but they come with more risk and less precision. The two most common alternatives are the fire-and-string method and the rotary-tool method. One uses heat shock, the other uses abrasion. Both require patience, safety gear, and a willingness to accept that the first bottle may not be your masterpiece.
Option A: The Fire-and-String Method
The fire-and-string method is popular because it looks like a magic trick. You wrap string around the bottle, soak it in a flammable liquid such as acetone, light it, rotate the bottle, then plunge it into cold water. The glass often separates near the heated line.
It can work, but it is less predictable than a scored cut. It can also produce uneven edges, wandering cracks, or dramatic breaks. Use this method outdoors or in a very well-ventilated, fire-safe area. Never use gasoline, lighter fluid, or mystery garage chemicals. Keep a fire extinguisher nearby. Do not perform this method near curtains, paper towels, dry leaves, or anyone who says, “Relax, I saw this on the internet.”
Steps for the Fire-and-String Method
- Wrap cotton string around the bottle 4 to 6 times where you want the cut.
- Tie the string tightly and trim loose ends.
- Slide the string off, soak it in acetone, then slide it back into position.
- Put on gloves and safety glasses.
- Light the string and slowly rotate the bottle so the heat spreads evenly.
- When the flame begins to fade, plunge the bottle into ice water.
- Repeat only if needed, and stop if cracks run away from the line.
This method is best for rustic candle holders, planters, or decorative projects where a slightly imperfect edge is acceptable. It is not ideal for drinking glasses unless you are prepared to grind and polish the rim thoroughly.
Option B: Cutting With a Rotary Tool
A rotary tool fitted with a diamond cutting wheel can cut through glass, but it must be used carefully. The main risks are overheating the glass, breathing glass dust, and creating chips. Work slowly, keep the glass wet, and let the tool do the cutting. Forcing the blade is how projects turn into confetti.
Mark your line with tape, clamp or support the bottle so it cannot roll, and cut in shallow passes. Drip water on the cutting area or pause often to prevent heat buildup. Wear eye protection and a respirator. If possible, do the work outside or in a garage with good ventilation.
This method is useful when you need a shaped cut, such as an opening in the side of a bottle for a planter or lamp. For a simple straight cut around the whole bottle, a bottle cutter is usually easier.
Option C: Using a Wet Tile Saw
A wet tile saw with a diamond blade can cut glass bottles more cleanly than a dry rotary tool because the water cools the blade and reduces dust. However, it is still a power tool, and round bottles are awkward. The bottle must be supported securely so it does not twist, kick, or bind against the blade.
If you already own a wet saw and are comfortable using it, this method can work for thicker bottles. If you are a beginner, practice on scrap bottles first. Keep your hands well away from the blade, move slowly, and never cut dry with a blade designed to run wet.
How to Smooth the Cut Edge
Cutting the bottle is only half the job. The raw edge can be sharp enough to ruin your day. Smoothing is not optional, especially for anything that will touch hands, mouths, plants, candles, or countertops.
Start With Coarse Sandpaper
Place 80- or 120-grit wet/dry sandpaper on a flat surface. Wet the paper, turn the cut bottle upside down, and move it in small circles or figure-eight patterns. This helps level the rim evenly. Keep the sandpaper wet to control dust and reduce heat.
Round the Inside and Outside Edges
After flattening the rim, hold wet sandpaper at a slight angle and gently sand the inside and outside edges. Your goal is to remove the knife-like corner. Move through finer grits, such as 220 and 400, until the edge feels smooth to the touch.
Polish for Drinking Glasses
If you plan to drink from the bottle, be extra picky. The rim should feel smooth everywhere, not “smooth except for that one exciting spot.” You can use a diamond sanding pad, rotary polishing bit, or glass polishing compound for a more finished edge.
When in doubt, reserve imperfect pieces for non-contact uses like planters or candle sleeves. Your lips deserve better than a questionable rim.
Common Mistakes to Avoid
Pressing Too Hard While Scoring
A glass cutter scores the surface; it does not dig a trench. Too much pressure can crush tiny chips into the line and create an uneven break. Moderate, steady pressure is better than brute force.
Scoring the Same Line Multiple Times
Going over the line again may feel like being thorough, but it often makes the break messier. One clean score is the gold standard.
Skipping Edge Finishing
A cut bottle with an unfinished rim is not done. It is merely waiting to attack. Sand and polish every edge before using the piece.
Using Boiling Water Too Aggressively
Very hot water can help separate a scored bottle, but sudden extreme temperature swings can cause uncontrolled cracks. Use hot water carefully and rotate the bottle so heat is distributed evenly.
Trying to Save Every Bottle
Some bottles simply do not cooperate. Thick glass, hidden stress, seams, and curves can all lead to weird breaks. If a bottle cracks badly, let it go. There are more bottles in the recycling bin, and they are eager for auditions.
Project Ideas for Cut Glass Bottles
Once you learn how to cut a glass bottle, the empty-bottle section of your kitchen starts looking less like recycling and more like a craft supply store. Here are a few beginner-friendly ideas:
- Wine bottle tumblers: Cut below the shoulder, sand thoroughly, and create custom drinking glasses.
- Candle holders: Use the lower half for poured candles or the upper half as a hurricane-style cover.
- Self-watering planters: Invert the neck into the lower half and use cotton cord as a wick.
- Mini vases: Cut small bottles for flowers, herbs, or propagation cuttings.
- Pendant light shades: Cut the bottom off a decorative bottle and fit it over a light socket kit.
- Wind chimes: Combine bottle rings, beads, and wire for a musical garden accent.
Start with decorative projects before making drinkware. Candle holders and planters are more forgiving while you learn how different bottles behave.
Best Method for Beginners
The best method for beginners is a glass bottle cutter plus hot and cold water. It is affordable, controlled, and easier to repeat than the fire-and-string method. A bottle cutter also gives you a more even line, which means less sanding and fewer failed attempts.
If you only want to make one rustic project, the string method may be tempting. If you plan to cut several bottles, buy or borrow a bottle cutter. Your future self will thank you, probably while holding a smoother candle holder.
Troubleshooting: Why Did My Bottle Crack Wrong?
The Score Line Was Uneven
If the cutter slipped or the line overlapped unevenly, the crack may follow the weaker section instead of your intended path. Keep the bottle level and rotate it smoothly.
The Bottle Had Internal Stress
Some bottles contain stress from manufacturing, impacts, or temperature changes. You cannot always see it. If multiple bottles from the same batch crack badly, switch brands or shapes.
The Temperature Change Was Uneven
Pouring hot water on one spot instead of rotating the bottle can create a crack that runs vertically. Always heat and cool the entire score line evenly.
The Glass Was Too Thick
Thick-bottomed liquor bottles can be beautiful but stubborn. They often require more patience, better scoring, and more sanding. Beginners should practice on average wine bottles before tackling the heavyweight champions.
Experience Notes: What Cutting Glass Bottles Teaches You
The first thing you learn when cutting glass bottles is that confidence is useful, but rhythm is better. A beginner often approaches the bottle like a contest of strength: press hard, rotate fast, force the break. That usually creates a jagged rim that looks like it lost a fight with a sidewalk. The better approach is calmer. Score once. Rotate evenly. Heat slowly. Cool evenly. Let the glass respond.
One of the most helpful habits is practicing on plain bottles before touching the “special” bottle. Maybe it is a wine bottle from a wedding, a fancy whiskey bottle, or a colorful glass bottle you have been saving because it looks expensive even though it was mostly marketing. Do not start with that one. Practice on ordinary bottles until you understand the sound of a good score. A clean score has a consistent scratchy whisper. A bad score skips, crunches, or wanders like a shopping cart with one broken wheel.
Another lesson is that preparation affects the final result more than people expect. Removing the label is not just cosmetic. A tiny ridge of glue can lift the cutter and interrupt the score. A damp bottle can slip. A cluttered table can turn a simple project into a tiny glass avalanche. The best bottle-cutting sessions feel almost boring: clean workspace, steady hands, repeatable setup, no heroic improvisation.
Sanding also takes longer than most beginners think. The bottle may separate in two minutes, but the edge finishing can take ten, twenty, or even thirty minutes depending on the cut. That is normal. The sanding stage is where a rough craft project becomes something you would actually use. When making drinking glasses, the rim should pass the “eyes closed” test: run a gloved finger gently around the edge and check for any sharp, raised, or gritty spots. If you notice one, keep sanding. Glass does not become safer because you are tired.
The fire-and-string method teaches a different lesson: viral craft tricks do not always equal precision. It is fun, dramatic, and occasionally effective, but it can produce uneven results. If you want a rustic planter, it may be fine. If you want a polished tumbler set for your kitchen, use a proper cutter. The internet loves flame because flame looks exciting. Glass prefers consistency because glass is a tiny diva with engineering principles.
Finally, cutting bottles is a great reminder that upcycling works best when you respect the material. A bottle is not just trash with potential; it is glass with thickness, tension, curves, and limits. Some pieces will fail. Some will surprise you. Some will become gifts, planters, candle holders, or the oddly satisfying cup you reach for every morning. With practice, the process becomes less mysterious and more meditative: score, heat, cool, sand, polish, admire. Then, naturally, start eyeing every empty bottle in the house like it has a second career waiting.
Conclusion
Learning how to cut a glass bottle is part craft, part science, and part patience test. The cleanest beginner-friendly approach is to use a glass bottle cutter, make one even score, separate the bottle with controlled hot and cold water, and finish the rim with careful wet sanding. If you do not have a glass cutter, methods like fire and string, a rotary tool, or a wet tile saw can work, but they require extra caution and usually produce less predictable results.
Whether you are making wine bottle tumblers, candle holders, herb planters, or pendant lights, remember the golden rules: protect your eyes and hands, control the bottle, avoid rushing the score, and never skip sanding. Glass can be transformed into something beautiful, but only if you treat it with respect. Or, at minimum, with goggles.
Note: This article is for general DIY education. Cutting glass always carries risk. Wear proper protective gear, work slowly, and discard any piece with deep cracks, unstable edges, or damage that could make it unsafe.

