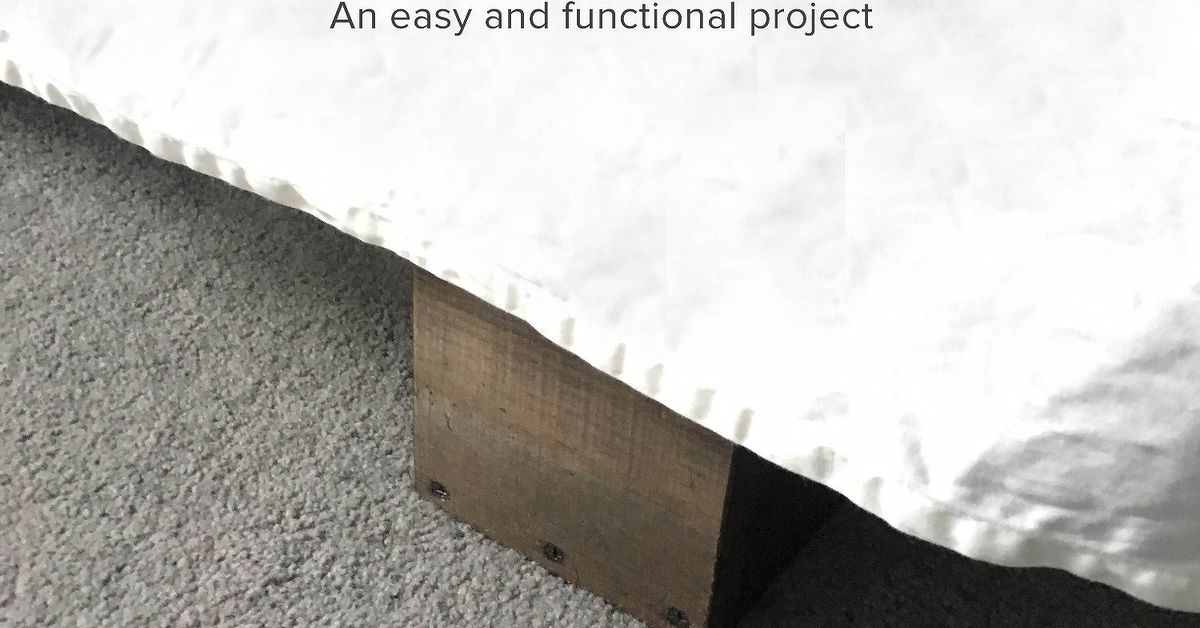
A bedroom can run out of storage space remarkably fast. One minute, everything fits neatly in the closet; the next, your winter blankets, extra shoes, and mysteriously large collection of reusable shopping bags are fighting for territory. Raising your bed a few inches can unlock valuable storage without requiring a larger room, a new bed frame, or negotiations with the laws of physics.
Easy DIY bed risers can also adjust the height of a low bed, make cleaning underneath it less awkward, and create space for rolling bins. The key word, however, is safe. A bed supports a mattress, a frame, one or more sleepers, and occasionally a pet that somehow occupies 70% of the available surface. Your homemade risers must support that weight without cracking, sliding, tilting, or turning midnight into an unexpected amusement-park ride.
This guide explains how to build sturdy wooden bed risers, choose appropriate materials, measure your bed correctly, and avoid common shortcuts that look clever until gravity submits its review.
Why Make Your Own Bed Risers?
Commercial bed risers are inexpensive and convenient, but DIY versions offer several advantages. You can customize the height, match the finish to your bed frame, create recesses sized precisely for unusual legs, and build additional supports for frames with center legs.
The most common reasons to raise a bed include:
- Creating clearance for under-bed storage bins
- Making room for shoes, luggage, bedding, or seasonal clothing
- Increasing access for a vacuum, mop, or robotic cleaner
- Adjusting a low bed to a more comfortable sitting height
- Improving the appearance of a bed with short or hidden legs
- Leveling a bed on a slightly uneven floor
Bed height affects comfort as well as storage. When sitting on the mattress edge, many adults find it easiest to stand when their feet rest firmly on the floor and their knees remain close to a right angle. Taller is not automatically better. A bed that becomes too high may be difficult to enter or exit, especially for children, older adults, shorter sleepers, or anyone with balance or mobility limitations.
Before Building: Inspect Your Bed Frame
Do not begin by cutting four blocks of wood. Begin by looking underneath the bed. Bed frames vary more than they appear to from pillow level.
Count Every Load-Bearing Leg
A twin bed may have four corner legs. A queen or king frame may have four corner legs plus one or more center supports. Platform beds may use six, seven, or even nine contact points. Every leg that currently touches the floor and carries weight generally needs its own riser.
Ignoring a center support can cause the middle rail or slats to sag because the corner legs have been raised while the center remains at the original height. If your frame has seven supports, build seven matching risersnot four risers and three optimistic thoughts.
Identify the Leg Shape
Measure the width and depth of square legs or the diameter of round legs. Metal frames may rest on narrow feet, glides, casters, or wheels. Risers should have a recessed pocket wide enough to accept the entire foot while preventing it from sliding over the edge.
For a round leg measuring 2 inches in diameter, a pocket approximately 2 1/4 inches wide allows modest clearance. For a rectangular foot measuring 2 by 3 inches, create a recess or top cradle larger than those dimensions. Do not make the pocket excessively loose, because extra space permits movement.
Check for Special Bed Types
Basic homemade risers are best suited to conventional stationary wood or metal frames. Avoid modifying bunk beds, loft beds, cribs, hospital-style beds, or adjustable power bases unless the manufacturer explicitly approves the method. Raising these products may affect guardrail height, structural geometry, moving components, electrical clearances, or anti-entrapment features.
A bed with wheels requires deep, appropriately sized cups and locked casters. If the wheels cannot be secured, use manufacturer-approved risers or replace the casters with compatible stationary feet.
How High Should DIY Bed Risers Be?
For a beginner project, a lift of 2 to 4 inches is usually more manageable than a dramatic 6- or 8-inch increase. A shorter riser has a lower center of gravity and is less likely to tip under sideways movement.
Measure the item you plan to store before choosing a height. Suppose your storage bin is 7 inches tall and the current floor-to-frame clearance is 5 inches. You need slightly more than 2 additional inches, not a miniature observation tower. Add approximately half an inch of working clearance so the bin does not scrape the frame every time it is removed.
Also calculate the finished mattress height. Sit on the edge before building and imagine the mattress several inches higher. Your feet should still reach the floor comfortably. If you must climb into bed using momentum and a motivational speech, the risers are probably too tall.
The Best Material for Homemade Bed Risers
Solid lumber is the most practical material for a straightforward DIY build. A dry, straight 4-by-4 post is commonly used because its actual dimensionsapproximately 3 1/2 by 3 1/2 inchesprovide a broad base for many standard bed legs.
Dense hardwood such as maple or oak can produce attractive, durable risers, but construction-grade pine or Douglas fir can also work when the blocks are sound, wide, and free from serious defects. The compressive strength of wood varies by species, grain direction, grade, and moisture content, so avoid trying to calculate a universal homemade weight rating from block size alone.
Reject any piece with:
- Deep cracks or checks running through the block
- Rot, insect damage, or soft areas
- Large loose knots near the top or bottom
- Severe twisting, cupping, or uneven end cuts
- Wet lumber that may shrink or distort as it dries
Avoid particleboard, medium-density fiberboard, hollow plastic containers, stacked books, loose bricks, and milk crates. These materials may crumble, shift, crack, or provide an unstable contact surface. Concrete blocks are strong in appropriate structural applications, but hollow blocks can chip, damage floors, and create awkward pressure points when casually used beneath furniture.
Easy DIY Wooden Bed Risers: Materials and Tools
Materials
- One straight, dry 4-by-4 wood post or suitable hardwood block stock
- Non-slip rubber furniture pads or dense rubber sheet
- Wood glue or construction adhesive suitable for wood and rubber
- Sandpaper in approximately 80-, 120-, and 180-grit
- Wood stain, paint, or clear protective finish
- Optional plywood or hardwood strips for a square top cradle
Tools
- Tape measure
- Pencil and combination square
- Miter saw, circular saw, or handsaw
- Drill or drill press
- Forstner bit sized for round bed legs
- Clamps
- Safety glasses and a dust mask
- Level
A Forstner bit is useful because it can create a relatively clean, flat-bottomed recess. Use a depth stop, tape marker, or drill-press setting so every pocket is drilled to the same depth. Clamp each block before drilling; holding a small block by hand while a large bit spins into it is not bravery. It is an awkward future story.
Step-by-Step Instructions
Step 1: Determine the Finished Height
Measure the current distance from the floor to the lowest part of the bed frame. Then measure your storage containers. Subtract the existing clearance from the required clearance and add a small margin.
For example:
- Storage bin height: 7 inches
- Existing clearance: 4 1/2 inches
- Additional practical clearance: 1/2 inch
- Required lift: approximately 3 inches
Remember that the recess in the top of the riser reduces the effective lift. A 3-inch block with a 1/2-inch-deep pocket raises the leg by approximately 2 1/2 inches.
Step 2: Cut Identical Blocks
Mark the desired block length around all four sides of the post using a square. Cut one block and use it as the reference for the remaining pieces. Every riser must be the same finished height.
If one block differs by even a modest amount, the bed may rock. Sanding can correct tiny variations, but noticeably uneven cuts should be recut rather than disguised with thick pads.
Step 3: Mark the Center
Draw diagonal lines from corner to corner on the top of each block. Their intersection marks the center. For rectangular legs, trace the foot while keeping an even border around it.
Leave enough solid wood around the recess. A pocket positioned too close to an edge weakens the block and increases the chance of the leg slipping out.
Step 4: Drill or Build the Recess
For round legs, clamp the block securely and drill a flat-bottomed pocket approximately 3/8 to 3/4 inch deep. Deeper is not always better; the block must retain substantial solid material beneath the pocket.
For square or rectangular feet, you have two beginner-friendly options:
- Use a router or overlapping Forstner-bit holes to create a fitted recess.
- Attach four short wood strips around the block’s top to form a shallow cradle.
A raised cradle is often easier than routing a large rectangular pocket. Glue and screw the strips securely, predrilling pilot holes to reduce splitting. The strips should restrain the foot without carrying the entire vertical load; the leg should rest on the solid center of the block.
Step 5: Sand the Blocks
Sand all faces and ease the sharp edges. Begin with coarse paper if saw marks are visible, then move to finer grits. Slightly rounding or chamfering the bottom edges helps reduce splintering when the blocks are moved.
Do not aggressively round the top surface. The bed leg needs a broad, level bearing area.
Step 6: Add a Finish
Paint the blocks to match a metal frame, stain them to coordinate with wood furniture, or apply a clear finish. Allow coatings to cure fully before installation. A finish that feels dry on top may still be soft enough to transfer onto carpet or flooring.
Step 7: Attach Non-Slip Bases
Cut rubber pads slightly smaller than each block and attach them to the bottom. Rubber increases grip on tile, laminate, and hardwood while protecting the floor from scratches.
Use dense material intended for furniture loads. Soft foam may compress unevenly, and ordinary felt pads are designed primarily to make furniture slide more easilythe exact opposite of what a bed riser should do.
Step 8: Install the Risers Safely
Remove bedding, under-bed items, and anything unstable from the frame. Ask another adult to help. Lift one section only as high as necessary, slide the riser underneath, and lower the leg into the pocket.
Never place your hands, head, or torso beneath an unsupported bed. Do not rely on another person to hold the entire frame in the air while you casually make adjustments. For a heavy bed, use an appropriate furniture-lifting tool and blocking method or hire professional assistance.
Install a riser beneath every load-bearing point, including center legs. Confirm that each foot sits fully inside its recess.
Step 9: Test the Bed
Place a level across the side rails and footboard. Press down firmly at each corner and along the center. The frame should not rock, slide, twist, or make new cracking sounds.
Sit on the edge before lying down. Then shift your weight gently from side to side. Reinspect every riser after the first night and periodically thereafter, especially on carpet where the blocks may settle.
Alternative DIY Bed Riser Designs
Wide Two-Layer Plywood Risers
Quality plywood can be laminated into wide, low risers. Cut several identical squares, glue and clamp the layers, then create a top pocket. This approach allows precise height adjustments and produces a broad footprint.
Use cabinet-grade plywood without major voids, and orient the layers consistently. Seal exposed edges with wood filler, edge banding, or paint if appearance matters.
Decorative Hardwood Risers
For visible bed legs, use hardwood blocks shaped with beveled edges. Stain them to match the frame and add a carefully sized recess. Decorative risers take longer to build but look like intentional furniture components rather than leftover lumber that wandered into the bedroom.
Continuous Platform Risers
If a bed needs substantial elevation, a continuous platform may be safer than several very tall independent blocks. A properly constructed platform distributes loads across a larger structure and can include storage cubbies or drawers.
This is no longer a quick beginner riser project. It requires bracing, accurate joinery, suitable fasteners, and a design that resists sideways racking. For lifts beyond a few inches, consider a purpose-built platform bed or professionally rated commercial system.
Common DIY Bed Riser Mistakes
Making Only Four Risers
Many modern bed frames have center supports. Raising only the corners leaves those supports hanging above the floor or forces the frame into an uneven position.
Using Risers With Narrow Bases
A tall block with a tiny footprint behaves like a person wearing platform shoes on an icy sidewalk. Wider bases resist tipping and spread pressure across a larger area of flooring.
Stacking Separate Blocks
Do not stack loose wood scraps to achieve extra height. Layers can slide in different directions. When greater height is needed, laminate the pieces permanently with suitable glue and mechanical fasteners, or use a better engineered solution.
Skipping the Recess
A flat wood block may support vertical weight, but it does little to restrain horizontal movement. A pocket or cradle helps prevent the bed leg from walking toward the edge during normal use.
Forgetting About the Floor
Small hard blocks can dent soft wood, mark vinyl, or sink into thick carpet. Use a broad footprint and floor-compatible non-slip material. On plush carpet, check whether the risers remain vertical after the bed has settled.
Raising the Bed Too High
Extra height creates more storage but also increases leverage and fall distance. Use only the lift you actually need. A 3-inch riser that solves the problem is better than a 7-inch riser that creates three new ones.
What Can You Store Under a Raised Bed?
Once your bed is stable, use containers designed for the available space. Lidded bins protect clothing and linens from dust. Wheeled drawers are convenient on hard flooring, while handled fabric bags work well for lightweight bedding.
Good candidates for under-bed storage include:
- Seasonal clothing
- Spare sheets and blankets
- Shoes in ventilated containers
- Gift-wrapping supplies
- Travel bags and small luggage
- Books or documents in moisture-resistant boxes
- Infrequently used hobby supplies
Avoid packing the area so tightly that airflow and cleaning become impossible. Do not block electrical outlets, heating vents, adjustable-bed mechanisms, or power strips. Heavy items should be stored in containers that can be moved without straining your back.
My Practical Experience With Easy DIY Bed Risers
The first lesson from building bed risers is that measuring the bed matters more than measuring the mattress. A mattress may be queen-size, but that tells you almost nothing about the number, shape, or location of the frame’s feet. On one project, the bed appeared to have four legs until the mattress and box spring were removed. Underneath were two center supports quietly doing their jobs without receiving any recognition. Had the project continued with four risers, those supports would have been left several inches above the floor.
The second lesson is to choose the storage containers before choosing the lift height. It is tempting to decide that “four inches sounds useful” and start cutting. In practice, the best result comes from measuring an actual bin. A container that was supposed to fit beneath one raised bed had a molded lid that added nearly half an inch beyond its listed body height. The first risers technically created enough space for the box but not enough for the box to enter without scraping. Rebuilding four blocks over half an inch is an excellent way to become emotionally invested in accurate measurements.
For most straightforward builds, 4-by-4 lumber has been easier to work with than decorative furniture feet. The broad base feels stable, the blocks are simple to cut consistently, and the top surface provides enough room for a useful recess. The lumber must still be inspected carefully. One inexpensive post contained a long hidden check that became obvious only after the first block was cut. That piece went into the scrap pile rather than under a bed.
Creating identical recesses is another area where patience pays. A Forstner bit and drill press produce clean, repeatable pockets, but a handheld drill can also work with a clamped guide block and a clearly marked depth. Without a guide, the bit may wander or tilt, leaving one bed leg seated differently from the others. Testing each foot in its intended riser before applying finish prevents unpleasant discoveries during installation.
Non-slip pads have made a noticeable difference on smooth flooring. Bare wood blocks can move slightly when someone sits heavily on the edge of the mattress. Dense rubber pads reduce that movement and prevent scuffing. Felt pads, although excellent beneath chairs that need to slide, were not suitable for this purpose. The bed moved more easily, which was impressive engineering in exactly the wrong direction.
Installation has consistently been the part that benefits most from another person. Mattresses are flexible, frames are awkward, and center legs are difficult to see while lifting one side. Removing the mattress first makes the structure lighter and prevents it from shifting unexpectedly. After installation, checking every support with a flashlight takes only a minute and catches feet that are resting on the rim instead of inside the recess.
The final practical lesson is to live with the raised bed for several days before filling every inch underneath it. Walk around it, sit on both sides, listen for movement, and inspect the blocks again. Carpet compresses, rubber pads settle, and a frame that seemed level during installation may reveal a slight wobble after normal use. Correcting that problem while the storage area is empty is considerably easier than unloading six bins, two suitcases, and a holiday decoration collection large enough to alarm the neighbors.
Conclusion
Easy DIY bed risers can create useful storage and improve bedroom functionality with only basic woodworking tools. The safest design uses sound solid wood, identical block heights, wide bases, properly sized leg recesses, non-slip floor protection, and support beneath every load-bearing leg.
Keep the lift modest, inspect the bed frame before building, and test the finished installation carefully. Homemade risers should feel boring once installed: no wobbling, no sliding, no mysterious noises, and absolutely no surprise descent at 2:00 a.m. In this project, boring is not a lack of creativity. Boring is structural success.