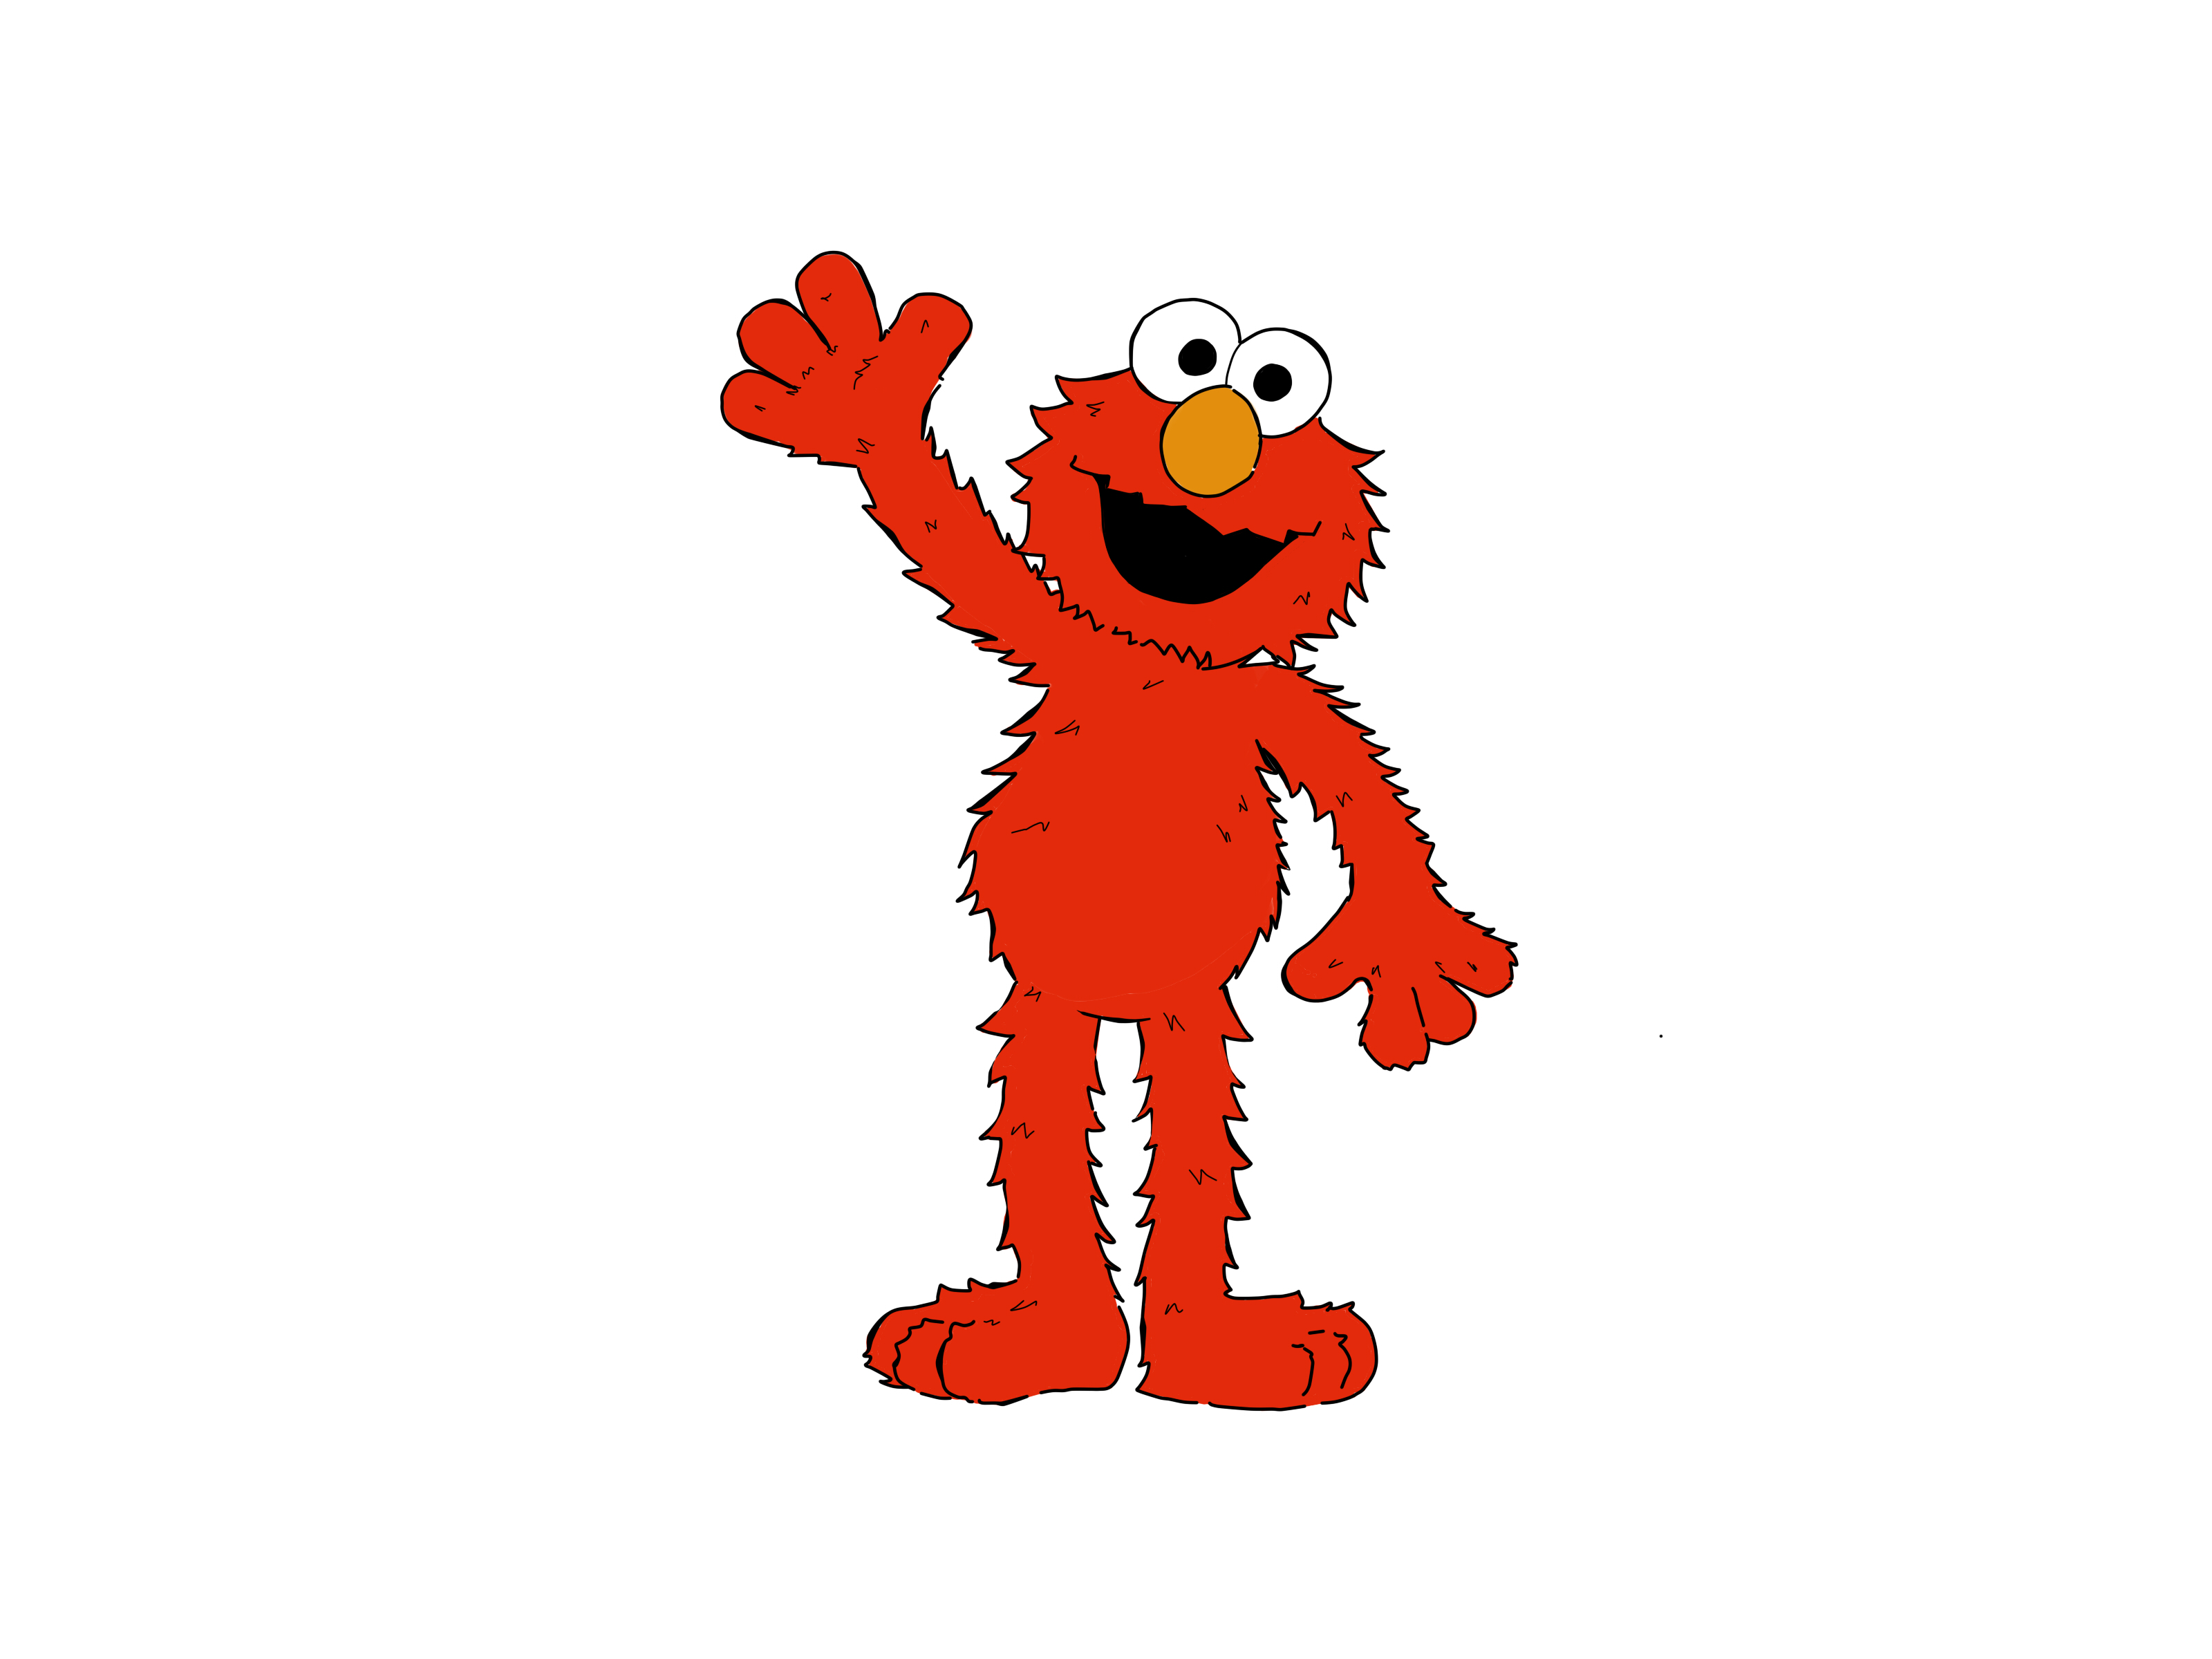
Elmo may look like a lively explosion of red fur, but he is surprisingly easy to draw once you reduce him to circles, ovals, curved lines, and a few cheerful wiggles. His oversized eyes, orange nose, enormous smile, and fuzzy silhouette make him instantly recognizableeven if your first sketch looks as though Elmo just rolled out of bed.
This step-by-step tutorial explains how to draw Elmo using beginner-friendly shapes. You can create a simple head-and-shoulders portrait or continue to complete his entire body. No advanced art training, expensive equipment, or ability to speak in the third person is required.
What You Need to Draw Elmo
You can complete this easy Elmo drawing with basic supplies found in most homes or classrooms:
- White drawing paper or a sketchbook
- A regular HB or No. 2 pencil
- A soft eraser
- A black marker or fine-liner
- Red, orange, black, white, and pink coloring tools
- A reference image of Elmo, if available
Crayons and colored pencils are excellent for children because they offer plenty of control. Markers produce brighter colors, but place a spare sheet beneath the drawing to prevent ink from bleeding onto the table. The table has done nothing to deserve a permanent red Elmo tattoo.
Understanding Elmo’s Basic Design
Before drawing, take a moment to identify Elmo’s defining features. He is a small red monster with an approximately round, furry head. Two large white eyes sit close together at the top of his face. His orange oval nose rests beneath and slightly in front of them, while a wide black mouth creates his famously delighted expression.
Elmo’s body is compact and slightly pear-shaped. His arms and legs resemble flexible tubes covered in shaggy fur. The character’s proportions are intentionally playful rather than realistic, so the head and facial features should receive more visual attention than the torso.
Using basic shapes first keeps these proportions under control. The initial circles and guidelines are only scaffolding; they are not expected to be attractive. Construction lines are the sweatpants of drawinguseful, comfortable, and not meant for the final presentation.
How to Draw Elmo Step by Step
Step 1: Plan the Pose and Page Placement
Decide whether you want to draw only Elmo’s face or his full body. For a complete figure, turn the paper vertically and leave space beneath the head for the torso, legs, and feet. Place a faint mark near the top, bottom, and sides of the area your drawing will occupy.
A waving pose is a good choice for beginners because it expresses Elmo’s friendly personality. Leave additional room on one side for the raised arm. Sketch lightly so every early line can be adjusted without leaving dark grooves in the paper.
Step 2: Create the Head Guide
Draw a large, light circle in the upper half of the page. It does not have to be geometrically perfect. In fact, a slightly irregular circle works well because Elmo is furry rather than polished like a bowling ball.
Add a faint vertical guideline through the center. Then draw a horizontal guideline slightly above the circle’s midpoint. These marks will help you align the eyes, nose, and mouth. Keep the pressure gentle because the guides will eventually be erased.
Step 3: Draw Elmo’s Eyes
Place two large circles near the upper center of the head. The circles should touch or overlap slightly. Let them extend a little above the original head guide so the eyes appear perched on Elmo’s face.
Inside each eye, draw a smaller black circle for the pupil. Keeping the pupils close to the center makes Elmo look attentive and friendly. Moving them slightly in one direction can make him appear to be looking at another object in the scene.
Check that the eyes are large enough. Tiny eyes can make the drawing resemble an entirely different red monsterpossibly one who handles taxes instead of singing songs.
Step 4: Add the Orange Nose
Draw a wide horizontal oval below the eyes. Its upper edge may overlap the bottom of the eye shapes slightly. Elmo’s nose should be smaller than the combined width of his eyes but prominent enough to become the center of the face.
For a flat cartoon style, leave the oval simple. To create more dimension, place a small curved highlight near its upper-left edge and add a slightly darker orange area along the lower-right side.
Step 5: Sketch the Happy Mouth
Under the nose, draw a curved line that sweeps outward on both sides. Extend another deep U-shaped curve beneath it and connect the ends to form an open mouth. Elmo’s mouth is broad, so do not be afraid to make it nearly as wide as the lower half of the head.
Draw a small rounded tongue along the bottom inside edge. The rest of the mouth will be colored black or very dark brown, while the tongue can be pink or muted red. Make the upper curve rise slightly at both corners to emphasize the smile.
Step 6: Replace the Head Circle With Furry Contours
Now trace around the outside of the head using clusters of short, irregular curves. Alternate tiny outward points with rounded bumps to suggest shaggy fur. Follow the general circular guide without copying it exactly.
Vary the length and direction of the fur marks. Repeating identical zigzags makes the head look like a decorative postage stamp. A mixture of soft tufts and uneven curves creates a more natural fuzzy effect.
Elmo has no visible neck, so allow the bottom of the head to connect closely to the body. Once you are satisfied with the new outline, erase the original circle and facial guidelines carefully.
Step 7: Construct Elmo’s Torso
Below the head, lightly draw a compact oval or pear shape. The torso should be narrower than the head and slightly wider near the bottom. Part of its upper edge may disappear behind the head, reinforcing the character’s short, cuddly proportions.
Replace the smooth torso guide with a furry outline similar to the head. Keep the texture subtle for now. Too many interior fur lines can make the body visually confusing once color is added.
Step 8: Draw the Arms and Hands
For the arm at Elmo’s side, extend two gently curving lines from the upper torso. Bring them together at a rounded hand. For a waving arm, angle the second pair of lines upward and slightly outward.
Draw four rounded digits on each hand, including the thumb. The fingers should look soft and simplified rather than anatomically precise. Add small tufts around the outer edges of the arms and hands to maintain the furry appearance.
Elmo’s elbows do not need sharp corners. Smooth curves make the pose feel loose, energetic, and puppet-like.
Step 9: Add the Legs and Feet
Extend two short, thick legs from the bottom of the torso. Separate them enough that the pose remains readable, but keep them close to the center so Elmo looks balanced.
At the end of each leg, draw a broad, flattened foot with a rounded toe. The feet may angle outward slightly. Use broken, wavy contours along the legs and feet instead of perfectly smooth lines.
If Elmo appears likely to topple over, widen the feet or move one slightly outward. Cartoon characters may ignore many rules of anatomy, but gravity remains annoyingly committed to its job.
Step 10: Refine the Outline
Review the entire sketch before using a marker. Compare the size and placement of the eyes, nose, mouth, head, and limbs. Correct anything that feels crowded, tilted, or out of proportion.
When the construction is working, trace the final lines with a black marker or darker pencil. Use smooth strokes around the eyes and nose, but allow the body outline to remain lively and irregular. Slight variations in line thickness can give the illustration more energy.
Wait until the ink is completely dry before erasing the remaining pencil marks. Otherwise, one enthusiastic swipe of the eraser may turn Elmo into a mysterious red-and-black weather system.
Step 11: Add Fur Texture
Place a limited number of short curved strokes inside the head, torso, arms, and legs. Follow the direction in which the fur might naturally sit. Marks near the outer edges can curve outward, while those on the torso can point downward or diagonally.
Avoid filling every inch with black texture. The red coloring will provide much of the fuzzy effect, especially if you apply it using short strokes instead of one flat layer.
Step 12: Color Your Elmo Drawing
Color the fur a bright, warm red. Preserve the white eyes, fill the pupils with black, and make the nose a vivid orange. Color the inside of the mouth black and the tongue pink or reddish pink.
For crayon or colored pencil, apply the red in short overlapping strokes that follow the body’s contours. Begin with light pressure and gradually deepen the color. Leave tiny irregular gaps or introduce a darker red near the edges to enhance the impression of fur.
If you use markers, color in small sections to reduce streaks. A darker red pencil can later add shadows under the head, beneath the arms, and where the legs meet the torso. Keep the eyes clean and bright because their contrast contributes strongly to Elmo’s expression.
How to Make the Drawing Look More Like Elmo
Recognizable character drawings depend more on relationships between features than on perfect individual shapes. Elmo’s eyes should sit extremely close together, his orange nose should overlap the area directly below them, and his open mouth should occupy much of the lower face.
The furry head outline should surround these features closely. If the face has too much empty space, gradually bring the silhouette inward. If the expression looks sleepy, enlarge the pupils and raise the corners of the mouth.
Keep the pose upbeat. A raised hand, slightly tilted head, or outward-facing feet can communicate enthusiasm before color is added. These expressive decisions matter more than drawing every tuft of fur.
Common Elmo Drawing Mistakes and Easy Fixes
The Eyes Are Too Far Apart
Elmo’s eyes touch or overlap visually. If there is a large red gap between them, redraw one circle closer to the other. Make this correction before adding the nose.
The Nose Is Too Small
A tiny nose weakens the character’s familiar facial design. Enlarge it into a confident horizontal oval positioned immediately below the eyes.
The Mouth Looks Like a Thin Smile
Elmo usually has a large open mouth rather than a narrow curved line. Deepen the lower U shape, widen the corners, and fill the interior with a dark color.
The Fur Looks Like Sharp Spikes
Combine gentle waves, rounded tufts, and occasional points. Fur should look soft and chaotic, not as if Elmo recently argued with an electrical outlet.
The Sketch Became Difficult to Erase
Heavy construction lines can become trapped beneath the final outline. On the next attempt, hold the pencil farther from its tip and use less pressure. You can also practice the main shapes once on scrap paper before beginning the finished version.
Creative Ideas for Your Finished Elmo Picture
Once the basic drawing is complete, turn it into a small scene. Add alphabet blocks, colorful balloons, crayons, stars, or a simple Sesame Street-inspired neighborhood background. Elmo could hold a birthday card, wave from behind a large letter, or point toward the artist’s name.
For a personalized version, change the pose or expression while preserving the signature eyes, nose, smile, and red fur. Try drawing Elmo laughing, dancing, reading, or wearing a seasonal hat. Children can also create a speech bubble with a friendly greeting.
If you are drawing digitally, place the sketch, outline, color, and shading on separate layers. Lower the sketch layer’s opacity before inking, use a textured brush for the fur, and lock the color layer before adding shadows. These simple habits make corrections much easier.
Experience-Based Lessons From Drawing Elmo
A typical first attempt at drawing Elmo often reveals an encouraging truth: the character is recognizable much earlier than expected. As soon as two close white eyes, one orange oval, and a large black smile appear on the page, the drawing begins to read as Elmo. The furry outline and red color then strengthen an identity that is already present.
The most useful experience for beginners is drawing the face before committing to the outer head contour. Starting with a perfectly finished head can create a cage that forces the eyes and mouth into whatever space remains. Building outward from the central features gives the artist more freedom to adjust the silhouette. It also makes correcting proportions less frustrating.
Another common experience is discovering that the second drawing usually looks noticeably better than the first. During the first attempt, the artist is learning where every feature belongs. During the second, the hand already remembers the sequence. The circles arrive more confidently, the smile becomes wider, and the fur stops behaving like frightened grass. Repetition is not evidence that the first drawing failed; it is how visual memory develops.
Children and adult beginners sometimes pause when their construction sketch looks messy. This is the moment when reassurance matters most. Early lines are supposed to overlap. An unfinished collection of circles and ovals is not a bad Elmoit is simply an Elmo who has not gotten dressed yet. Once the final outline replaces the guides, the image becomes dramatically clearer.
Coloring provides another practical lesson. Applying one heavy red layer immediately can flatten the figure and tire the hand. Building several light layers produces more even coverage and leaves room for darker shadows. Short directional strokes also create a fur-like texture without requiring hundreds of individually drawn hairs.
In family or classroom drawing sessions, comparisons between finished pages can be especially interesting. One Elmo may have an enormous nose, another may wave with spectacular enthusiasm, and a third may possess feet large enough to qualify as public transportation. These differences are not problems. They show that each artist interpreted the same familiar character through a personal drawing style.
When helping a young artist, specific observations tend to be more useful than taking over the pencil. Questions such as “Which shape looks too small?” or “Where should the nose overlap the eyes?” encourage the child to study the drawing and make an independent choice. Process-focused comments also preserve the playful nature of the activity.
The final experience worth remembering is that a successful cartoon does not need flawless symmetry. Elmo’s appeal comes from warmth, movement, and joyful irregularity. If the circles wobble slightly or one furry arm is thicker than the other, the image can still feel completely convincing. Clean relationships between the major features matter; microscopic perfection does not.
Conclusion
Learning how to draw Elmo becomes much easier when you begin with simple shapes and work from the facial features outward. Build the eyes, orange nose, and open smile first; surround them with an irregular furry head; then add the compact body, flexible limbs, texture, and bright red color.
Take your time, sketch lightly, and treat corrections as part of the process. After one or two attempts, you will understand Elmo’s proportions well enough to experiment with poses, expressions, and backgrounds. Most importantly, keep the experience cheerful. A drawing of Elmo should be allowed to have almost as much fun as Elmo does.
Note: This independent fan-art tutorial is intended for personal and educational drawing practice. Elmo and Sesame Street are associated with their respective rights holders, and this tutorial is not an official Sesame Street publication.