Learning how to do a double cere a loose strand of yarn suddenly starts behaving like actual fabric. Better yet, double crochet grows quickly, looks tidy, and appears in everything from scarves and blankets to granny squares, sweaters, shawls, and bags.
This beginner-friendly double crochet tutorial explains every movement in plain American English. You will learn where to insert the hook, how to manage the loops, how to begin a new row, how to count stitches, and how to fix the mistakes that make crochet pieces mysteriously widen, shrink, or lean like a tiny yarn-based Tower of Pisa.
What Is a Double Crochet Stitch?
A double crochet stitch is a basic, relatively tall crochet stitch made by wrapping the yarn over the hook, inserting the hook into a stitch, pulling up a loop, and then working the loops off the hook in two stages.
In crochet patterns, double crochet is abbreviated as dc. Its standard chart symbol resembles a tall vertical line crossed by a short horizontal bar. The stitch is taller than single crochet and half double crochet but shorter than treble crochet. cause of that extra height, double crochet rows build faster than rows made with shorter stitches. The resulting fabric is generally lighter, more flexible, and more open than single-crochet fabric. This makes double crochet useful for projects that need drape or quick progress, including:
- Beginner scarves and blankets
- Classic granny squares
- Shawls and wraps
- Cardigans and lightweight garments
- Market bags and mesh designs
- Decorative shells, fans, and V-stitches
It is also a building block for more advanced techniques such as front-post double crochet, back-post double crochet, double crochet clusters, double crochet decreases, and corner-to-corner crochet.
What You Need to Practice Double Crochet
You do not need a suitcase full of craft supplies. For a simple practice swatch, gather the following:
- One ball of smooth, medium-weight yarn
- A crochet hook that matches the yarn label
- Scissors
- One or two stitch markers
- A yarn needle for weaving in the ends
Best Yarn for a Beginner
A smooth, light-colored, medium-weight yarnoften labeled as size 4 or worsted weightis usually easiest for practice. Its stitches are large enough to see without being comically oversized, and the strands are less likely to hide where your hook should go.
Avoid fuzzy, eyelash-style, very dark, or highly textured yarn for your first swatch. Those yarns can be beautiful, but they camouflage stitch anatomy with the enthusiasm of a secret agent. Save them for after you can recognize the top of a double crochet without holding it under three lamps.
Best Crochet Hook Size for Practice
Check the recommended hook range printed on the yarn label. For many medium-weight yarns, a hook around 5 to 5.5 millimeters works well for practice, although the appropriate size depends on the specific yarn and your tension. Industry hook-size recommendations are guidelines rather than absolute rules, so the project pattern and desired fabric should take priority. slightly larger hook may help if your stitches are painfully tight. A slightly smaller hook can help if your swatch looks extremely loose and floppy.
Double Crochet Abbreviations and Terms
Before beginning, learn these common abbreviations:
- ch: chain
- dc: double crochet
- st: stitch
- sts: stitches
- yo: yarn over
- rep: repeat
- turn: rotate the work so you can crochet the next row
The basic double crochet sequence can be summarized as follows:
Yarn over, insert the hook, yarn over and pull up a loop, yarn over and pull through two loops, then yarn over and pull through the final two loops. at sentence may currently sound like a yarn-related legal document. Once you perform it slowly a few times, however, your hands will begin remembering the rhythm.
How to Do a Double Crochet Stitch Step by Step
Make a short foundation chain for practice. Chain 15 stitches so you have enough room to see the pattern without committing to a blanket large enough to cover a small airport.
Step 1: Make a Slip Knot
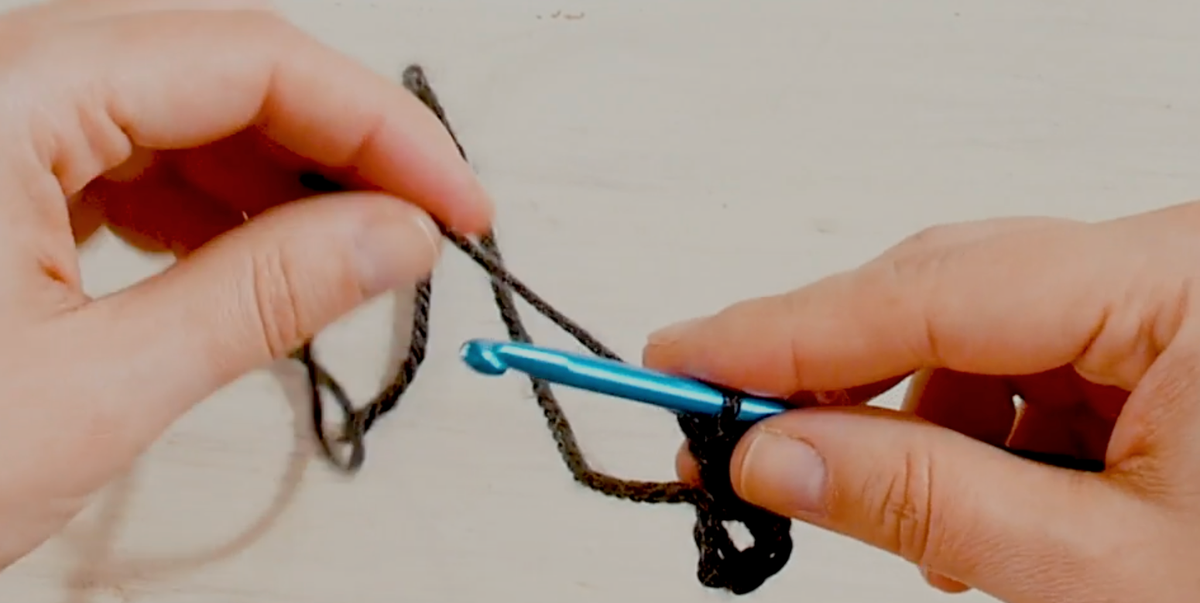
Create a slip knot and place it on your crochet hook. Tighten the knot gently so it rests comfortably around the shaft of the hook. It should slide without falling off and without gripping the hook like it owes the yarn money.
The slip knot does not count as a chain stitch.
Step 2: Crochet the Foundation Chain
Hold the working yarn in your non-hook hand. Yarn over by bringing the working yarn over the hook, then pull it through the loop already on the hook. One chain is complete.
Continue until you have made 15 chains. Try to keep them similar in size. They do not need to be perfect; they simply need to be loose enough for the hook to enter later.
Step 3: Yarn Over
Wrap the working yarn over the hook from back to front. This preliminary yarn over gives the double crochet its height.
Do not confuse the working yarn with the short tail hanging from the slip knot. Crocheting with the tail is an exciting experiment that ends very quickly.
Step 4: Insert the Hook Into the Fourth Chain
Count four chains away from the hook. Do not count the loop currently sitting on the hook. Insert the hook into the fourth chain.
Many traditional beginner instructions treat the first three skipped chains as the equivalent of the first double crochet. This raises the working yarn to the correct height and affects the final stitch count. en inserting the hook, you may work under one strand or under two strands of the foundation chain, depending on the method being taught. Working into the back bump of each chain can create a particularly neat lower edge, but it may feel fiddly during your first attempt. Consistency matters more than choosing the fanciest method.
Step 5: Yarn Over and Pull Up a Loop
With the hook inserted into the chain, yarn over again. Pull the yarn back through the chain.
You should now have three loops on the hook. Pause and count them. Learning to notice the number of loops is one of the easiest ways to catch a mistake before it turns into an entire row of modern abstract crochet.
Step 6: Yarn Over and Pull Through Two Loops
Yarn over, then pull the hook through the first two loops on the hook.
You should now have two loops remaining. Keep the hook level and allow its head to face slightly downward as it passes through the loops. This helps prevent the hook from snagging the yarn.
Step 7: Yarn Over and Pull Through the Final Two Loops
Yarn over one more time. Pull the yarn through both remaining loops.
Only one loop should remain on the hook. Congratulationsyou have completed one double crochet stitch.
Step 8: Double Crochet Across the Row
To make the next stitch, repeat the same sequence in the next chain:
- Yarn over.
- Insert the hook into the next chain.
- Yarn over and pull up a loop.
- Yarn over and pull through two loops.
- Yarn over and pull through the final two loops.
Continue in every remaining chain. When the row is complete, count your stitches before moving on. In the traditional method described above, the skipped chains may count as the first stitch, so include them when checking the row total.
How to Start the Second Row of Double Crochet
At the end of the first row, turn the work so the opposite side faces you and the hook is ready to travel back across the fabric.
Next, make the turning chain required by your pattern. Traditional instructions frequently use a chain 3 that counts as the first double crochet of the new row. However, some modern patterns use chain 2, chain 3 that does not count, or a chainless starting stitch. There is no universal rule that overrides the pattern designer’s instructions. hen the Turning Chain Counts as a Stitch
If the turning chain counts as the first double crochet, skip the first stitch at the base of the chain. Work the first regular double crochet into the next stitch.
At the opposite end of the row, work the final double crochet into the top of the previous row’s turning chain. Missing this final location causes the fabric to lose one stitch and gradually become narrower.
When the Turning Chain Does Not Count
If the instructions say the turning chain does not count as a stitch, work the first double crochet into the first stitch. At the end of the row, do not treat the turning chain as an additional stitch.
Whichever method you use, place a stitch marker in the first and last stitch of each row. This small habit prevents a surprisingly large percentage of beginner problems.
How to Recognize and Count Double Crochet Stitches
Each completed double crochet has a tall vertical post and a V-shaped top. When a pattern tells you to work into the next stitch, insert the hook under both loops of that V unless the instructions specify the front loop, back loop, post, or another location.
Count the V shapes across the top edge rather than counting gaps between the posts. Gaps can be misleading, particularly when the turning chain creates a larger opening at the edge.
Easy Stitch-Counting Method
- Lay the swatch flat without stretching it.
- Find the first V-shaped stitch at one edge.
- Count each V across the row.
- Include the turning chain only when the pattern says it counts as a stitch.
- Compare the total with the required stitch count.
Count after every row while learning. It takes a few seconds and is much less dramatic than discovering a missing stitch 23 rows later.
Common Double Crochet Mistakes and How to Fix Them
Your Foundation Chain Is Too Tight
Problem: The hook will not slide into the chains, or the lower edge curves inward.
Fix: Remake the chain more loosely or use a hook one size larger for the foundation chain. Return to the regular hook when beginning the double crochet row.
Your Swatch Keeps Getting Narrower
Problem: You are probably skipping the first stitch incorrectly or missing the last stitch near the turning chain.
Fix: Count every row and mark both edge stitches. Determine whether the turning chain counts before deciding where the first and last stitches belong.
Your Swatch Keeps Getting Wider
Problem: You may be working into the first stitch even though the turning chain already counts as a stitch. You may also be adding a double crochet to both the last stitch and the turning chain when only one should be used.
Fix: Review the turning-chain rule and keep the same stitch count in every straight row.
Your Stitches Are Extremely Tight
Problem: You may be pulling the working yarn after every motion or holding the hook and yarn too firmly.
Fix: Relax your hands and allow each loop to sit on the wider shaft of the hook before completing the next yarn over. Beginner guidance commonly recommends practicing with relaxed, loose stitches because they are easier to enter and manipulate. our Stitches Look Uneven
Problem: Some loops are being pulled higher than others, or your grip changes as your hands become tired.
Fix: Work slowly, pause after every few stitches, and focus on lifting each pulled-up loop to approximately the same height. Even tension comes from repetition rather than squeezing the yarn into submission.
You Have the Wrong Number of Loops
A normal double crochet should produce three loops after you pull up the first loop. You then pull through two loops twice.
If you have only two loops after pulling up yarn, you may have forgotten the initial yarn over. If you have four loops, you may have wrapped the yarn over twice, which begins a taller stitch.
Beginner Double Crochet Practice Swatch
Use this simple exercise to practice straight rows.
Materials
- Medium-weight yarn
- Appropriate crochet hook
- Two stitch markers
- Scissors and yarn needle
Practice Instructions
Foundation: Chain 18.
Row 1: Double crochet in the fourth chain from the hook and in each remaining chain across. Count the skipped chains as the first double crochet.
Row 2: Chain 3 and turn. Treat the chain 3 as the first stitch. Skip the first stitch at its base, double crochet in each stitch across, and work the final double crochet into the top of the turning chain.
Rows 3–10: Repeat Row 2.
Check the stitch count after every row. Your swatch should remain rectangular. If it becomes triangular, trapezoidal, or emotionally complicated, compare the two edges and locate the row where the stitch count changed.
Once the swatch is complete, fasten off by cutting the yarn with a tail several inches long. Pull the tail through the final loop and tighten gently. Weave the tail through nearby stitches with a yarn needle.
Easy Projects to Make After Learning Double Crochet
After completing a practice swatch, choose a project with straight rows and minimal shaping. Good first projects include:
- A rectangular scarf
- A washcloth or dishcloth
- A simple baby blanket
- A square pillow panel
- A basic cowl
- A granny-square practice sampler
Double crochet is commonly used in granny squares, lacy stitch patterns, garments, shawls, hats, and blankets. It also provides the foundation for V-stitches, shell stitches, clusters, post stitches, and diagonal corner-to-corner blocks. r your first real project, choose a smooth yarn and a pattern with a clearly stated stitch count. A straightforward scarf made entirely in double crochet may not require advanced wizardry, but it teaches tension, turning, edge control, counting, and finishingthe practical skills that make later projects much easier.
Frequently Asked Questions About Double Crochet
Is Double Crochet Easy for Beginners?
Yes. It requires more movements than single crochet, but its tall posts and visible V-shaped tops can become easy to recognize after a little practice. The repeated two-stage pull-through also develops useful yarn-control skills.
How Many Chains Do I Need to Turn Double Crochet?
Many traditional U.S. patterns use chain 3, but some use chain 2 or another starting method. More important than memorizing one number is checking whether the turning chain counts as a stitch. Follow the specific pattern rather than assuming every designer uses the same convention.
Why Are There Three Loops on My Hook?
The three loops are correct after you yarn over, insert the hook, yarn over again, and pull up a loop. Complete the stitch by pulling through two loops, then through the remaining two.
Should I Crochet Under One Loop or Two?
Unless instructed otherwise, insert the hook under both top loops of the next stitch. Working through only the front or back loop creates a different texture and is normally stated in the pattern.
How Do I Make a Double Crochet Increase?
Work two double crochet stitches into the same stitch or space. Because two stitches emerge from one location, the stitch count increases by one.
How Do I Make a Double Crochet Decrease?
A common decrease is dc2tog, meaning double crochet two stitches together. Begin a double crochet in the first stitch but stop before the final pull-through. Begin another in the following stitch, then join the unfinished stitches with a final yarn over and pull-through. This combines two stitch locations into one finished top. n>
Conclusion
To make a double crochet stitch, remember one simple rhythm: yarn over, insert, pull up a loop, pull through two, and pull through two again. That sequence creates a tall, versatile stitch that can carry you from a small practice square to blankets, garments, granny squares, and dozens of textured designs.
Your first rows may not look machine-made, and that is perfectly normal. Focus on keeping the foundation chain loose, identifying the V at the top of each stitch, counting every row, and following the pattern’s turning-chain rule. With repetition, the motions become smoother and the edges become straighter. Soon you will stop narrating every yarn over in your headwhich is the crochet equivalent of taking off the training wheels.
Beginner Experience Notes: What Learning Double Crochet Really Feels Like
Most beginners do not struggle with the basic double crochet sequence for very long. The harder part is learning to see the fabric as a collection of individual stitches rather than one mysterious woolly landscape. During the first practice session, the hook may seem determined to split the yarn, the foundation chain may tighten into a cord, and the last stitch of each row may apparently vanish into another dimension.
A useful early experience is making several small swatches instead of immediately beginning a large project. A ten-row sample gives you permission to experiment. You can deliberately use looser tension on one half and tighter tension on the other, compare chain-2 and chain-3 turning edges, or place markers in different locations to understand which loops belong to the edge stitches. A practice square is not wasted yarn; it is a tiny classroom that does not assign homework.
Many new crocheters notice that their dominant hand learns the hook movements before the other hand learns to feed yarn evenly. This creates alternating tight and loose stitches. The solution is usually not to pull harder. Instead, slow down and adjust how the working yarn passes through the fingers of the non-hook hand. The yarn should move with mild resistance, not require a wrestling match.
Another common experience is producing a swatch that gradually narrows. This often happens because the final stitch is less obvious than the stitches in the middle. The turning chain may lean to one side, creating a gap that looks like the end of the row even when one stitch remains. Marking the first and last stitches transforms the process. Suddenly, the “missing” stitch is no longer hiding; it has a brightly colored marker waving from its roof.
After five or six rows, the double crochet rhythm generally becomes more natural. The hands begin performing the sequence as one connected action rather than five unrelated commands. This is the moment when beginners often realize why crochet can feel relaxing. Attention shifts away from worrying about every loop and toward watching the fabric grow.
It is also normal for the sides of an early swatch to look slightly bumpy even when the stitch count is correct. Turning chains have a different structure from regular double crochet stitches, and tension at the beginning of a row may differ from tension in the center. Blocking the finished swatch can improve its shape, but practice is the main cure. With each sample, your hands become better at creating consistent loop height and edge tension.
A helpful goal is not “perfect stitches” but “predictable stitches.” You want to understand why the fabric looks the way it does. If the swatch widens, identify the added stitch. If it narrows, locate the skipped one. If it curls, examine the foundation-chain tension. Each mistake is easier to fix when it becomes information rather than evidence that you are bad at crochet.
Finally, choose a first project that provides visible progress without demanding complicated shaping. A scarf or small blanket panel lets you repeat double crochet long enough for muscle memory to develop. By the end, your last rows will probably look noticeably smoother than your first ones. That uneven beginning is not embarrassingit is a built-in record of improvement, preserved forever in yarn.