A brand-new computer without an operating system is a little like a gorgeous new house with no doors, furniture, or Wi-Fi password taped under the router. The hardware may be ready to roar, but until you install Windows, Linux, macOS where supported, or another compatible operating system, the machine has very little to do beyond displaying firmware screens and looking expensive.
Fortunately, installing an operating system on a new computer is much easier than it sounds. Modern installers automate most of the intimidating work, including partition creation, hardware detection, file copying, and initial configuration. The trick is choosing the right installation method and preparing your computer correctly before clicking anything labeled “Erase Disk.”
This guide explains four practical ways to install an operating system on a brand-new computer: a bootable USB flash drive, optical installation media, network or PXE deployment, and built-in Internet or recovery installation. We will also cover UEFI settings, Secure Boot, storage preparation, common installation problems, and the lessons that make a second OS installation considerably less dramatic than the first.
Current installation-media, firmware, and operating-system requirements are based on official vendor documentation.
Before Installing an Operating System
Do not start by downloading the first ISO file that appears in a search result. A few minutes of preparation can prevent hours of troubleshooting later.
Confirm Hardware and OS Compatibility
First, make sure the operating system supports your processor architecture and hardware. Most consumer PCs today use 64-bit x86 processors, but ARM-based computers require ARM-compatible operating-system images. You should also check Wi-Fi, graphics, audio, chipset, and storage-controller support, especially when installing Linux on unusually new hardware.
Windows 11 has specific minimum hardware requirements, including a compatible 64-bit processor, at least 4 GB of RAM, at least 64 GB of storage, UEFI firmware with Secure Boot capability, and TPM 2.0. Those are minimums rather than recommendations for a pleasantly fast computer, of course. Technically surviving and actually enjoying the experience are two different benchmarks.
Check Your UEFI or BIOS Settings
Most new computers use UEFI rather than the traditional legacy BIOS. UEFI controls which device starts first and can include options for Secure Boot, TPM, storage modes, virtualization, and network booting.
The exact keys vary by manufacturer. Depending on the motherboard or PC, you may press Delete, F2, F8, F9, F10, F12, or Esc shortly after powering on the machine. Instead of permanently changing the boot order, use the one-time boot menu when possible. This lets you boot from your installation device once and then automatically return to the internal SSD afterward.
Prepare Your License and Network Connection
If you are installing a commercial operating system, have the appropriate license or activation information available. Windows computers sometimes activate automatically through a digital license or a product key stored in firmware, but that should not be assumed for a newly assembled custom PC.
A wired Ethernet connection is useful during installation because it usually requires fewer drivers than Wi-Fi. Internet access also makes it easier to download updates, security patches, drivers, and firmware immediately after installation.
Method 1: Install the Operating System From a Bootable USB Drive
For most people, a bootable USB flash drive is the best way to install an operating system on a new computer. USB drives are inexpensive, reusable, fast, and supported by virtually every modern desktop and laptop.
Step 1: Download the Official Installation Image
Use another working computer to download the operating system directly from its official publisher. Windows users can obtain installation media from Microsoft. Linux distributions such as Ubuntu provide downloadable ISO images, while Google offers a USB installation process for ChromeOS Flex on compatible PCs.
Avoid mysterious third-party ISO download sites. An operating-system installer runs with enormous privileges, so installing one from an untrusted source is approximately the cybersecurity equivalent of giving a stranger your house keys because he said he was “probably the plumber.”
Step 2: Create Bootable USB Media
You normally cannot make an installation drive by dragging an ISO file onto a USB stick. The image needs to be written in a bootable format using the operating-system publisher’s media-creation utility or a suitable imaging application.
Microsoft recommends a blank USB flash drive with at least 8 GB for Windows installation media. Current Ubuntu documentation also recommends an 8 GB or larger flash drive. Creating installation media usually erases the existing contents of the USB drive, so rescue your vacation pictures first.
Step 3: Boot the New Computer From USB
Insert the USB installer into the new computer and switch it on. Enter the one-time boot menu or UEFI setup and select the USB device. On a UEFI system, you may see an entry beginning with “UEFI:” followed by the USB drive’s name. Choosing the UEFI version is generally appropriate for a modern installation.
If the USB drive does not appear, try another USB port, recreate the installation media, verify that USB booting is enabled, and check whether the firmware recognizes the device at all.
Step 4: Follow the Installer
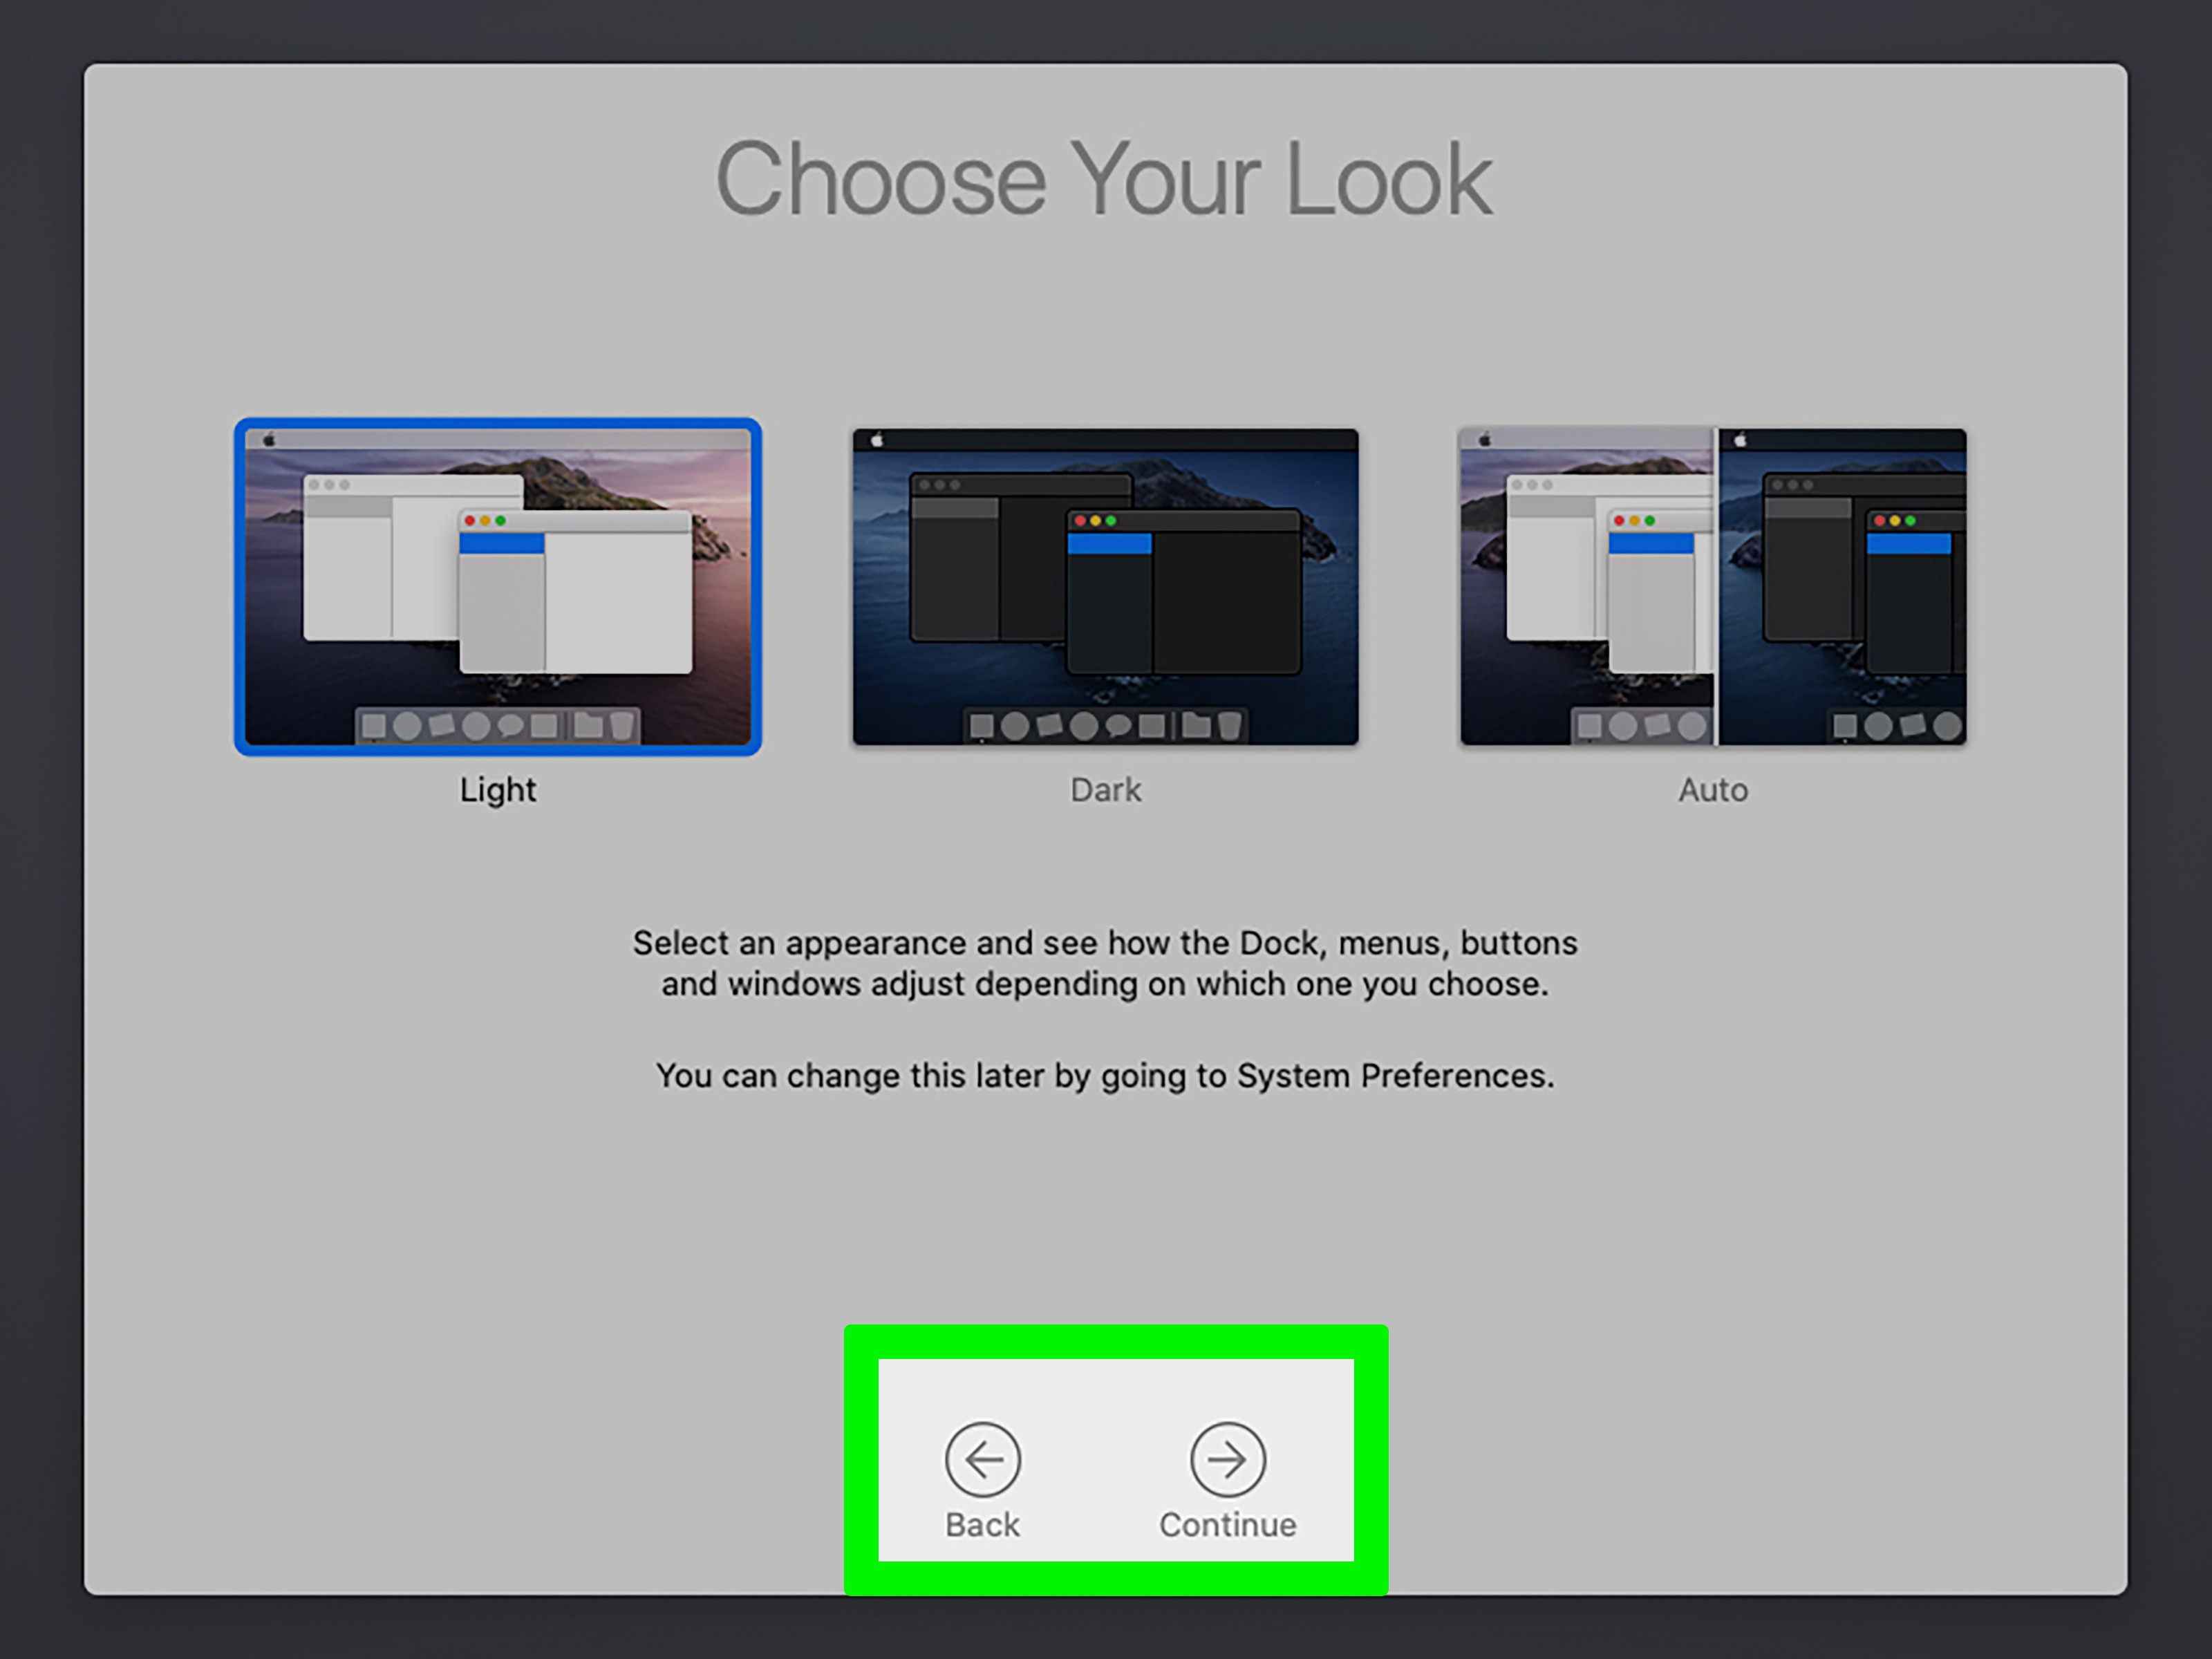
The installer will normally ask for language, keyboard layout, destination disk, user account information, and potentially a product key. On a completely new SSD, allowing the installer to create its recommended partitions automatically is usually the simplest choice.
After files have been copied, the computer will restart. At this point, remove the USB drive when instructed or make sure the internal SSD becomes the first boot device. Otherwise, you may cheerfully return to the installer and wonder why your computer has developed short-term memory loss.
Method 2: Install the Operating System From a DVD
Optical installation media is much less common than it once was, but it remains a legitimate option for computers equipped with a DVD drive or connected to a compatible external optical drive.
When a DVD Installation Makes Sense
A DVD can be useful when you already have official installation media, when USB booting is troublesome, or when working with older hardware. Some firmware implementations still support booting directly from an optical drive in UEFI mode.
The disadvantages are obvious: modern computers frequently ship without optical drives, discs are slower than modern USB storage, and large installation images may exceed the capacity of standard DVDs.
How to Install From Optical Media
Burn the ISO as a disc image rather than storing the ISO file on the disc as ordinary data. Insert the completed installation DVD, open the computer’s boot menu, select the optical drive, and start the installer.
Some systems display a message such as “Press any key to boot from CD or DVD.” Press a key quickly. The message is not particularly patient.
From there, installation proceeds much like the USB method: select the target drive, configure installation options, copy files, restart, and complete the operating system’s initial setup.
Method 3: Install an Operating System Over a Network With PXE
If you have one new PC, network installation is probably more machinery than you need. If you have 50 new PCs, however, walking around with the same USB stick starts to feel like an unusual fitness program.
PXE, or Preboot Execution Environment, allows compatible computers to boot deployment software through the network before a local operating system is installed.
How PXE Installation Works
The target computer is configured to boot from its network adapter. Network infrastructure supplies the information necessary to locate a boot environment, which then loads the installation or deployment tools. The operating-system files can subsequently be delivered from a server or network repository.
Microsoft’s deployment documentation supports PXE-based Windows deployment using technologies such as Windows PE and Configuration Manager. Linux environments commonly use PXE together with DHCP, boot services, network repositories, and automated configuration systems such as Kickstart.
Why Businesses Use Network Installation
The main advantage is consistency. Administrators can prepare standardized operating-system images containing approved drivers, applications, configurations, and security policies. Dozens or hundreds of computers can then receive essentially the same deployment without technicians manually configuring each machine.
PXE is particularly useful in offices, schools, repair shops, computer labs, and data centers. It can also support unattended installations, although modern deployment systems need to be configured carefully because security hardening and supported deployment behavior can change over time.
What You Need
You generally need a compatible network adapter, appropriate firmware settings, deployment infrastructure, an operating-system image, and a properly configured network. Wired Ethernet is normally preferred because network booting before an OS loads cannot depend on the normal Wi-Fi software stack.
For one home computer, stick with USB unless learning PXE itself is the project. For an IT administrator deploying a room full of machines, network installation can save a remarkable amount of repetitive work.
Method 4: Use Internet Recovery or Built-In Recovery Installation
Some computers provide a recovery environment capable of downloading and reinstalling an operating system without requiring you to prepare conventional installation media first. This method is hardware- and manufacturer-dependent, so it is not available on every custom-built PC.
macOS Recovery Is the Classic Example
Supported Macs include macOS Recovery tools for reinstalling macOS. Depending on the Mac model, Recovery can use an Internet connection to obtain the operating system. On compatible Intel Macs, different startup key combinations can request the current compatible release or the version associated with the machine. Apple silicon Macs use their own startup-options workflow.
Apple also documents the creation of bootable macOS installers on USB or another secondary volume, which remains useful for administrators, troubleshooting, or installations where recovery over the Internet is inconvenient.
OEM Recovery Systems
Some Windows PC manufacturers provide recovery tools or downloadable recovery images that restore the operating system, drivers, and manufacturer-specific utilities. Availability depends on the computer model and vendor.
The major advantage is convenience. The major disadvantage is dependence on the manufacturer’s recovery ecosystem. A custom PC assembled from individually purchased components generally will not have a factory operating-system recovery image waiting somewhere in firmware.
Which Installation Method Should You Choose?
For a typical home-built gaming PC, office workstation, or general-purpose desktop, start with a bootable USB drive. It offers the best combination of speed, compatibility, and simplicity.
Choose DVD installation when the computer has reliable optical boot support and you already have suitable media. Choose PXE when deploying many machines from centralized infrastructure. Choose Internet or built-in recovery when your computer specifically supports it and you want the manufacturer’s standard recovery path.
Common Problems During a Fresh OS Installation
The Installer Cannot See the SSD
If the internal SSD or hard drive is missing from the disk-selection screen, first check whether UEFI itself detects the drive. If it does, the installer may lack the required storage-controller driver or the firmware storage configuration may not match what the installer expects.
Do not randomly change RAID, AHCI, or other storage options without understanding what they do. On a brand-new blank computer you have more freedom than on an existing installation, but it is still better to consult the motherboard or system manufacturer’s documentation.
The USB Drive Will Not Boot
The usual suspects include incorrectly created installation media, the wrong boot mode, a damaged USB drive, an unsuitable USB port, disabled USB boot support, or firmware security settings.
Recreate the installer using the official image, try a different flash drive, and use the motherboard’s one-time boot menu. Do not disable Secure Boot merely because an old forum post from 2017 told you to. Modern Windows installations expect current UEFI security features, and major Linux distributions increasingly work properly with Secure Boot as well.
The Computer Keeps Returning to the Installer
This usually means the machine is still booting from the USB drive or DVD after the operating system has been copied to the SSD. Remove the installation media at the appropriate restart or choose the internal drive from the boot menu.
What to Do Immediately After Installing the OS
Reaching the desktop is not the finish line. Connect to the Internet and install operating-system updates first. Then check for chipset, graphics, network, audio, Bluetooth, and other hardware drivers from trusted sources.
Linux users should apply available package updates after installation. Ubuntu, for example, explicitly recommends updating a newly installed system. Windows users should run Windows Update repeatedly until important updates and drivers are complete.
Next, verify Device Manager or the equivalent hardware-management tools for missing devices, set the correct display resolution and refresh rate, enable security features, create recovery options, and install your essential applications.
This is also an excellent moment to create a backup. Your computer is clean, healthy, and not yet home to six years of downloaded files named things like final-final-really-final-v4.zip.
Hands-On Lessons From Real-World Operating System Installations
Installing an operating system is one of those computer jobs that sounds terrifying the first time and strangely routine by the fifth. The installer itself is rarely the difficult part. Most frustrating situations happen before the installer loads or immediately after it finishes.
A typical first-time builder might assemble a new PC perfectly, press the power button, enter UEFI successfully, and then become concerned because the machine announces that no bootable device exists. That is completely normal when the SSD is blank. An empty SSD is not broken simply because the firmware cannot boot from it; there is simply nothing bootable on it yet.
Bootable USB preparation causes another surprisingly large percentage of headaches. Copying an ISO file to a flash drive is not the same as creating bootable media. When a perfectly healthy new computer refuses to recognize an installer, recreating that USB correctly often solves the mystery faster than changing a dozen firmware settings.
USB ports can create amusing problems too. If an installer acts strangely, try another port, preferably one directly connected to the motherboard rather than a hub or front-panel accessory. The goal during setup is boring reliability. Fancy comes later.
Another lesson is to resist changing every UEFI setting simultaneously. Suppose a Windows installer will not boot. If you disable Secure Boot, enable legacy compatibility, change the storage controller, modify the boot order, and toggle four settings whose names sound like rejected Star Wars droids, you have created five new variables instead of solving one problem. Change one relevant setting at a time and document what you changed.
Storage detection is another common surprise on modern systems. A new NVMe SSD may appear in firmware but not in the operating-system installer if the installation environment does not have the appropriate storage-controller support or if an unusual controller mode is enabled. The sensible response is to check documentation and drivers for that exact motherboard, laptop, or storage controller rather than formatting random disks and hoping one becomes cooperative.
Networking deserves preparation as well. Ethernet frequently works immediately, while a brand-new Wi-Fi chipset may require a newer driver. Anyone installing Windows or Linux on recently released hardware can save trouble by downloading the network driver to a second USB drive beforehand. You may never need it, which is precisely when preparation feels unnecessary. When you do need it, it suddenly feels brilliant.
New Linux users can benefit from testing a live environment before committing to an installation when the distribution supports it. Ubuntu and ChromeOS Flex, for example, provide ways to evaluate hardware functionality from removable media before permanently replacing an existing operating system. Testing Wi-Fi, sound, graphics, keyboard input, and sleep behavior can expose compatibility problems early.
Finally, patience during the first round of updates matters. A fresh installation image may be months behind current security patches and drivers. Allow the operating system to update fully before diagnosing every minor glitch. A graphics problem, unidentified device, or network issue sometimes disappears after the correct driver arrives through the normal update process.
The broader lesson is simple: successful OS installation is mostly about preparation. Use official images, make reliable installation media, understand the machine’s UEFI settings, know which disk you intend to use, and have important drivers available. Do those things and installing an operating system becomes less like computer surgery and more like following a moderately nerdy recipe.
Conclusion
There is no single correct way to install an operating system on every new computer. A bootable USB drive is the strongest default for most users, DVD media remains useful in certain situations, PXE deployment excels when many machines need standardized installations, and Internet or built-in recovery provides an elegant option on supported hardware.
Whichever method you choose, the fundamentals remain the same: verify hardware compatibility, obtain the OS from a trusted source, configure UEFI correctly, select the intended storage device carefully, and fully update the machine afterward. Get those basics right and your shiny pile of processors, RAM, fans, and RGB lighting can finally become an actual computer.
Note: Installation procedures and firmware menus vary by operating system, motherboard, laptop model, and manufacturer. Always verify the current instructions for your exact hardware before erasing disks, changing storage-controller settings, disabling security features, or modifying existing partitions.