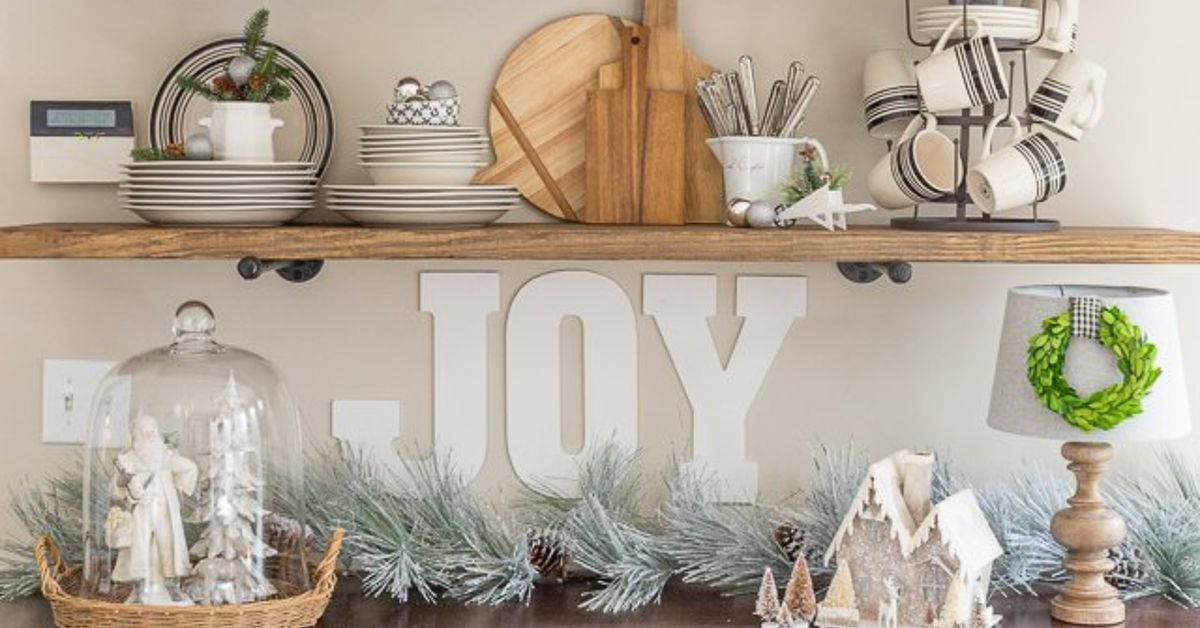
A new set of rustic kitchen shelves is already a small domestic victory. The wall gains storage, the kitchen gains character, and the owner gains a fresh horizontal surface that will eventually attract three mugs, seven cookbooks, and one mysterious lid that matches nothing. At Christmas, however, those shelves can become something better: a warm, practical holiday display that makes the whole room feel festive without sacrificing the space needed to butter toast.
The best Christmas shelf styling does not bury beautiful wood under a blizzard of plastic ornaments. It works with the shelf’s grain, brackets, knots, and handmade appearance. Natural greenery, useful dishes, vintage accents, warm light, and restrained color create a look that feels collected rather than purchased in one frantic afternoon. Open shelves are especially effective for seasonal displays because they combine everyday storage with visual storytelling, although careful editing is essential to prevent clutter.
Why Rustic Kitchen Shelves Shine at Christmas
Rustic style is built around natural materials, visible texture, earthy colors, and an easy sense of age. Reclaimed-looking wood, iron brackets, pottery, woven baskets, stoneware, and imperfect finishes all belong comfortably in the same room. Christmas decor uses many of those same ingredients: evergreen branches, pinecones, dried fruit, warm metals, wool ribbon, wood ornaments, and nostalgic kitchenware. In other words, rustic shelves and Christmas were destined to meet. They probably exchanged numbers near a stack of plaid napkins.
Wood shelves also soften kitchens dominated by white cabinets, stainless steel appliances, tile, or stone. Their warm tone gives red, green, cream, brass, and copper decorations a grounded backdrop. Floating shelves can preserve an airy feeling, while shelves supported by substantial corbels or black metal brackets lean more farmhouse or old-world. Both approaches work; the important part is letting the shelf remain visible instead of covering every inch.
Prepare the New Shelves Before Decorating
Confirm Strength, Placement, and Finish
Before hanging a ceramic village and enough stoneware to serve a lumber camp, confirm that the shelves are properly anchored and rated for the intended load. Heavy platters, crocks, cookbooks, and cast-iron pieces add weight quickly. Keep the heaviest frequently used objects on the lowest shelf, where they are easier to lift and less dramatic if someone reaches for them before coffee.
Wipe the shelves with a dry microfiber cloth, then clean them according to the wood finish. Avoid soaking unfinished or reclaimed wood. If the boards are newly stained or sealed, allow the finish to cure fully before adding fabric, paper, or felt-backed decorations. A thin liner beneath rough pottery can prevent scratches without spoiling the rustic look.
Decide What Must Remain Functional
A kitchen is not a department-store window. Write a short list of what must stay accessible: breakfast bowls, coffee mugs, everyday plates, drinking glasses, oils, or cookbooks. Place these items first. Holiday pieces should fit around them rather than forcing the household to move a miniature forest every time someone wants oatmeal.
Open shelving works best when beautiful daily-use objects occupy the easiest-to-reach areas and occasional decorative pieces sit higher. Frequently used dishes are also less likely to gather dust. Large appliances, packaging, plastic containers, and unrelated collections are better hidden elsewhere because their shapes and labels interrupt the display.
Choose a Christmas Color Story
A defined palette makes mixed objects look intentional. Choose two main colors, one neutral, and one metallic or natural accent. The wood itself counts as a color, so do not ignore it while assembling a cart full of decorations.
Classic Rustic Christmas
Combine forest green, cranberry red, warm white, and dark wood. Add plaid ribbon, red transferware, berry stems, and cream pottery. This palette feels traditional and cheerful without becoming cartoonish, especially when the red appears in small repeated touches rather than one enormous bow attempting to govern the room.
Quiet Woodland Christmas
Use pine green, oatmeal, brown, matte black, and soft brass. Decorate with pinecones, wooden trees, tiny cabins, stoneware, and natural linen. This scheme suits darker shelves and kitchens with black hardware, soapstone, or exposed beams.
Vintage Farmhouse Christmas
Build the display around milky white, faded red, jade green, silver, and aged copper. Vintage Santa mugs, old tins, cookie cutters, Mason jars, Bundt pans, and stacked plates provide nostalgia without requiring every object to match. Repurposed kitchen pieces are especially effective because they belong in the room instead of looking as though the living-room mantel sneezed.
Modern Rustic Christmas
Choose cream, olive, walnut, charcoal, and muted gold. Keep shapes simple and repeat only a few materials: ceramic trees, greenery, glass, and brass. The restraint allows the shelf texture to remain the star while still creating a festive atmosphere.
Build the Display in Layers
Start With the Largest Anchors
Place one or two large objects on each shelf before adding anything small. Good anchors include a breadboard, framed winter print, serving platter, woven basket, crock, cake stand, or stack of cookbooks. Lean flat pieces against the wall to create height while preserving usable shelf depth.
Do not center everything. An asymmetrical arrangement usually feels more relaxed and collected. Place a tall board or pitcher on one side, then balance it with a wider stack of bowls or books on the other. The objects do not need identical visual weight, but they should feel like they are having the same conversation.
Add Everyday Kitchenware
White plates, amber glasses, ironstone pitchers, wooden bowls, and neutral mugs make excellent foundations. Introduce Christmas through small changes: tie a narrow velvet ribbon around a pitcher, place a tiny wreath behind a stack of bowls, or swap two plain mugs for vintage holiday cups. Seasonal dinnerware can be mixed with everyday pieces instead of replacing an entire collection.
Bring in Greenery Without Creating a Jungle
Drape a short cedar, pine, or mixed faux garland along the upper shelf, allowing one end to fall slightly. Alternatively, tuck small evergreen sprigs into crocks, pitchers, or bottles. Fresh greenery adds fragrance and natural variation, while high-quality faux stems last longer and require less cleanup. Dried orange slices, cinnamon sticks, bay leaves, eucalyptus, and pinecones add color and texture in small doses. Open-shelf garlands and greenery-framed kitchen windows are reliable ways to bring holiday energy into a hardworking room.
Keep foliage away from burners, toasters, ovens, hot light fixtures, and open flame. Never place candles among dried branches or paper decorations. Holiday greenery and lighting should be separated from heat sources, and open flames should not be used on combustible Christmas displays.
Create Small Collections
Groups of three or five tend to feel natural. Cluster bottlebrush trees in varied heights, arrange three brass bells beside a crock, or line up several Santa mugs with one filled with candy canes. A small Christmas village can occupy one shelf, but leave breathing room around it so it reads as a feature rather than zoning-density misconduct. Designers often use compact groups of bottlebrush trees because they create a winter scene without consuming much space.
Use Light as a Finishing Layer
A strand of warm-white battery-operated LED micro lights can outline the shelf, glow inside a glass jar, or wind loosely through faux greenery. Hide the battery box behind a board or crock while keeping it accessible. Avoid dangling cords near water, heat, or food-preparation areas. Under-shelf lighting can also warm the wall and highlight the grain without adding more objects.
Rustic Christmas Shelf Decor Ideas That Still Feel Useful
Create a Holiday Coffee Station
Reserve the lowest shelf for mugs, coffee, tea, cocoa jars, and spoons. Add a tiny tree, striped napkins, cinnamon sticks, and a handwritten sign. Store marshmallows and peppermint candies in lidded jars so the display remains edible, practical, and protected from enthusiastic dust.
Display a Baking Collection
Lean wooden rolling pins beside a stack of mixing bowls. Add copper cookie cutters, a flour crock, a vintage recipe card, and one small wreath. A Bundt pan can frame ornaments or greenery, while tart tins and old baking molds contribute shape and patina. Vintage kitchen objects bring Christmas charm while reinforcing the room’s purpose.
Make an Edible Rustic Arrangement
Fill a wooden bowl with red apples, pears, walnuts, or oranges. Add a few evergreen clippings around the base, keeping them separate from food that will be eaten. Glass jars filled with wrapped candy, gingerbread cookies, or peppermint sticks provide color without another decorative purchase. Grocery-store ingredients can become effective holiday accents when their colors and textures support the palette.
Turn Cards Into Shelf Art
String twine beneath a shelf and attach Christmas cards with miniature wooden clothespins. The cards add personality and change throughout the season. Keep the line short enough that it does not interfere with the countertop or resemble holiday laundry. Twine displays are a simple way to move cards off the refrigerator while preserving their sentimental value.
Add One Playful Detail
Rustic does not have to mean solemn. Place a tiny wooden mouse beside the cookie jar, give a bottlebrush tree a miniature star, or set one Santa mug among serious white pottery. A single whimsical object gives guests something to notice and keeps the display from feeling professionally staged to the point of nervousness.
How to Avoid Clutter and Styling Mistakes
Step back after each layer. If the shelves look busy in a phone photo, remove about 20 percent of the objects. Cameras are brutally honest roommates. Preserve empty wall space, vary heights, and repeat colors across shelves so the eye moves smoothly from one arrangement to the next.
Avoid spreading tiny decorations evenly across every inch. Small isolated objects create visual noise and make cleaning tedious. Group them into stronger moments. Keep clear glassware limited unless it catches light beautifully; too much disappears visually while still requiring washing. Do not place valuable antiques near shelf edges, and consider a discreet shelf rail where breakage is a concern. Railings can provide both vintage character and practical protection.
Finally, match the amount of decoration to the kitchen. A compact room benefits from vertical displays, short garlands, small trees, and wall-mounted features rather than countertop sprawl. Floating shelves are useful in small spaces because they employ wall area without taking floor space.
Keep the Shelves Fresh Through the Season
Dust exposed surfaces weekly and wipe cooking residue before it settles into greenery or ribbon. Rotate fruit, remove brittle fresh stems, and check light batteries. Keep a small empty basket nearby for temporarily moving decorative pieces when the kitchen becomes busy. This is especially useful during holiday baking, when every available surface suddenly develops a job.
After Christmas, remove the unmistakably seasonal items first: Santa mugs, ornaments, bells, stockings, and bright ribbon. Leave neutral greenery, pinecones, wood trees, cream pottery, and warm lights for a winter display. This gradual transition prevents the kitchen from feeling bare on December 26 and reduces the annual emotional drama of putting Christmas into plastic bins.
Experience: Decorating New Rustic Kitchen Shelves for Christmas
When I first decorated a pair of new rustic kitchen shelves for Christmas, I made the classic beginner’s mistake: I treated each shelf like an empty suitcase. If an object physically fit, I packed it in. There were mugs, plates, three kinds of garland, tiny houses, wooden trees, bells, cookbooks, two lanterns, and a ceramic deer who appeared to be trapped behind a gravy boat. The result was festive in the same way a crowded airport is festivelots of movement, strong emotions, and no clear route to the coffee.
I started again by removing everything and letting the shelves stand empty for a few minutes. That pause mattered. The boards had warm brown grain, rough edges, and black brackets, and covering them completely defeated the reason I had installed rustic shelving in the first place. I decided the wood would be part of the color palette, not merely a platform beneath it.
The second attempt began with function. The lower shelf kept the white everyday mugs, a jar of coffee, and a stack of breakfast bowls. I added one red-and-cream towel beneath the bowls and placed a small crock of cinnamon sticks beside the coffee. Suddenly the shelf looked Christmassy, but nobody needed an instruction manual to make a drink.
On the upper shelf, I leaned an old cutting board against the wall and placed a cream pitcher in front of it. The pitcher held three cedar stems and a few berry branches. A cluster of bottlebrush trees occupied the opposite end, with enough empty space between the groups to show the wood. Warm micro lights ran behind the objects rather than across the shelf edge, so the glow appeared without the wire becoming the main attraction.
The most successful detail was also the cheapest. I dried orange slices in the oven and threaded a few onto narrow twine with small wood beads. Instead of making a long garland, I created two short strands and draped them around the pitcher and a stack of cookbooks. The orange echoed the warmth of the shelf and smelled wonderful near the cedar. It also looked handmade without looking like the craft table had exploded.
Living with the display taught me that attractive Christmas kitchen shelves must survive actual kitchen behavior. Fresh greenery directly above the toaster dried too quickly, so I moved it. A tiny metal bell near the mugs jingled at 6:30 every morning, which was charming for approximately two days. The glass ornaments looked beautiful but made me nervous whenever someone reached for a bowl, so they moved to the tree. The shelves improved each time I noticed what was inconvenient and edited it.
By Christmas week, the arrangement felt settled rather than staged. Guests noticed the old cutting board, asked about the orange slices, and used the coffee station without moving anything. That became my favorite lesson: successful rustic Christmas decor is not about filling shelves with seasonal merchandise. It is about making ordinary kitchen rituals feel warmer. A mug looks more inviting beside cedar. White bowls feel special under soft light. Even the morning search for coffee becomes slightly more civilizedand in December, that may qualify as a miracle.
Conclusion
New rustic kitchen shelves offer an ideal stage for Christmas because their natural texture already provides warmth and character. Begin with secure, clean shelves and the everyday items your household actually uses. Choose a focused palette, build the arrangement from large anchors to small accents, and repeat greenery, pottery, wood, fabric, and warm metal across the display. Leave open space, keep decorations away from heat, and edit anything that makes cooking harder.
The final look should feel festive but believable: a kitchen dressed for Christmas, not a Christmas store attempting to prepare dinner. When useful dishes, vintage finds, natural materials, gentle lighting, and a little humor share the shelves, the room becomes both beautiful and welcomingthe exact combination holiday decorating is supposed to create.
Note: Before decorating, verify that shelves and brackets are securely installed, respect their load limits, and keep lights, greenery, paper, and fabric safely away from burners, appliances, candles, and other heat sources.