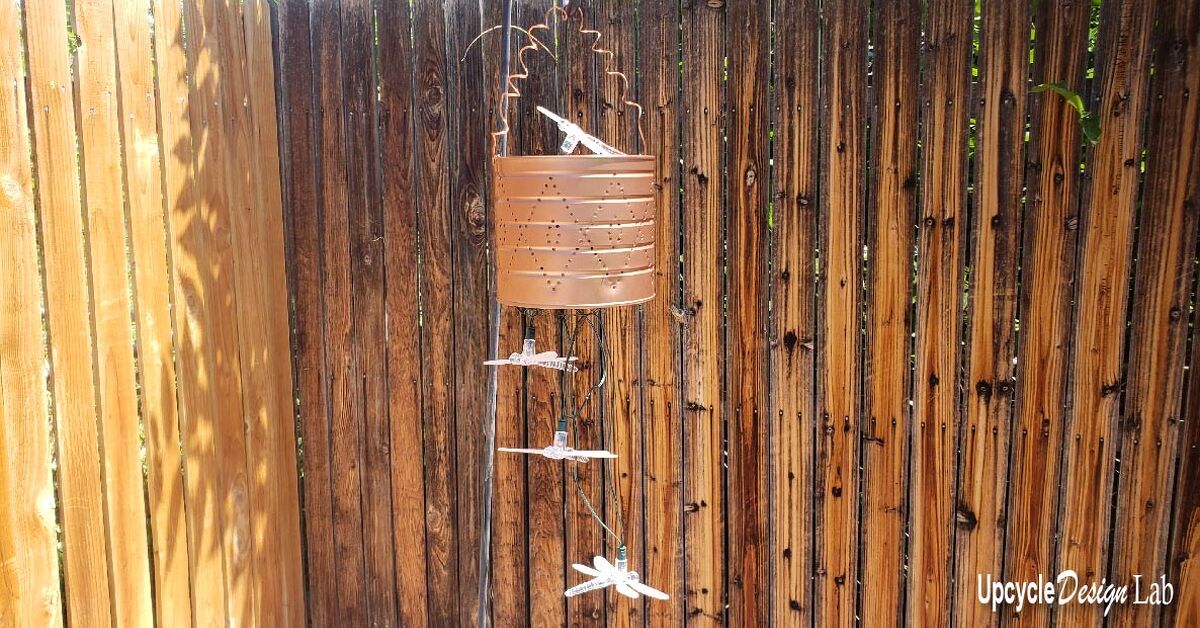
Backyard lighting does not have to involve trenching wires, hiring an electrician, or whispering apologies to your wallet. With a few inexpensive solar stake lights, jars, hooks, clips, or scrap wood, you can build a charming outdoor lighting setup that makes your yard feel warm, useful, and just a tiny bit magical. The best part? The sun pays the electric bill, and the sun has never sent a late fee.
This easy cheap DIY solar light project for backyard spaces is designed for homeowners, renters, patio dwellers, and anyone who has ever looked at a dark garden corner and thought, “That could use a glow-up.” The project uses budget solar lights, simple materials, and beginner-friendly steps. No complicated wiring. No electrical panel drama. No mysterious hardware store aisle where every screw looks like it has a law degree.
In this guide, you will learn how to make affordable solar lanterns and path lights, where to place them for the best charge, how many lumens you actually need, and how to keep them working longer. You will also get real-world backyard experience tips at the end, including what looks good, what fails hilariously, and why one solar light in the wrong place can turn into a very fancy mushroom decoration.
Why DIY Solar Backyard Lights Are Worth It
Solar backyard lights are popular because they solve three problems at once: they add visibility, they improve outdoor ambiance, and they do not increase your monthly power bill. Most solar lights use a small solar panel to collect sunlight during the day. That energy charges an internal rechargeable battery, which powers an LED light after sunset. Many models include dusk-to-dawn sensors, so they turn on automatically when the yard gets dark.
For a backyard, solar lights are especially useful because many outdoor areas are far from outlets. A garden bed, fence line, shed path, fire pit zone, or side yard may need light, but not enough to justify hardwired landscape lighting. DIY solar lights fill that gap beautifully. They are portable, low commitment, and easy to rearrange when you change your mind, which you absolutely will after seeing the first nighttime test.
Project Overview: Budget Solar Jar Lanterns and Path Lights
This project combines two simple ideas: solar jar lanterns for decoration and solar path lights for function. The jar lanterns create a soft glow for patios, tables, fences, trees, and pergolas. The path lights help guide people along walkways, steps, garden borders, or the route between the grill and the snack table, also known as the most important infrastructure in the backyard.
Estimated Cost
You can usually make a small set of DIY backyard solar lights for about $15 to $40, depending on how many lights you build and whether you already own jars, hooks, wire, or adhesive. Dollar-store solar stakes, discount-store lights, thrifted jars, and leftover craft supplies can lower the cost even more.
Skill Level
Beginner. If you can remove the top of a solar stake light, twist wire around a jar, and resist the urge to glue your fingers together, you are qualified.
Time Needed
Plan on 30 to 90 minutes for a small batch. Add extra time if you paint jars, build wooden stands, or spend 20 minutes holding two lanterns at different heights while asking your family, “Which one feels more charming?”
Materials You Will Need
- Inexpensive solar stake lights or replacement solar light lids
- Mason jars, glass jars, plastic jars, or clear outdoor-safe containers
- Outdoor-rated adhesive or waterproof silicone sealant
- Floral wire, copper wire, chain, or small hanging hooks
- Shepherd hooks, fence hooks, garden stakes, or scrap wood posts
- Small stones, glass gems, sand, or pebbles for weight and decoration
- Optional: frosted glass spray, outdoor paint, stencils, twine, or ribbon
- Optional: zip ties, hose clamps, screws, or cup hooks for mounting
Choose outdoor-friendly materials whenever possible. Glass jars look beautiful, but they can break if dropped or knocked over. Plastic jars are safer around kids, pets, and high-traffic areas. If you use metal wire, pick something that will tolerate outdoor moisture. If you use adhesive, make sure it is rated for exterior use.
How to Make Cheap DIY Solar Jar Lanterns
Step 1: Test the Solar Lights First
Before you glue, wire, hang, or decorate anything, test every solar light. Remove any battery pull tab, switch the light on, cover the solar panel with your hand, and check whether the LED turns on. Then place the lights in direct sun for a full day. This step saves you from making a gorgeous lantern that has the lighting power of a sleepy firefly.
Step 2: Remove the Solar Light Top
Most inexpensive solar stake lights have a removable top section that includes the solar panel, LED, battery, and sensor. Gently twist or pull the top away from the stake. You usually do not need the plastic stake for jar lanterns, but save it. It may become useful for another backyard lighting idea later.
Step 3: Fit the Solar Top to the Jar
Place the solar light top over the mouth of the jar. Some light tops fit almost perfectly into standard jars. Others need a little help. If the solar unit is smaller than the opening, use the jar lid ring, a washer, cardboard template, plastic lid, or a small wood disk as a support. The goal is simple: the solar panel must face upward, and the LED must shine into the jar.
Step 4: Add Weight and Texture
Add a thin layer of pebbles, sand, or glass gems to the bottom of the jar. This gives the lantern weight so it does not tip over easily. It also helps scatter the light in a pretty way. Clear glass gems create sparkle, while white stones create a soft glow. Sand gives a beachy look, even if your backyard is mostly crabgrass and ambition.
Step 5: Secure the Solar Light Top
Use outdoor-rated adhesive or silicone sealant to attach the solar top to the jar opening. Do not block the battery compartment if the battery may need replacing later. This is important. A fully sealed solar lid may look neat, but it can turn a simple battery swap into a tiny home improvement tragedy.
Step 6: Create a Hanging Handle
Wrap wire around the neck of the jar and twist it securely. Then create a loop over the top as a handle. For extra strength, wrap the wire twice and test it before hanging. If you prefer tabletop lights, skip the handle and place the lanterns directly on outdoor tables, steps, or low walls.
Step 7: Charge and Place the Lanterns
Set the finished lanterns in full sun for a full day before using them. Solar lights often perform better after a complete initial charge. Place them where the panels receive direct sunlight for at least six to eight hours when possible. A solar lantern tucked under a dense tree may look cute in the daytime, but at night it may contribute only emotional support.
Easy Backyard Placement Ideas
Along a Walkway
Place solar path lights on alternating sides of a walkway instead of lining them up like an airport runway. Staggered placement feels more natural and reduces glare. For narrow paths, keep lights low and spaced evenly. For larger garden paths, mix stake lights with jar lanterns at key turning points.
Around a Patio or Seating Area
Use jar lanterns on tables, steps, posts, or low walls to define the patio zone. Warm white solar lights are usually best for seating areas because they feel cozy and flattering. Cool white lights can look sharp and bright, but they may make your patio feel less like a relaxing retreat and more like a dental office with mosquitoes.
On a Fence
Fence lighting is one of the easiest ways to make a backyard feel finished. Use cup hooks, brackets, or zip ties to hang solar jar lanterns along fence posts. Make sure each solar panel is not shaded by the fence cap, tree branches, or the neighbor’s ambitious hedge.
Near Garden Features
Place one or two lights near a birdbath, raised bed, ornamental grass, small tree, or sculpture. Do not light every object in the yard. Outdoor lighting works best when it creates contrast. A few glowing focal points are elegant; lighting every tomato cage like a museum exhibit is a bit much.
How Bright Should Backyard Solar Lights Be?
Brightness is measured in lumens. For decorative jar lanterns, low-lumen solar lights are usually enough. They create mood lighting rather than task lighting. For path lights, choose enough brightness to see where you are walking without blasting the whole yard. For security areas, such as gates, driveways, sheds, or dark side yards, brighter motion-sensor solar lights are more practical.
- Decorative glow: 2 to 20 lumens
- Soft path lighting: 20 to 100 lumens
- Clear walkway visibility: 100 to 200 lumens
- Motion-sensor areas: 300 to 700 lumens
- Floodlight coverage: 700 lumens or more
For this cheap DIY solar light project, the best choice is usually a mix. Use low-lumen lights for charm and a few brighter solar fixtures for safety. Layered lighting makes the yard look intentional instead of randomly sprinkled with glowing plastic mushrooms.
Choosing the Right Solar Lights for DIY Projects
Look for Replaceable Batteries
Many solar lights use rechargeable AA or AAA batteries. Models with replaceable batteries are better for long-term value because you can refresh the light instead of throwing away the entire fixture. If runtime drops after a year or two, the battery may be the first thing to check.
Check Weather Resistance
Outdoor solar lights should be able to handle rain, sprinkler spray, dust, and summer heat. Look for weather-resistant or waterproof descriptions. An IP rating, such as IP44, IP65, or higher, tells you how well the housing resists dust and water. For exposed backyard use, stronger water resistance is worth it, especially if your sprinkler system has the personality of a fire hose.
Choose Warm White for Ambiance
Warm white lighting, often around 2700K to 3000K, looks inviting in most backyard spaces. It works well for dining, lounging, garden borders, and fence lighting. Bright white can help in task or security areas, but use it sparingly if your goal is a relaxed evening atmosphere.
Pay Attention to Panel Placement
The solar panel matters as much as the light itself. If the panel is small, shaded, dirty, or angled poorly, the light will not run as long. When possible, choose lights with panels that face upward and receive direct sun during the brightest part of the day.
Cheap Design Upgrades That Make DIY Solar Lights Look Expensive
Frost the Glass
Frosted glass spray softens the LED and hides the plastic solar component inside the jar. Apply it lightly and evenly to the outside of the jar. The result is a gentle lantern glow that looks more polished than a bare clear jar.
Add Black or Bronze Accents
A little outdoor paint can make inexpensive solar lights look more coordinated. Matte black, bronze, or dark green finishes blend well with fences, planters, and garden beds. Just avoid painting the solar panel. It is difficult to charge a light after giving its panel a stylish little hat.
Use Repeated Shapes
Repeating the same jar size, hook style, or stake color makes a budget project look planned. You do not need expensive materials. Consistency is the secret sauce. A row of matching $2 lanterns often looks better than a chaotic collection of premium lights fighting for attention.
Mix Heights
Place some lights low along pathways, some at table height, and a few higher on hooks or fence posts. Varying heights creates depth. It also helps the backyard feel like an outdoor room instead of a flat patch of darkness with occasional blinking dots.
Maintenance Tips for Longer-Lasting Solar Backyard Lights
Solar lights are low maintenance, but they are not zero maintenance. Dust, pollen, rain spots, bird droppings, and tree sap can block sunlight from reaching the panel. Wipe panels regularly with a soft cloth and mild soapy water. Avoid abrasive scrubbers that can scratch the plastic surface.
If a light becomes dim, try these quick fixes:
- Move it to a sunnier location for one full day.
- Clean the solar panel and lens.
- Check whether the switch is fully on.
- Replace the rechargeable battery if runtime has dropped.
- Make sure nearby porch lights are not confusing the dusk sensor.
Bring delicate jar lanterns indoors during extreme storms, freezing conditions, or high winds. Even weather-resistant materials last longer when they are not constantly abused by the outdoor elements. Your solar lights are tough, but they are not trying to become marine equipment.
Common DIY Solar Light Mistakes to Avoid
Mistake 1: Installing Before Testing
Always test lights before building around them. A dead solar light hidden inside a beautiful jar is still a dead solar light. It is just wearing a costume.
Mistake 2: Using Indoor Glue Outdoors
Indoor craft glue may fail when exposed to heat, rain, and humidity. Use outdoor-rated adhesive, silicone, or mechanical fasteners whenever possible.
Mistake 3: Blocking the Solar Panel
Decorations should not cover the panel. Twine, ribbon, paint, leaves, and overhanging hooks can reduce charging. Keep the panel clean and open to the sky.
Mistake 4: Overlighting the Yard
More lights do not always mean better design. Too many bright lights can create glare, harsh shadows, and a less relaxing atmosphere. Use light to guide, highlight, and softennot interrogate the lawn.
Mistake 5: Forgetting Battery Access
Design the lantern so you can still open the battery compartment. This one small detail can double the useful life of the project.
Safety Notes for Backyard Solar Light Projects
Solar lights are generally safer and easier than hardwired lights, but basic safety still matters. Do not hang heavy glass jars above seating areas unless the hooks and handles are secure. Keep lights away from dry leaves, fabric canopies, grills, fire pits, and areas where children or pets may knock them over.
If you modify a solar fixture, avoid cutting wires unless you understand the light’s basic wiring and battery setup. For this beginner project, there is no need to rewire anything. The simplest method is to reuse the solar top exactly as manufactured and only change how it is displayed.
of Real-World Experience: What Actually Happens When You Make Cheap DIY Solar Backyard Lights
The first thing you learn from an easy cheap DIY solar light project for backyard spaces is that placement beats price. A $2 solar light in full sun can outperform a nicer light hiding under a tree. During one backyard test, the lights along the open fence stayed glowing well into the night, while the lanterns under the maple tree faded early. They looked adorable at noon, but by 9 p.m. they had the energy of someone who skipped lunch.
The second lesson is that warm white usually wins. Cool white lights can be useful around gates or steps, but for a patio, warm white creates a much better mood. It makes wood, plants, brick, and outdoor furniture look richer. It also keeps the yard from feeling too harsh. When a backyard is meant for dinner, conversation, and quiet evenings, warm light feels like hospitality. Cool light feels like the yard is asking for your insurance card.
Another useful experience is that not every jar needs to hang. Hanging lanterns look charming in photos, but tabletop lanterns are often more practical. They are easier to move, clean, repair, and store. If you have a windy yard, a few weighted tabletop solar jars on steps, patio edges, or plant stands may survive better than lightweight lanterns swinging from hooks like tiny haunted chandeliers.
It also helps to build in batches. Make two or three lights first, test them for a few nights, and then make more. This prevents buying twenty jars, twenty lights, and twenty hooks before discovering that your favorite corner gets almost no sun. A small test batch lets you adjust height, brightness, spacing, and style before committing to the full backyard plan.
Cleaning matters more than most people expect. After a few weeks outside, solar panels collect dust, pollen, and water spots. The lights may seem weak, but the problem is often just a dirty panel. A quick wipe with a damp cloth can bring back brightness. If the lens is cloudy, clean that too. Solar lights are like windows: they work better when they are not wearing a sweater made of grime.
Finally, the most satisfying part of this project is the nighttime reveal. During the day, the lights may look simple, even a little too humble. But after sunset, the jars glow, the path becomes visible, the fence line gains depth, and the backyard suddenly feels like a place to stay awhile. That is the real win. You did not just make lights. You made the yard more usable, more welcoming, and more personal without spending much money.
Conclusion
An easy cheap DIY solar light project for backyard areas is one of the simplest ways to upgrade outdoor living without wiring, big tools, or a big budget. By reusing affordable solar stake lights, jars, hooks, and basic outdoor materials, you can create lanterns, path markers, fence lights, and patio accents that add warmth and function after dark.
The key is to keep the project practical. Test the lights first, choose sunny locations, use outdoor-safe adhesive, leave access to the battery compartment, and clean the solar panels regularly. For the best backyard atmosphere, mix low decorative lights with brighter safety lights where needed. Use warm white lighting for comfort, place lights at different heights, and avoid overlighting every square inch of the yard.
With a little creativity, a modest budget, and one sunny afternoon, your backyard can go from “Where did the patio chair go?” to “Wow, this looks like a place people with matching napkins would hang out.” That is the beauty of DIY solar backyard lighting: it is simple, affordable, useful, and just fancy enough to make you want to invite someone over after sunset.