Minecraft is already the digital equivalent of a bottomless toy box: blocks, mobs, biomes, Redstone contraptions, dramatic creeper betrayals, and enough dirt to start a small landscaping empire. But once you learn how to install Minecraft mods using Minecraft Forge, the game turns from “fun sandbox” into “wait, why is there a dragon-powered factory next to my potato farm?”
Minecraft Forge is one of the most popular mod loaders for Minecraft: Java Edition. It lets you run community-made mods that add new items, improve performance, change world generation, introduce magic systems, automate crafting, enhance building tools, and sometimes turn your peaceful survival world into a beautiful machine that eats your weekend. In a good way.
This guide walks you through the full process: preparing Minecraft, downloading Forge safely, installing mods, fixing common problems, and keeping your game stable. Whether you want a cozy furniture mod, a serious tech mod, a minimap, or a full modpack, this tutorial will help you get started without accidentally launching vanilla Minecraft and wondering where all your shiny new toys went.
What Is Minecraft Forge?
Minecraft Forge is a free mod loader and modding framework for Minecraft: Java Edition. In plain English, Forge is the bridge between Minecraft and the mods you want to use. Minecraft by itself does not automatically know what to do with most mod files. Forge gives the game a structured way to load them.
Think of Minecraft as a restaurant kitchen and mods as ambitious new recipes. Forge is the chef who says, “Yes, we can add jetpacks, backpacks, new ores, and a suspiciously powerful hammerbut please put everything in the correct folder first.”
Forge is commonly used for larger gameplay-changing mods, technology mods, magic mods, adventure mods, building tools, and many classic Minecraft modpacks. It is not the only mod loaderFabric, Quilt, and NeoForge also existbut many well-known mods still support Forge or Forge-compatible versions.
Before You Install Minecraft Mods Using Forge
Before dragging random files into folders like a raccoon organizing a garage, take a few minutes to prepare. Most mod problems come from mismatched versions, unsafe downloads, or missing dependencies.
1. Make Sure You Are Using Minecraft: Java Edition
Forge works with Minecraft: Java Edition, not the Bedrock Edition. If you play on Xbox, PlayStation, Nintendo Switch, mobile, or the Windows Bedrock version, Forge mods will not work there. Bedrock uses add-ons and Marketplace content instead.
On PC, open the Minecraft Launcher and check that you are launching Minecraft: Java Edition. If you see options for both Java and Bedrock, choose Java for modding with Forge.
2. Know Your Minecraft Version
Mods are version-sensitive. A mod made for Minecraft 1.20.1 usually will not work on 1.21.1 unless the developer specifically released a compatible version. Forge itself also has different builds for different Minecraft versions.
Before downloading anything, decide which Minecraft version you want to mod. Many modded players choose a version because their favorite mods support it, not because it is the newest. Newer is not always better in modding; sometimes “stable and supported” beats “fresh out of the oven and still screaming.”
3. Back Up Your Worlds
Mods can change blocks, items, terrain, entities, and save data. Most are safe when used correctly, but a broken mod setup can crash your game or make a world difficult to open. Before installing mods, back up your important worlds.
To back up a world manually:
- Open Minecraft.
- Go to Singleplayer.
- Select the world you care about.
- Click Edit.
- Choose Make Backup.
This simple step can save your castle, your automatic sheep-shearing machine, and your emotional support dirt hut.
How to Download Minecraft Forge Safely
The safest way to get Forge is from the official Minecraft Forge website. Avoid random download mirrors, “one-click mod installers” from unknown sites, and anything that asks you to install extra browser extensions, suspicious software, or a toolbar that looks like it was designed in 2009 by a haunted printer.
Step 1: Go to the Official Forge Download Page
Open the official Minecraft Forge download page and choose the Minecraft version you want from the version list. You will usually see options such as Latest and sometimes Recommended.
If a recommended build is available for your version, it is often the safer choice for beginners because it has usually had more testing. The latest build may include newer fixes but can occasionally be less stable.
Step 2: Download the Installer
Click the Installer option for your operating system. Forge commonly downloads as a .jar file. Some browsers may warn you about Java files because they can run code. That does not automatically mean Forge is dangerous, but it does mean you should only download it from the official site.
If the download page sends you through an ad page, wait for the skip button and avoid clicking fake download buttons. The real file should have “forge” in the filename and should match the Minecraft version you selected.
How to Install Minecraft Forge
Once the Forge installer is downloaded, the actual installation is usually simple.
Step 1: Run Minecraft Once First
Before installing Forge, open the official Minecraft Launcher and run the Minecraft version you want to mod at least once. For example, if your mods are for Minecraft 1.20.1, launch vanilla Minecraft 1.20.1 first. Then close the game.
This helps create the necessary game files so Forge has something to attach itself to. It is the digital version of setting the table before inviting the mods over for dinner.
Step 2: Open the Forge Installer
Double-click the downloaded Forge installer file. If it does not open, you may need to install or update Java. On Windows, some users may need to right-click the file and choose Open with Java.
When the Forge installer opens, select:
- Install client if you want to play mods on your own computer.
- Install server only if you are setting up a Forge server.
For most players, Install client is the correct choice. Click OK and let Forge install.
Step 3: Open the Minecraft Launcher
After installation, open the Minecraft Launcher. In the Java Edition section, look for a Forge profile. It may appear automatically in the version selector near the Play button.
Choose the Forge profile and click Play. Minecraft may show a warning that the installation has been modified. That is normal for modded Minecraft. Continue if you installed Forge from the official source.
Step 4: Launch Forge Once
Let Minecraft open completely with the Forge profile selected. Then close the game. This first launch allows Forge to create important folders, including the mods folder if it does not already exist.
How to Install Minecraft Mods Using Minecraft Forge
Now comes the fun part: installing the actual mods. This is where your Minecraft world can become a medieval fantasy adventure, a futuristic factory simulator, a farming paradise, or a performance-optimized block machine that finally lets your laptop stop sounding like an angry hair dryer.
Step 1: Download Forge-Compatible Mods
Download mods from trusted platforms such as CurseForge, Modrinth, official mod websites, or well-known community pages. When choosing a mod, check three things:
- The mod supports your exact Minecraft version.
- The mod supports Forge, not only Fabric, Quilt, or another loader.
- The mod does not require extra dependency mods you forgot to download.
For example, if you are playing Minecraft 1.20.1 with Forge, you need the 1.20.1 Forge version of the mod. A Fabric version of the same mod will not work in Forge. Minecraft mod loaders are not interchangeable, no matter how politely you ask them.
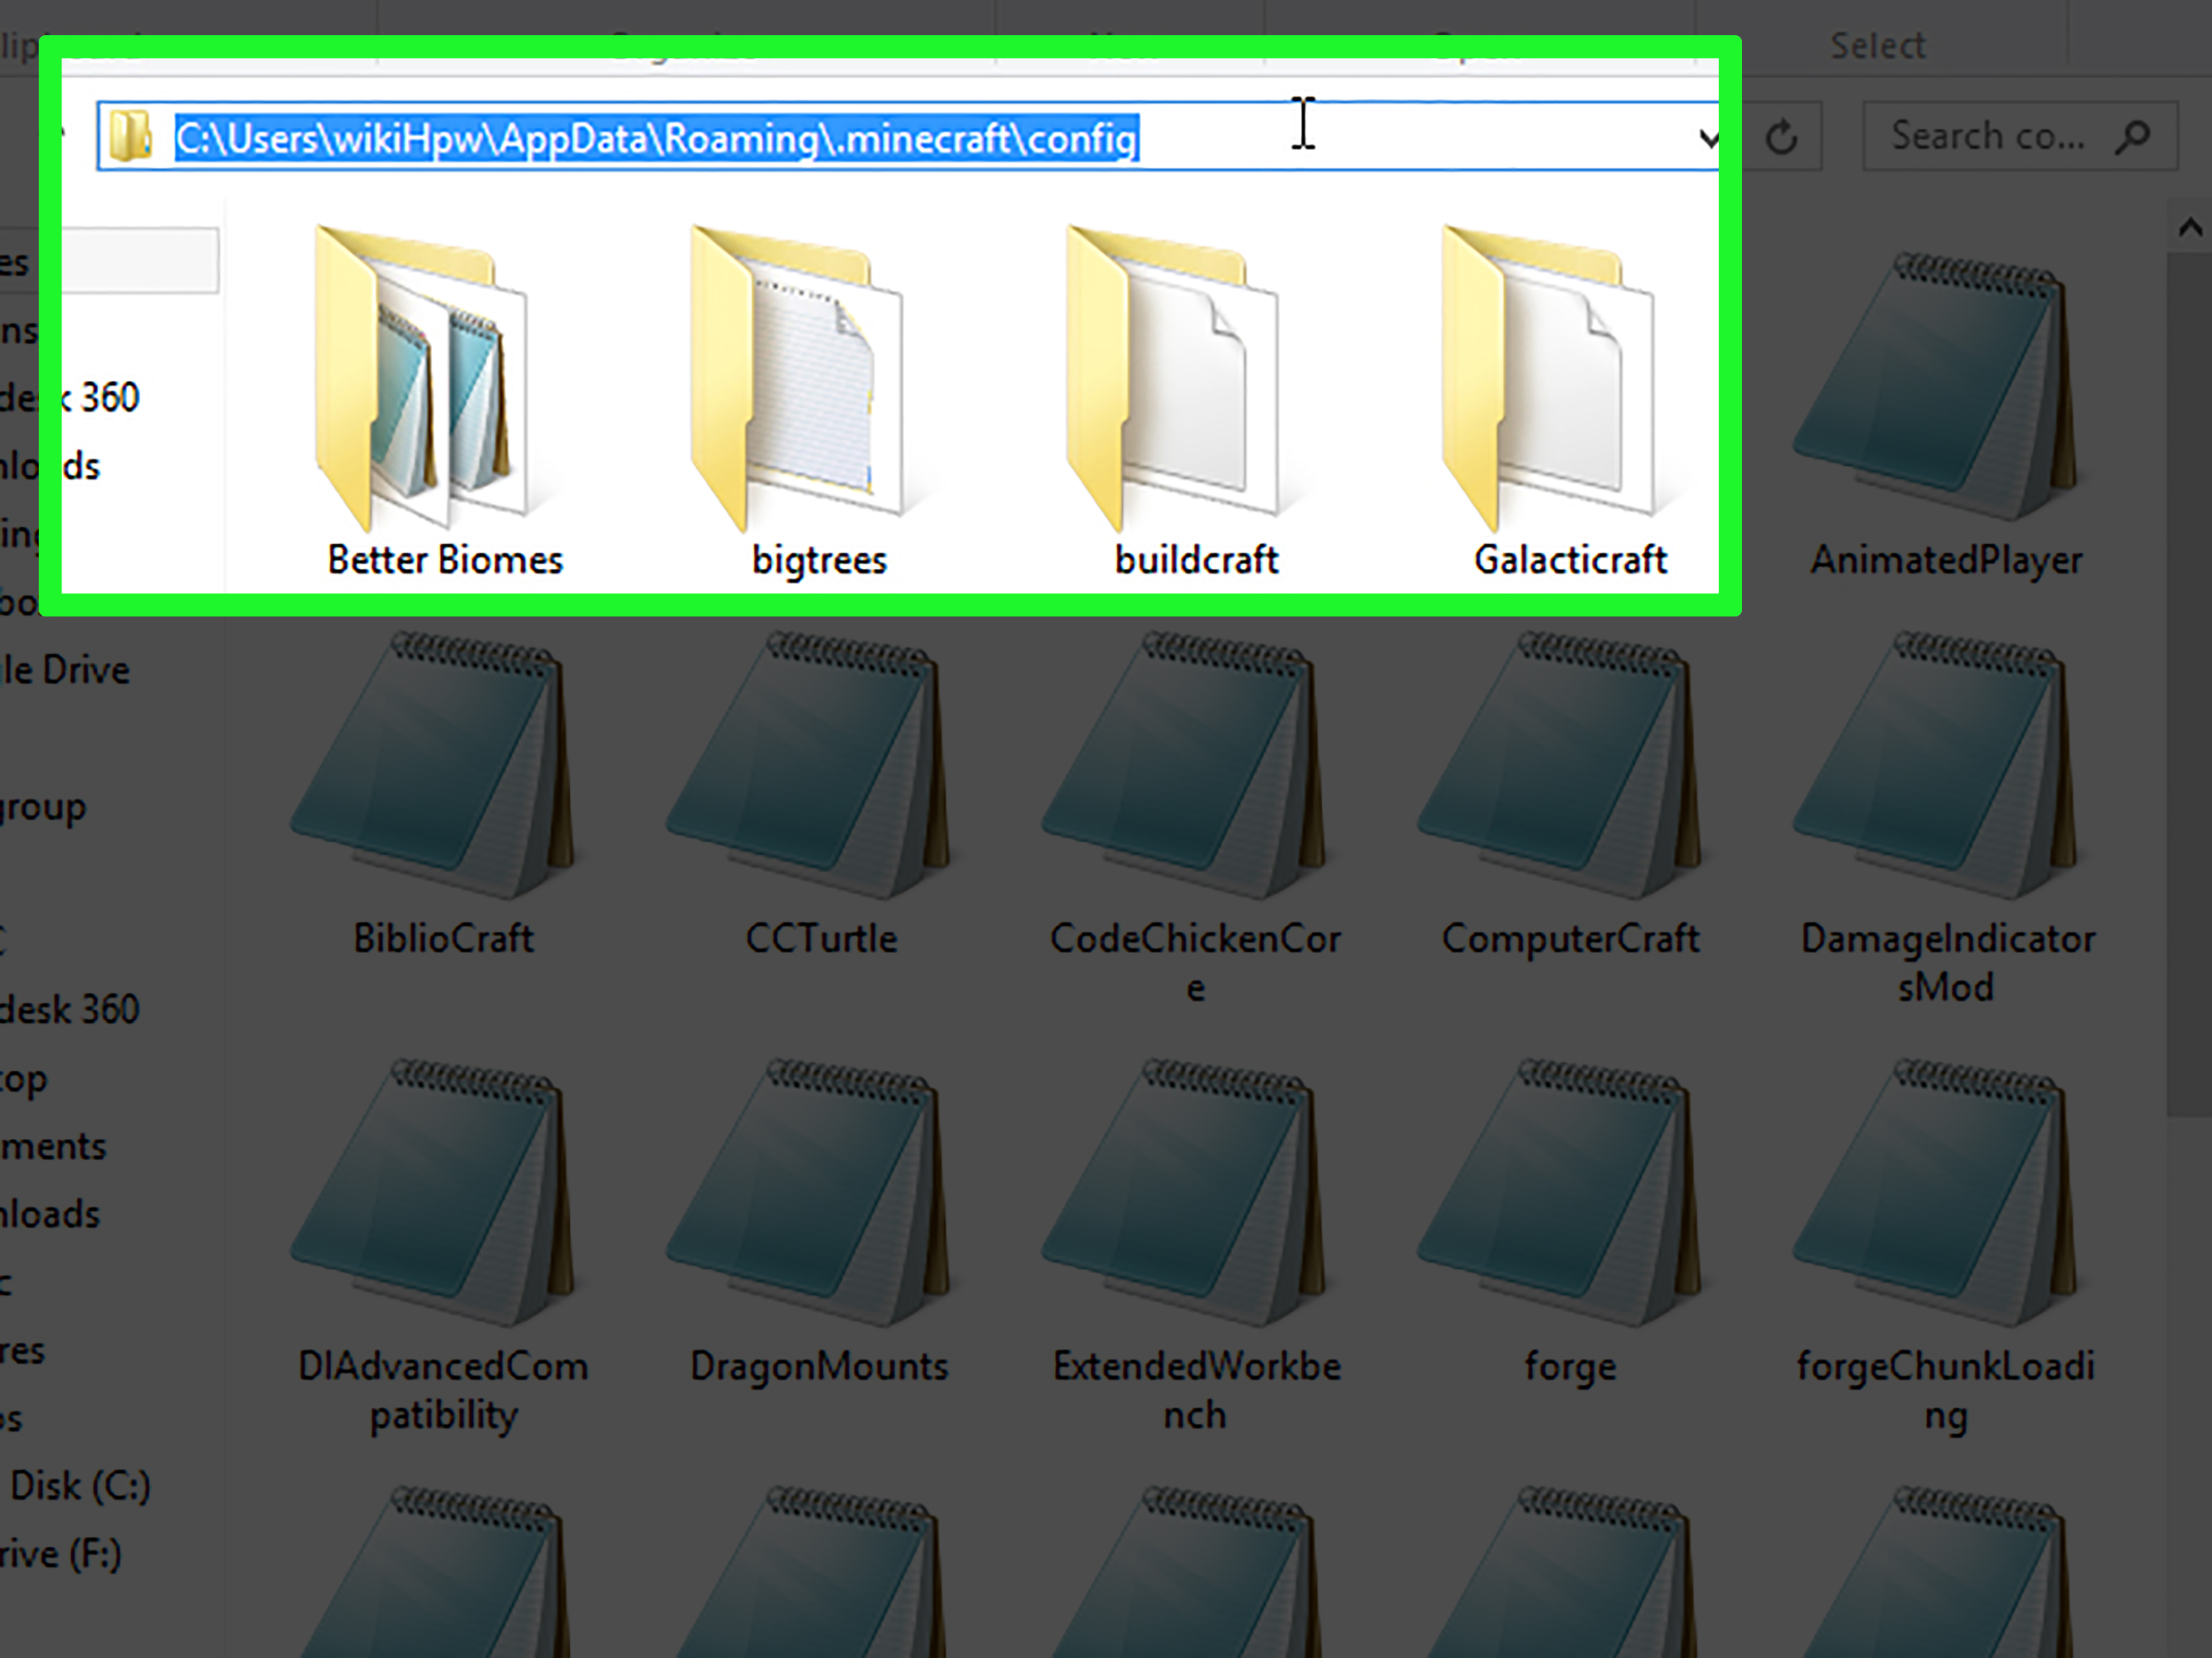
Step 2: Find Your Minecraft Mods Folder
The mods folder is where Forge looks for mod files. The location depends on your operating system.
Windows
Press Windows + R, type:
Then open the mods folder.
macOS
Open Finder, click Go in the menu bar, choose Go to Folder, and enter:
Then open the mods folder.
Linux
Open your home directory and look for:
Then open the mods folder.
If the mods folder does not exist, create one. Make sure it is named exactly mods in lowercase.
Step 3: Place Mod Files in the Mods Folder
Most Forge mods come as .jar files. Copy or move the downloaded mod files into the mods folder. Do not unzip them unless the mod author specifically tells you to. For most modern mods, the .jar file goes directly into the folder as-is.
Your folder might look something like this:
Step 4: Launch Minecraft with the Forge Profile
Open the Minecraft Launcher, select the Forge installation, and click Play. If everything is compatible, Minecraft should load with your mods active.
On the main menu, you may see a Mods button. Click it to view the loaded mods list. If your mod appears there, congratulations: your Minecraft is officially wearing a tiny modded top hat.
How to Use CurseForge or Modrinth Instead of Manual Installation
Manual installation gives you control, but launchers like CurseForge, Modrinth App, and Prism Launcher can make mod management easier. These apps can create separate profiles, download compatible mod versions, manage updates, and reduce folder confusion.
Using CurseForge
The CurseForge app lets you create a custom Minecraft profile, choose a Minecraft version, select Forge as the mod loader, and install mods from within the app. This is useful if you want to avoid manually searching through folders.
A typical CurseForge workflow looks like this:
- Install the CurseForge app.
- Open the Minecraft section.
- Create a custom profile.
- Select the Minecraft version and Forge loader.
- Use Add More Content to install mods.
- Launch the profile from the app.
Using Modrinth App
The Modrinth App also helps manage mods and modpacks. It supports searching, installing, updating, and organizing Minecraft projects. It is especially helpful for players who want a clean interface and simple profile management.
Manual vs. App-Based Installation
Manual Forge installation is great for learning how Minecraft modding works. App-based installation is great when you want convenience, faster updates, and separate modded profiles. Neither method is “wrong.” Manual installation is the wrench; mod launchers are the toolbox with labels and fewer mysterious screws rolling under the couch.
Common Forge Mod Installation Problems and Fixes
Modded Minecraft is powerful, but occasionally it throws a tantrum and exits with a crash message. Do not panic. Most issues are caused by one of a few common problems.
Problem 1: The Mod Does Not Appear in Minecraft
If a mod does not show up in the Mods menu, check that:
- You launched the Forge profile, not vanilla Minecraft.
- The mod file is inside the correct
modsfolder. - The file is still a
.jarfile and was not unzipped. - The mod supports Forge.
- The mod matches your Minecraft version.
Problem 2: Minecraft Crashes on Startup
Startup crashes often happen because of version mismatches or missing dependencies. Read the crash screen carefully. It may mention a required library mod or tell you that a mod needs a different version of Forge.
If you recently added several mods at once, remove them and test one at a time. This method is not glamorous, but it works. It is also how you discover which mod is behaving like a skeleton with a punchable attitude.
Problem 3: The Mod Needs a Dependency
Some mods require additional library mods. These are support mods that do not always add visible gameplay features but are required for other mods to function. Mod pages often list dependencies under sections like Relations, Dependencies, or Required Files.
If Minecraft says a dependency is missing, go back to the mod’s download page and install the required file for the same Minecraft version and loader.
Problem 4: Forge Version Is Wrong
Some mods require a minimum Forge version. If a mod says it needs Forge version X or newer, download a compatible Forge build for your Minecraft version. Do not switch Minecraft versions unless all your mods support the new version too.
Problem 5: The Game Runs Slowly
Mods can increase memory usage and CPU load. If your game becomes slow, try these fixes:
- Lower render distance and simulation distance.
- Install fewer heavy mods at once.
- Allocate more RAM carefully in the Launcher settings.
- Use performance mods made for Forge, if compatible.
- Close background apps while playing.
Do not allocate all your system memory to Minecraft. Your computer still needs RAM for Windows, macOS, Discord, browsers, and whatever tab is playing music even though you cannot find it.
Best Practices for a Stable Forge Mod Setup
Create Separate Installations
Use separate Minecraft installations for different mod sets. For example, keep one profile for vanilla Minecraft, one for a 1.20.1 Forge modpack, and another for testing new mods. This prevents one chaotic experiment from wrecking your main setup.
Add Mods Slowly
Install a few mods, launch the game, test them, and then add more. Installing 87 mods at once may feel efficient until the game crashes and you have no idea which one caused it. Slow and steady wins the modded raceand produces fewer keyboard sighs.
Read Mod Pages Carefully
Good mod pages usually tell you the supported Minecraft versions, required loader, dependencies, known issues, and configuration options. Reading this information can prevent most installation headaches.
Keep a Backup Folder
Before updating Forge or replacing several mods, copy your mods, config, and saves folders somewhere safe. If something breaks, you can return to the working setup.
Do Not Mix Mod Loaders
Forge mods go in a Forge setup. Fabric mods go in a Fabric setup. NeoForge mods may work separately depending on the version and mod support. Mixing loaders without checking compatibility is a fast way to create a crash report with the emotional energy of a soap opera finale.
How to Install Forge Mods on a Server
If you want to play modded Minecraft with friends, everyone usually needs the same Minecraft version, Forge version, and mod list. A Forge server must be installed separately from the client.
The general process is:
- Download the Forge installer for the correct Minecraft version.
- Choose Install server.
- Select an empty server folder.
- Run the Forge server files once to generate folders.
- Accept the Minecraft EULA if you agree to it.
- Place server-side mods in the server’s
modsfolder. - Make sure players install matching client-side mods.
Some mods are client-only, such as certain minimaps or visual enhancements. Others must be installed on both the server and every player’s computer. Always check the mod page for instructions.
Safety Tips When Downloading Minecraft Mods
Minecraft mods are created by a huge community, and many are excellent. Still, you should be careful with downloads. Only download from trusted platforms or official creator pages. Avoid websites that re-upload mods without permission, hide files behind suspicious buttons, or bundle installers with unwanted software.
Safe modding habits include:
- Check the file name before opening it.
- Avoid random executable files for simple mods.
- Read comments or issue pages if available.
- Use antivirus protection.
- Download the correct loader and Minecraft version.
- Avoid fake “download now” ads.
A normal Forge mod is usually a .jar file placed in the mods folder. If a site insists you install a mysterious program to get one small mod, walk away like a villager avoiding nighttime.
Example: Installing a Simple Forge Mod
Let’s say you want to install a backpack mod for Minecraft 1.20.1 using Forge.
- Open the Minecraft Launcher and run vanilla Minecraft 1.20.1 once.
- Download the Forge installer for Minecraft 1.20.1.
- Run the installer and choose Install client.
- Launch Minecraft using the Forge profile once, then close it.
- Download the backpack mod version labeled for Minecraft 1.20.1 and Forge.
- Check whether the mod requires any library dependencies.
- Place the mod
.jarfile and any required dependency files into themodsfolder. - Launch the Forge profile again.
- Open the Mods menu to confirm the mod loaded.
If the game launches and the mod appears, you are ready to play. If it crashes, remove the mod, check the version, and confirm you did not download a Fabric-only file by mistake.
Conclusion
Learning how to install Minecraft mods using Minecraft Forge is one of the best ways to expand Minecraft: Java Edition. The process is simple once you understand the pattern: choose the right Minecraft version, install the matching Forge build, download Forge-compatible mods, place them in the mods folder, and launch the Forge profile.
The biggest secret is compatibility. Your Minecraft version, Forge version, mod version, and dependency files all need to agree with each other. When they do, modded Minecraft can become almost anything: a fantasy RPG, a technical engineering challenge, a peaceful farming world, a building studio, or a performance-tuned survival experience.
Start small, back up your worlds, download from trusted sources, and add mods gradually. Once you get comfortable, you can build custom mod lists, experiment with modpacks, and create a version of Minecraft that feels tailor-made for your play style. Vanilla Minecraft is great. Modded Minecraft is what happens when vanilla Minecraft drinks three cups of coffee and decides to become a spaceship.
Extra Experience: What Installing Forge Mods Feels Like in Real Play
The first time you install Minecraft mods using Minecraft Forge, the process may feel slightly intimidating. There are version numbers everywhere, files ending in .jar, loader names that sound like fantasy guilds, and at least one moment where you stare at the Minecraft Launcher wondering whether you chose the correct profile. That is normal. Every experienced modded player has had a “why is this not working?” moment. Some of us have had a whole evening of those moments, with snacks.
The best experience usually starts with a simple goal. Do not begin by installing a giant 300-mod pack manually unless you enjoy chaos as a lifestyle. Begin with one or two mods. For example, try a minimap, a storage improvement mod, or a small quality-of-life feature. Install Forge, add the mod to the folder, launch the game, and confirm it works. That first successful launch is oddly satisfying. It feels like convincing Minecraft to open a secret door.
After that, you can experiment. Maybe you add a furniture mod and suddenly your base looks less like a stone rectangle designed by a tired cave goblin. Maybe you add a biome mod and your world becomes full of forests, cliffs, flowers, and places where you immediately get lost. Maybe you install a tech mod and spend three hours building a machine that automatically processes ore while you proudly explain it to someone who only asked, “Are you still playing Minecraft?”
One practical lesson is to keep your mod folder organized. If you are testing new mods, create a temporary folder on your desktop called something like testing-mods. Move new files there first, then copy them into your main mods folder when you are ready. If something crashes, you will know which files were recently added. This saves time and makes troubleshooting much less painful.
Another useful habit is reading the mod page before downloading. Many players skip this step and then discover that the mod requires a library, a newer Forge build, or a different Minecraft version. The mod page is not just decoration. It is the instruction manual, warning label, and tiny treasure map all in one. A few minutes of reading can prevent an hour of crash-report detective work.
Performance is also part of the experience. A small mod list may run smoothly, while a larger collection can demand more memory and processing power. If your game starts stuttering, reduce render distance, remove heavy mods you do not actually use, and avoid stacking multiple world-generation mods unless your computer is ready for the workout. Minecraft may look simple, but modded Minecraft can become surprisingly demanding.
Multiplayer adds another layer. If you want friends to join a Forge-modded world or server, everyone needs matching versions. That means the same Minecraft version, the same Forge version, and usually the same mod files. When one friend says, “It works on my computer,” check their mod list before blaming the universe. In modded Minecraft, one missing dependency can stop the party faster than a creeper in a storage room.
The most rewarding part is that Forge lets you shape the game around how you like to play. Builders can add blocks, furniture, tools, and decorations. Explorers can add dungeons, structures, biomes, and mobs. Technical players can add automation, pipes, machines, and energy systems. Casual players can add backpacks, maps, inventory sorting, and small improvements that make survival more comfortable.
Over time, you learn your personal modding style. Some players want a lightweight setup that keeps Minecraft close to vanilla. Others want a full transformation with quests, magic, factories, new dimensions, and enough custom items to make the creative inventory look like a hardware store exploded. Both approaches are valid. The point of modding is not to install the most mods possible; it is to make the game more enjoyable for you.
So take it step by step. Install Forge carefully, match versions, use trusted sources, and test often. Once you understand the rhythm, installing Minecraft mods becomes easyand maybe even a little addictive. Today it is one backpack mod. Tomorrow you are designing a lava-powered ore-processing system under your starter house while telling yourself this is definitely still a casual survival world.
Note: This article is written for Minecraft: Java Edition players and is based on current real-world Forge, Minecraft Launcher, CurseForge, and Modrinth installation practices.