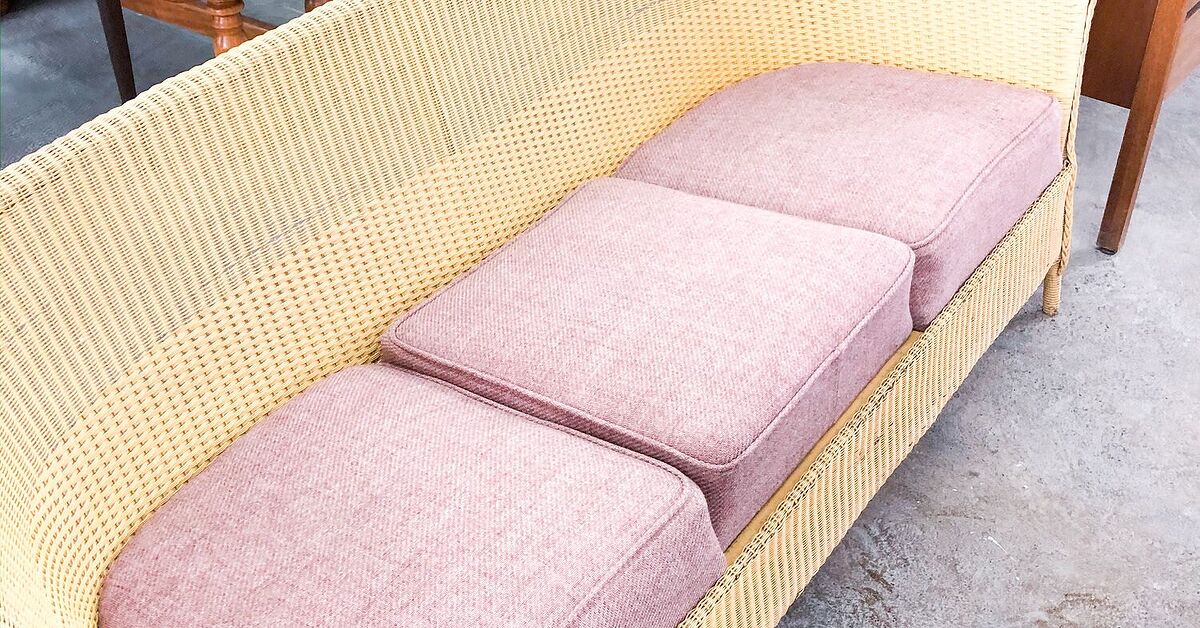
Note: This article is written for homeowners and DIY decorators who want a durable, good-looking wicker couch makeover using brushes, foam brushes, and patience instead of a paint sprayer.
Painting a wicker couch without a paint sprayer sounds a little like eating spaghetti with a spoon: possible, slightly awkward, and absolutely dependent on technique. Wicker has curves, crevices, shadowy little tunnels, and more personality than a chair at an estate sale. That is exactly why many tutorials recommend spray paint or a sprayer. But what if you do not own one, do not want overspray on your driveway, or simply prefer a slower, more controlled method?
Good news: you can paint a wicker couch with a brush and still get a fresh, charming, patio-ready result. The secret is not magic paint. It is preparation, thin coats, the right brush, proper drying time, and a willingness to inspect the couch from every angle like you are solving a tiny woven mystery. This guide walks you through how to paint a wicker couch without a paint sprayer, including cleaning, sanding, priming, brushing, sealing, and fixing common mistakes.
Why Paint a Wicker Couch by Hand?
A paint sprayer is fast, but speed is not always the goal. Brush painting gives you control, especially when your wicker couch has delicate weaving, older fibers, carved details, or mixed materials such as wood arms and cane panels. It also avoids the cloud of overspray that can decorate nearby plants, cars, fences, pets, and one unlucky pair of sneakers.
Painting by hand is also budget-friendly. Instead of buying or renting a sprayer, you need a few simple tools: brushes, drop cloths, cleaner, primer, paint, and perhaps a sealer. It takes longer, but the trade-off is precision. You can push paint into the weave, catch drips before they harden, and build color gradually instead of drowning the couch in one heroic but messy coat.
Know Your Wicker Before You Paint
Before opening a paint can, figure out what kind of wicker couch you have. “Wicker” is not a material by itself; it is a weaving method. Your couch may be made from rattan, reed, bamboo, willow, paper fiber, resin wicker, or a combination of materials.
Natural Wicker
Natural wicker is beautiful but sensitive. It can become brittle if it has lived outdoors too long, especially in direct sun or damp conditions. It does not love heavy soaking. Clean it gently, dry it thoroughly, and avoid thick paint layers that can stiffen the weave.
Resin or Synthetic Wicker
Resin wicker is usually more weather-resistant and easier to wash. However, paint adhesion can be trickier on slick plastic-like surfaces. For resin wicker, use a bonding primer or a paint labeled for plastic or exterior synthetic surfaces.
Antique Wicker
If the couch is antique or potentially valuable, think carefully before painting. A fresh coat may look pretty, but it can reduce collectible value. When in doubt, ask a furniture restoration professional before turning Great-Grandma’s heirloom into “Coastal White No. 47.”
Tools and Supplies You Need
You do not need a garage full of equipment. For a no-sprayer wicker couch makeover, gather the following:
- Drop cloth or plastic sheeting
- Vacuum with brush attachment
- Soft-bristle brush or old toothbrush
- Mild dish soap or gentle furniture cleaner
- Bucket of warm water
- Lint-free rags
- Fine-grit sanding sponge or sandpaper
- Tack cloth or microfiber cloth
- High-quality angled brush
- Small artist brush for tight areas
- Foam brush for smooth passes
- Exterior primer or bonding primer
- Exterior acrylic enamel, porch paint, chalk paint with sealer, or oil-based indoor/outdoor paint
- Clear exterior sealer if needed
- Gloves, eye protection, and a mask
Choose paint based on where the couch will live. For a covered porch, high-quality acrylic enamel may be enough. For a patio exposed to humidity, sun, and seasonal drama, use exterior-rated paint and a protective topcoat. Satin and semi-gloss finishes are popular because they are easier to wipe clean than flat paint.
Step 1: Remove Cushions and Inspect the Couch
Take off all cushions, pillows, covers, and removable hardware. Look for broken reeds, loose wrapping, cracked arms, sagging seat supports, mildew, peeling paint, and glossy old finishes. Paint is a makeover, not a miracle worker. If a strand is broken, glue or repair it before painting. If the seat sags badly, fix the structure first.
Run your hands gently over the couch. Snags and rough spots will show up more after painting, so it is better to catch them now. Trim tiny loose fibers only if they are clearly detached. Do not cut structural wicker strands unless you enjoy furniture that slowly unweaves itself like a bad plot twist.
Step 2: Clean the Wicker Thoroughly
Paint does not stick well to dust, pollen, grease, mildew, or old patio grime. Start by vacuuming the entire couch with a brush attachment. Work slowly across the arms, back, seat deck, legs, underside, and every woven panel. Then use a soft brush or toothbrush to loosen dirt hiding in the weave.
Mix a small amount of mild dish soap with warm water. Dip a cloth or soft brush into the solution and clean the wicker without soaking it. For resin wicker, you can usually be a little more generous with water. For natural wicker, keep moisture controlled and wipe rather than flood.
After cleaning, wipe with a damp cloth to remove soap residue. Residue can interfere with paint adhesion, and nobody wants their fresh finish peeling because a bubble of dish soap decided to become part of the family.
Step 3: Let It Dry Completely
This step is boring, which means it is important. Wicker traps moisture inside its weave. If you paint too soon, moisture can cause bubbling, poor adhesion, mildew, or a cloudy finish. Place the couch in a warm, shaded, well-ventilated spot and let it dry completely.
For natural wicker, overnight drying is often wise. If the weather is humid, give it longer. Use a fan to speed drying, but avoid blasting fragile wicker with intense heat. The couch should feel dry in crevices, not just on the easy-to-touch outer surfaces.
Step 4: Lightly Sand Peeling or Glossy Areas
You do not need to sand wicker aggressively. In fact, heavy sanding can damage woven fibers. The goal is to remove loose paint, dull glossy areas, and smooth rough spots. Use a fine-grit sanding sponge and a gentle hand.
Focus on chipped paint, shiny sealed areas, and places where the old finish is flaking. Wipe away sanding dust with a tack cloth or microfiber cloth. If the couch may have very old paint, especially from decades ago, be cautious. Sanding old lead-based paint can create hazardous dust. For questionable old pieces, testing or professional advice is the safer path.
Step 5: Prime the Wicker
Primer is the quiet hero of a wicker couch painting project. It helps paint grip, improves color coverage, and reduces blotchiness. When painting without a sprayer, primer also gives you a practice round for your brush technique.
Use an exterior primer for natural wicker that will sit outside. For resin wicker, choose a bonding primer suitable for plastic or slick surfaces. Apply primer in thin coats with an angled brush, pushing gently into the weave. Use a small artist brush for tight corners and underside areas.
Do not overload the brush. Heavy primer will collect in the crevices and dry into lumpy ridges. Thin coats are less glamorous at first, but they create a smoother, more durable finish. Let the primer dry according to the label before painting.
Step 6: Apply the First Thin Coat of Paint
Now comes the fun part: color. Stir the paint thoroughly. Dip only the tip of your brush into the paint, then tap off excess. Start with the back or underside of the couch so you can get comfortable before painting the most visible areas.
Brush with the direction of the weave where possible. Then change angles to reach the opposite side of each strand. Wicker is three-dimensional, so one pass from the front will not cover everything. Look from above, below, left, and right. If you feel ridiculous crouching around your couch like a furniture detective, congratulationsyou are doing it correctly.
Keep the first coat light. It may look streaky. That is normal. A thin first coat grips better and reduces drips. Trying to get full coverage immediately is the fastest way to create blobs, clogged weaving, and a couch that looks like it was frosted by an angry baker.
Step 7: Watch for Drips and Paint Pools
Wicker loves to hide drips. Paint gathers under rolled arms, inside corners, at the base of legs, and where strands overlap. After painting each section, pause and inspect it from different angles. Use a dry brush or lightly loaded brush to smooth any pooling paint before it dries.
If you find a drip after it has started drying, resist the urge to smear it wildly. Let it dry, sand it lightly, and touch it up. Wet panic usually makes the blemish larger. DIY painting rewards calm people, or at least people pretending very convincingly to be calm.
Step 8: Add a Second Coat
Most wicker couches need at least two coats when painted by hand. Dark wicker going white may need three. A bold color over a pale base may also need another pass for richness. Let each coat dry fully according to the paint label before adding the next.
The second coat is where the finish starts to look intentional. Continue using thin layers. Pay special attention to shadowed areas inside the weave. If you are painting a light color, check the couch outdoors in natural light before declaring victory. Indoor lighting can hide missed spots like a very polite liar.
Step 9: Seal the Finish If Needed
Some exterior paints do not require a separate sealer. Others, such as chalk paint or milk paint, usually need protection. If your couch will be used outdoors, choose a clear exterior-rated topcoat compatible with your paint. Water-based clear coats are often easier to clean up, while oil-based options can add durability but may amber over light colors.
Apply sealer in thin coats with a clean brush. Avoid heavy buildup in the weave. Let it cure fully before replacing cushions or sitting on the couch. Dry to the touch does not always mean fully cured. Give the finish time to harden so your first guest does not become permanently attached to the furniture.
Best Paint Colors for a Wicker Couch
White is classic, especially for sunrooms, porches, and coastal-style spaces. Black feels modern and dramatic. Soft sage, dusty blue, warm beige, and muted terracotta work beautifully outdoors because they blend with plants, wood tones, and natural light.
If your couch has thick cushions, coordinate the paint with the fabric. A navy cushion looks crisp against white wicker. Cream cushions feel relaxed with olive green. Striped cushions can handle black, charcoal, or natural tan. For small patios, lighter colors can make the furniture feel less bulky. For a large porch, darker paint can ground the seating area.
Common Mistakes to Avoid
Using Too Much Paint
Thick paint clogs wicker detail. Use multiple thin coats instead of one heavy coat.
Skipping Primer
Primer helps the paint bond and improves durability. This matters even more when brushing because the finish is built slowly.
Painting Damp Wicker
Moisture trapped in the weave can ruin the finish. Let the couch dry completely after cleaning.
Ignoring the Underside
The underside may not be glamorous, but unfinished areas can make the project look sloppy. Tilt the couch carefully and paint visible lower edges and legs.
Putting Cushions Back Too Soon
Paint needs curing time. Replace cushions only after the finish is dry and firm, especially in humid weather.
How Long Does It Take?
A hand-painted wicker couch usually takes a weekend, not because you are painting nonstop, but because cleaning, drying, priming, coating, and curing all need time. Expect several active hours plus drying periods between steps. If the couch is large, detailed, or changing from dark brown to bright white, plan for extra time.
Rushing is the enemy. A slow, careful project can last for years. A rushed one may start peeling before the season is over, which is rude behavior from furniture.
Maintenance After Painting
Once the couch is painted, keep it clean with regular dusting or vacuuming. Wipe spills quickly. Use furniture covers if the couch stays outdoors. Avoid leaving natural wicker exposed to constant rain or direct harsh sun. Even great paint cannot turn delicate woven furniture into a submarine.
Every season, inspect the finish for chips or worn spots. Touch up small areas before they grow. A tiny artist brush is perfect for quick repairs. Store cushions separately when not in use, and keep the couch in a covered area during extreme weather.
Real-World Experience: What Painting a Wicker Couch by Hand Actually Feels Like
Here is the honest part: painting a wicker couch without a paint sprayer is not difficult, but it is detailed. The first time you do it, you may underestimate how many angles a woven surface has. From the front, the couch looks covered. Then you step to the side and discover an entire secret neighborhood of unpainted brown lines. This is normal. Wicker does not reveal itself all at once.
The best experience-based tip is to work in zones. Do not try to paint the whole couch randomly. Start with one arm, then the back, then the seat deck, then the other arm, then the legs and underside. Finishing one zone at a time gives you better control and helps prevent missed patches. It also makes the project feel less endless.
A foam brush can be surprisingly useful on flat or gently curved sections, but it will not solve every problem. A good angled bristle brush is better for pushing paint into the weave. A small artist brush is your best friend for tight intersections. Keep a dry brush nearby for pulling out excess paint from crevices. That one small habit can save the finish from looking heavy.
Another lesson: do not judge the project after the first coat. The first coat on wicker often looks uneven, especially if you are painting a light color over dark stained rattan. You may briefly wonder if you have ruined the couch. You probably have not. Let it dry, apply the second coat, and the transformation will begin to make sense.
Lighting matters too. Paint outdoors in shade or in a bright garage with good ventilation. Direct sun can dry paint too quickly, making brush marks worse. Low light hides thin spots. After each coat dries, move around the couch with a flashlight or phone light and check the woven shadows. It sounds excessive until you find twenty missed lines under one armrest.
Finally, respect curing time. A couch can feel dry but still be soft enough to dent under cushions. Wait before heavy use. When the finish has cured, the reward is worth it: an old wicker couch that looks fresh, custom, and far more expensive than the cost of paint. Better yet, you did it without a sprayer, without overspray, and without turning the backyard into a fine mist of “oops.”
Conclusion
Learning how to paint a wicker couch without a paint sprayer is mostly about patience and thin layers. Clean the couch well, let it dry completely, sand only where needed, prime carefully, and brush on multiple light coats from several angles. Use the right paint for the couch material and location, then protect the finish with a compatible sealer if necessary.
A brush-painted wicker couch may take longer than a sprayed one, but the result can be charming, durable, and beautifully detailed. Plus, you get the satisfaction of rescuing a tired piece of furniture with your own two hands. That is not just DIY. That is porch poetry with a paintbrush.