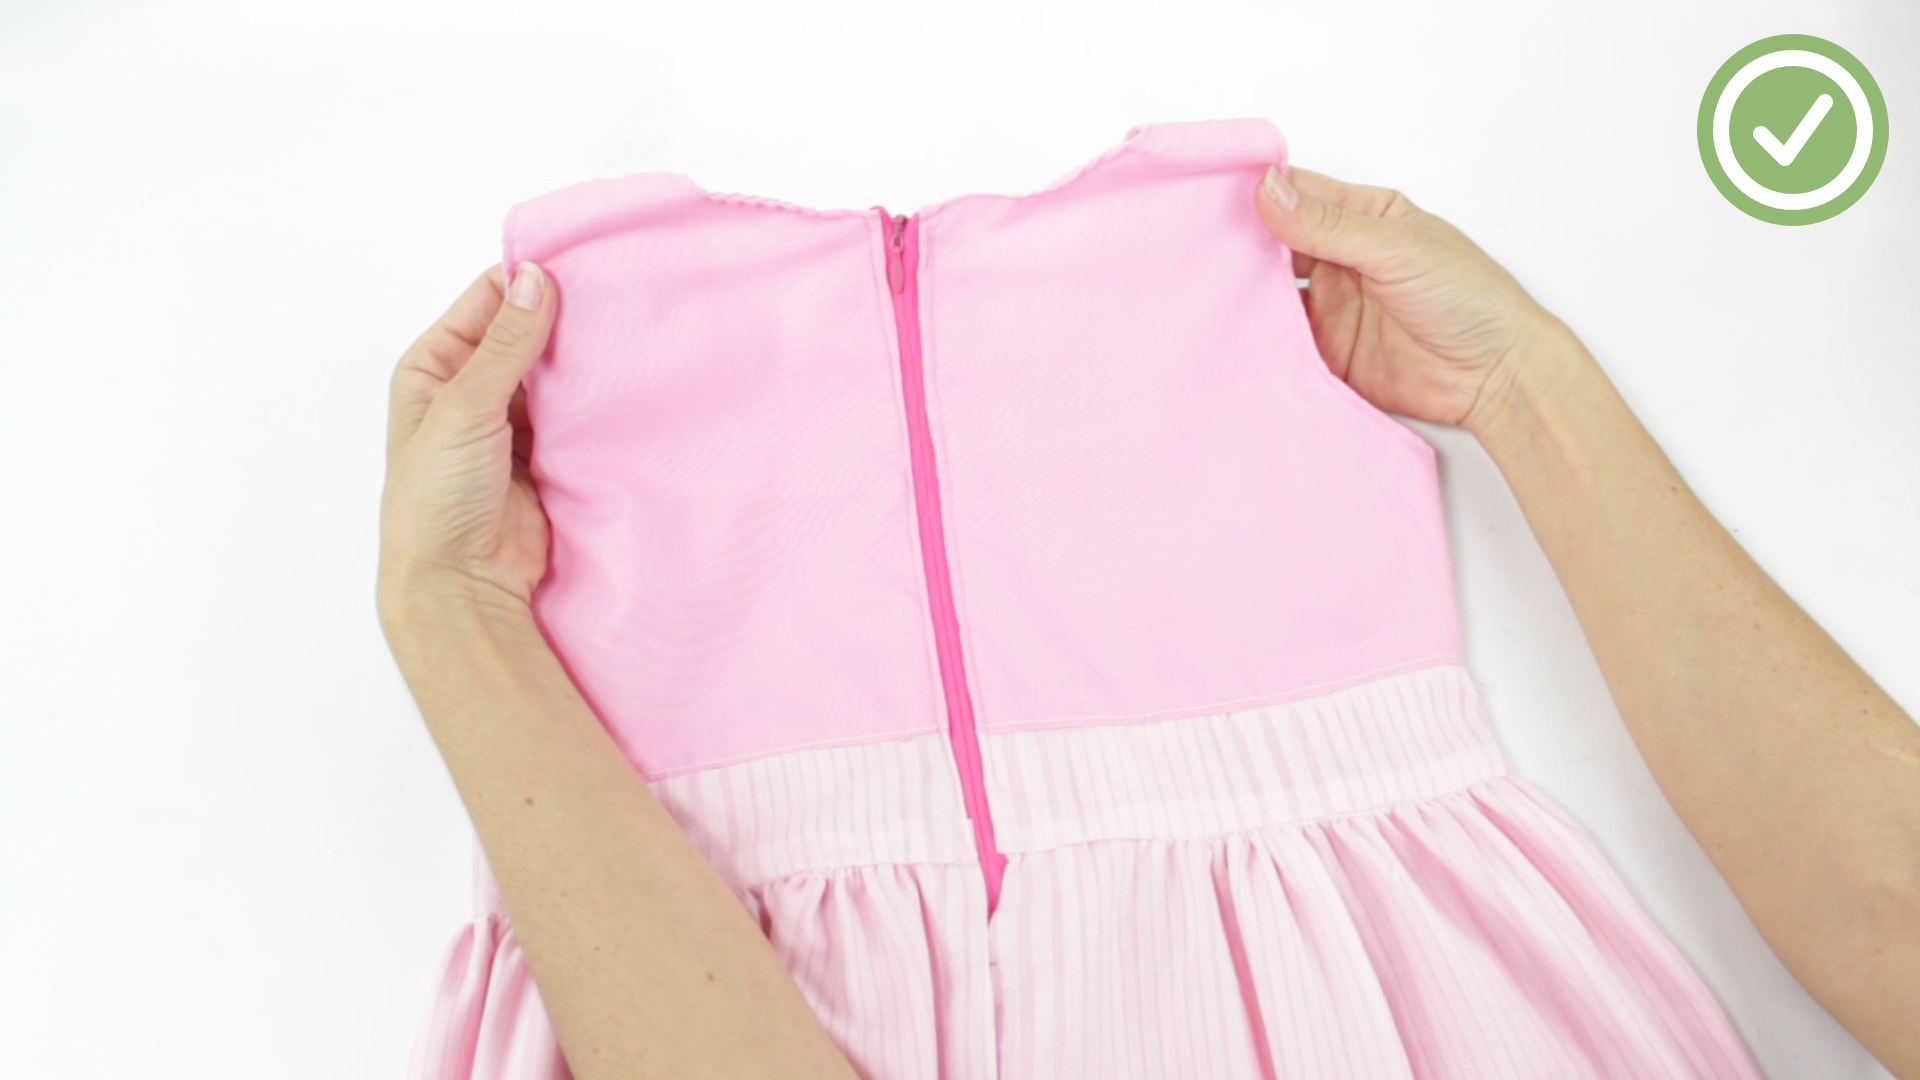
Sewing a zipper into a dress can feel like the sewing-room equivalent of defusing a tiny fabric bomb. One wrong move and suddenly your elegant back seam looks like it survived a wrestling match with a lawn chair. The good news? Learning how to sew a zipper in a dress is much easier when you break the process into clear, patient steps.
Whether you are making a new dress from scratch, replacing a broken zipper, or upgrading a thrift-store treasure, a clean zipper installation makes the difference between “homemade” and “handmade.” That little strip of teeth and tape controls how the dress fits, how easily it opens, and how polished the finished garment looks. No pressure, zipper. You only hold the whole outfit together.
This guide focuses mainly on installing an invisible zipper, the most common choice for dresses because it hides neatly in the seam. However, many of the same principles apply to centered and lapped zippers, too. You will learn what tools to use, how to prepare the dress, how to align the zipper, how to stitch it smoothly, and how to fix the small problems that make beginners want to pretend buttons were always the plan.
What Type of Zipper Should You Use for a Dress?
Before you sew, choose the right zipper for your dress style and fabric. The best zipper is not just the one that matches the color. It should also match the weight, purpose, and construction of the garment.
Invisible zipper
An invisible zipper is ideal for formal dresses, fitted dresses, skirts, and garments where you want the closure to disappear into the seam. The teeth curl toward the back of the zipper tape, which allows the seam to close over them when sewn correctly. This creates a smooth, professional finish with little or no visible stitching on the outside.
Centered zipper
A centered zipper has two fabric flaps that meet evenly over the zipper teeth. It is sturdy, beginner-friendly, and useful for casual dresses or costumes. Unlike an invisible zipper, it usually has visible topstitching.
Lapped zipper
A lapped zipper has one side of the fabric overlapping the zipper. It is often used in vintage-style dresses, side seams, and garments where a slightly more structured closure looks intentional and attractive.
For most modern dresses, an invisible zipper gives the cleanest look. If your pattern specifies a different zipper type, follow the pattern first. Patterns are like maps: occasionally confusing, but usually trying to keep you from walking into a swamp.
Tools and Materials You Need
Gather everything before you begin. Sewing a zipper goes better when you are not hunting for a seam ripper halfway through, although, let us be honest, the seam ripper always finds us eventually.
- Dress or dress pieces with the zipper seam prepared
- Invisible zipper or dress zipper in the correct length
- Matching all-purpose thread
- Sewing machine
- Invisible zipper foot or regular zipper foot
- Pins, clips, or hand-basting needle
- Fabric marker, tailor’s chalk, or washable pen
- Seam gauge or measuring tape
- Iron and pressing cloth
- Seam ripper
- Small scissors
- Fusible interfacing for lightweight or stretchy fabric
How to Sew a Zipper in a Dress: 12 Steps
Step 1: Read the Dress Pattern and Mark the Zipper Opening
Start by reading your pattern instructions carefully. Look for the zipper placement, seam allowance, zipper length, and whether the zipper is installed before or after the side or back seam is sewn. Most dress patterns use a 5/8-inch seam allowance, but never assume. Sewing has a delightful way of punishing assumptions with crooked seams.
Mark the zipper opening on the wrong side of the fabric. Use tailor’s chalk, a washable fabric marker, or small clips. If the zipper goes into the center back seam, mark the top edge, waistline seam, zipper stop, and the point where the regular seam begins below the zipper.
Step 2: Finish the Raw Edges First
Finish the raw edges of the zipper seam before attaching the zipper. This is especially important for woven fabrics that fray, such as linen, cotton, rayon, or satin. You can use a serger, zigzag stitch, pinking shears, or a narrow clean finish.
Do not wait until after the zipper is installed to wrestle with fraying edges. Once the zipper is in place, finishing the seam allowances becomes awkward. It is like trying to vacuum under a couch after you have nailed it to the floor.
Step 3: Stabilize Lightweight or Stretchy Fabric
If your dress fabric is delicate, slippery, stretchy, or loosely woven, apply a narrow strip of lightweight fusible interfacing to the wrong side of the zipper seam allowance. This helps prevent rippling, stretching, and wavy zipper seams.
Cut the interfacing slightly narrower than the seam allowance so it supports the zipper area without adding bulk. Press it carefully with the correct heat setting for your fabric. A little stabilizing now can save you from a zipper that looks like it is doing interpretive dance later.
Step 4: Press the Zipper Gently
Open the invisible zipper and gently press the zipper coils away from the tape using a low heat setting. Use a pressing cloth if needed, and never melt the zipper teeth. The goal is not to flatten the zipper into submission. You simply want to expose the stitching groove so the needle can get closer to the coil.
This step is small but powerful. A pressed invisible zipper is much easier to sew neatly because the foot can glide closer to the teeth. If you skip it, the zipper may still work, but it may not disappear as cleanly into the seam.
Step 5: Place the First Side of the Zipper
Lay the dress right side up. Open the zipper and place it face down on the right side of the fabric. The zipper teeth should face away from the raw edge, and the zipper tape should lie within the seam allowance. Align the coil with the marked seam line.
At the top, position the zipper stop low enough to allow room for the neckline seam, waistband, facing, or lining. In many dress patterns, the top of the zipper coil sits about 5/8 inch below the raw edge. Check your pattern because neckline finishes vary.
Pin or clip the zipper in place. For slippery fabric, hand-baste instead of relying only on pins. Basting may feel old-fashioned, but it is really just temporary insurance with thread.
Step 6: Sew the First Side
Attach an invisible zipper foot if you have one. The grooves underneath the foot help guide the zipper coil so the needle stitches close to the teeth. If you do not have an invisible zipper foot, use a regular zipper foot and sew as close to the coil as possible without stitching into it.
Begin at the top and sew down toward the zipper pull. Keep the fabric smooth and avoid stretching it. Stop when you get close to the zipper slider and cannot sew farther comfortably. Backstitch or lock the stitch to secure the seam.
Do not force the needle past the zipper pull. Needles are brave, but they are not invincible. If you hit metal or thick plastic, you can break the needle, damage the fabric, or invent a new vocabulary word.
Step 7: Match Seams Before Sewing the Second Side
Close the zipper temporarily and hold the second side against the opposite seam allowance. Match important horizontal lines, especially the waist seam, bodice seam, stripes, plaids, or print motifs. Mark these matching points on the zipper tape.
This step matters most on dresses with a waist seam. A zipper can be technically functional but visually disappointing if the waist seam jumps up on one side like it heard surprising news. Pin carefully and check alignment before stitching.
Step 8: Sew the Second Side of the Zipper
Open the zipper again. Place the second zipper tape face down on the right side of the opposite fabric edge. Make sure the zipper is not twisted. The top edges should align, and any marked seams should match.
Pin, clip, or baste the second side in place. Sew from the top down just as you did on the first side, stitching close to the coil. Stop near the zipper pull, backstitch, and remove the dress from the machine.
Close the zipper and inspect the outside. The zipper should disappear into the seam, and the top edges should line up. If one side is slightly off, remove only the problem area and restitch. Do not automatically rip out everything. Seam ripping should be strategic, not dramatic.
Step 9: Sew the Seam Below the Zipper
With the zipper closed, turn the dress wrong side out and bring the remaining seam below the zipper together. Pin the fabric right sides together below the zipper stop. Use a regular zipper foot or standard presser foot, depending on how close you need to stitch.
Start stitching slightly above or beside the previous zipper stitching, as close as possible to the last zipper stitches without catching the zipper teeth. Continue down the rest of the seam using the correct seam allowance. Press the seam open when finished.
This is where many beginners get a tiny pucker at the bottom of the zipper. To reduce it, do not pull the fabric, do not sew over a bulky lump, and try to blend the regular seam smoothly into the zipper stitching.
Step 10: Finish the Top Edge with a Facing, Lining, or Waistband
Most dress zippers end at a neckline, waistband, or facing. Fold the top ends of the zipper tape away from the teeth and secure them neatly inside the garment finish. If the dress has a facing, sew the facing right sides together over the zipper area, then turn it to the inside and press.
If the dress is lined, the lining can be attached so it hides the zipper tape from the inside. This creates a clean finish and keeps scratchy zipper tape away from the skin. For an unlined dress, you can hand-stitch the seam allowance or facing in place so the inside looks tidy.
Step 11: Press the Zipper Area Carefully
Press the zipper seam from the wrong side first, then lightly from the right side if the fabric allows. Use a pressing cloth to protect delicate fabric and plastic zipper teeth. Avoid smashing the zipper coils flat.
Pressing is not optional. It is the difference between “I sewed this during a calm afternoon” and “I fought this zipper at midnight and the zipper won.” A careful press helps the seam settle and makes the zipper look more professional.
Step 12: Test, Trim, and Final Check
Open and close the zipper several times. It should glide smoothly without catching fabric. Check that the seam lies flat, the top edges match, and the zipper pull can move freely. Trim loose threads and remove any visible basting stitches.
If the zipper is too long and your pattern allows shortening, create a new zipper stop before cutting away the extra length. Never cut first and hope for the best. Hope is not a zipper stop.
Common Mistakes When Sewing a Zipper in a Dress
The zipper teeth show from the outside
If an invisible zipper is visible, you may have sewn too far away from the coil. Press the coil open again and stitch slightly closer. Use an invisible zipper foot if possible for better control.
The fabric puckers near the zipper
Puckering often happens when the fabric stretches, the seam is not stabilized, or the stitch tension is too tight. Use interfacing for delicate fabric, avoid pulling while sewing, and test your stitch settings on scraps.
The waist seam does not match
Mark the waist seam on both zipper tapes before sewing the second side. Hand-baste the second side if needed. Matching seams is not about luck; it is about making the zipper behave before it gets permanent thread privileges.
The zipper will not close smoothly
You may have stitched too close to the teeth or caught fabric in the zipper path. Check the inside of the garment, trim loose threads, and restitch any section where the zipper tape is too tight against the coil.
Tips for a Professional-Looking Dress Zipper
- Buy a zipper slightly longer than the opening when possible; it can be easier to sew past the usable area cleanly.
- Use matching thread unless decorative topstitching is part of the design.
- Hand-baste slippery fabric before machine stitching.
- Check alignment before sewing the second side.
- Do not skip pressing between steps.
- Test the zipper before finishing the lining or facing.
- Practice on fabric scraps before sewing the final dress.
Can You Sew a Dress Zipper Without an Invisible Zipper Foot?
Yes, you can sew an invisible zipper with a regular zipper foot, although an invisible zipper foot makes the job easier. With a regular zipper foot, press the coils open well and stitch as close to the teeth as possible without catching them. Go slowly, use a seam guide, and test the zipper before completing the rest of the seam.
If you sew dresses often, an invisible zipper foot is worth owning. It is a small tool that can make your zipper installations look cleaner, especially on fitted dresses, formalwear, and garments with lined bodices.
How to Replace a Broken Zipper in a Dress
Replacing a zipper follows the same basic process, but first you must remove the old zipper carefully. Use a seam ripper to take out the old stitches without cutting the dress fabric. Press the seam allowances flat, check for damage, and reinforce weak areas with lightweight interfacing if needed.
Choose a replacement zipper that matches the original length and color as closely as possible. If the old zipper was centered or lapped, you can replace it with the same type. If the dress construction allows, you may upgrade to an invisible zipper for a cleaner finish.
Be patient during removal. Old thread can hide in seams like it signed a lease. Good lighting helps, and so does walking away for five minutes before you accidentally cut the dress instead of the stitch.
Experience Section: Real-World Lessons from Sewing Dress Zippers
The first practical lesson about sewing a zipper in a dress is simple: the zipper is rarely the real problem. Most zipper disasters begin earlier, with fabric that was not stabilized, seam allowances that were not marked, or a waist seam that was pinned with the optimism of a person who believes “close enough” will magically become symmetrical. It usually will not. Fabric remembers.
One common experience for beginners is sewing the first side beautifully, feeling deeply talented for approximately twelve seconds, and then discovering that the second side is twisted. This happens because an open invisible zipper can be surprisingly disorienting. Before sewing the second side, close the zipper, position it against the dress, and confirm that the pull faces the correct direction. Then open it again without flipping anything around. This tiny check prevents a huge headache.
Another real-life lesson is that pins are sometimes not enough. On cotton poplin, pins may hold the zipper perfectly. On charmeuse, rayon challis, satin, or lightweight crepe, the fabric can shift under the presser foot even when it looked innocent on the table. Hand-basting feels slower, but it often saves time because you do not have to unpick a wandering zipper. In sewing, the “slow” method is frequently the fast method wearing sensible shoes.
Pressing also becomes more important with experience. Many sewists try to solve zipper issues only at the machine, but the iron is doing half the work. Pressing the zipper coil open, pressing the seam allowances, and pressing the final seam help the zipper sit flat. A dress zipper that looks bulky or homemade may simply need better pressing, not a complete redo.
Matching waist seams is another area where experience teaches humility. If the dress has a bodice seam and skirt seam, mark that point directly on both sides of the zipper tape. Do not rely on eyeballing. The human eye is excellent at admiring fabric and terrible at measuring 1/8 inch under pressure. After marking, baste across the seam area, zip it closed, and check the match from the right side before committing to permanent stitches.
It is also helpful to practice on scraps using the same fabric, thread, needle, and zipper type. A zipper sewn into quilting cotton behaves differently from one sewn into silk, linen, ponte knit, or taffeta. Testing shows whether the fabric puckers, whether the needle leaves marks, and whether the zipper tape needs interfacing underneath.
Finally, every sewist eventually learns not to fear the seam ripper. Removing a few inches of stitching is not failure; it is editing. Writers revise sentences. Cooks adjust seasoning. Sewists unpick zipper seams while muttering softly. The goal is not to sew the zipper perfectly on the first try. The goal is to understand the process well enough to fix what needs fixing and finish with a dress you are proud to zip up.
Conclusion
Learning how to sew a zipper in a dress is one of those skills that makes your sewing projects look dramatically more polished. Once you understand zipper placement, fabric preparation, seam alignment, stitching, pressing, and finishing, the process becomes far less intimidating. An invisible zipper may look mysterious at first, but it is really just careful measuring, steady stitching, and a few smart habits repeated in the right order.
Take your time, stabilize tricky fabrics, baste when needed, and test the zipper before finishing the dress. With practice, you will be able to install zippers that sit smoothly, close easily, and quietly do their job without announcing themselves to the room. That is the dream: a zipper that works beautifully and stays humble.