Note: An aerial cartwheel is an advanced gymnastics and dance-acro skill. This guide is for educational, web-publishing purposes and should not replace hands-on instruction from a qualified coach. Practice only in a supervised gym, on proper mats, with progressions that match your skill level. Your living room carpet is not a training facility, no matter how confidently it lies to you.
What Is an Aerial Cartwheel?
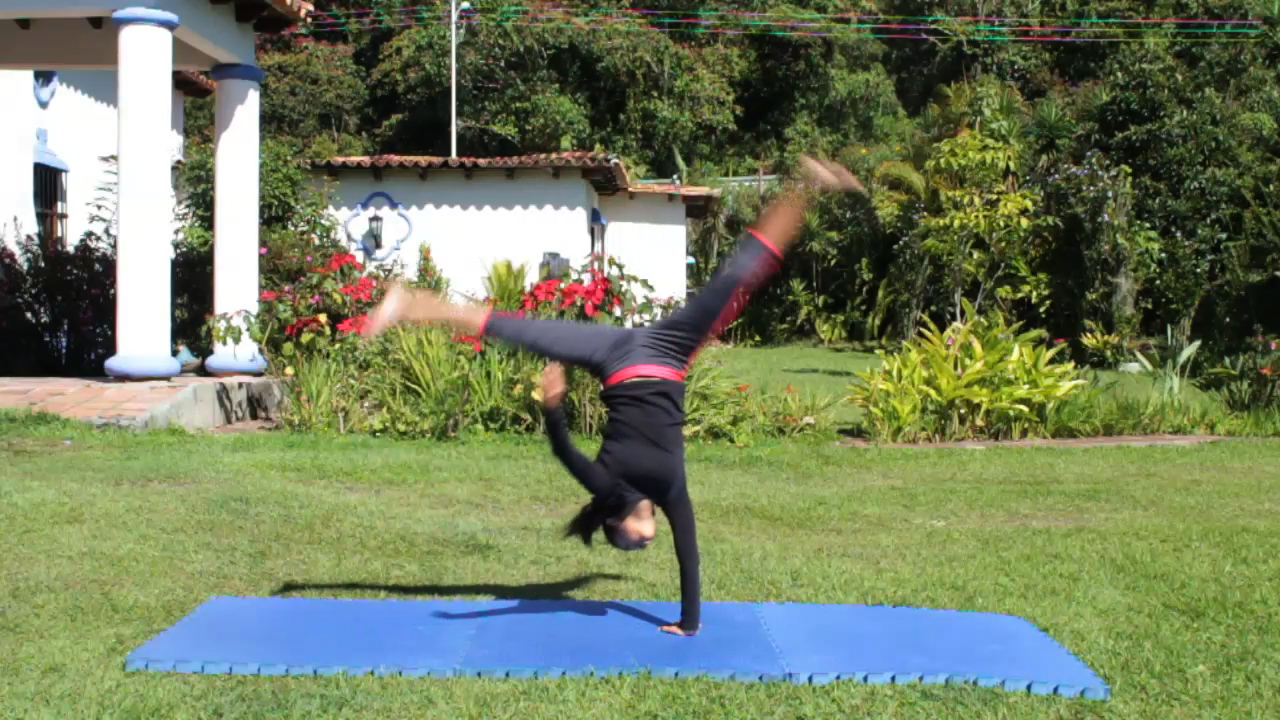
An aerial cartwheel, sometimes called a side aerial or no-hands cartwheel, is a cartwheel performed without placing the hands on the floor. Instead of relying on the arms for support, the athlete uses speed, leg drive, core control, hip lift, and body alignment to travel sideways through the air and land safely on one foot, then the other.
It looks effortless when performed well, but that smooth “floating” effect is built from a serious foundation: a strong cartwheel, a controlled one-handed cartwheel, confident lunges, active flexibility, explosive leg power, and enough body awareness to know where the floor is while your brain is briefly negotiating with gravity.
Before learning how to do an aerial cartwheel, remember one important rule: the goal is not to throw yourself into the air and hope for applause. The goal is to build the skill gradually, with smart drills, safe equipment, and coaching feedback.
Before You Start: Safety and Readiness Checklist
Do not rush into aerial cartwheel training if you are still learning basic cartwheels. A safe aerial starts long before the no-hands attempt. You should already be comfortable with a regular cartwheel on both sides, a strong lunge, a one-handed cartwheel, basic jumping power, and controlled landings.
Train on a spring floor, tumble track, or padded gymnastics surface when available. Use landing mats, keep the space clear, and work with a coach or trained spotter. Stop if you feel sharp pain, dizziness, unusual joint discomfort, or fear that makes you lose control. Confidence matters, but so does listening to your body.
How to Do an Aerial Cartwheel: 13 Steps
Step 1: Master a Clean Cartwheel First
The aerial cartwheel is not a separate magic trick; it is an advanced version of a cartwheel. Your regular cartwheel should be smooth, straight, and consistent before you remove your hands from the equation. Practice landing with control, keeping your legs long, and moving through a clear sideways path.
A good test is this: can you perform ten cartwheels in a row without bending your knees, twisting wildly, or landing like a startled flamingo? If yes, you may be ready for progressions. If no, keep polishing the basic cartwheel first.
Step 2: Build a Strong One-Handed Cartwheel
The one-handed cartwheel teaches you to rely less on your arms and more on your legs, hips, and core. Start with the hand closest to your lead leg, then progress to the opposite hand when your coach says you are ready. Keep your chest lifted and your legs active.
This step is important because an aerial cartwheel requires commitment through the entire motion. If your one-handed cartwheel collapses, your aerial will probably collapse too. Gravity is very strict about these things.
Step 3: Choose Your Dominant Side
Most athletes have one side that feels more natural. Your dominant aerial side is usually the same as your favorite cartwheel side. If you cartwheel with your right leg leading, your right-side aerial may feel more comfortable. If your left leg leads, your left side may be stronger.
Do not force the “cooler-looking” side just because someone else does it that way. Gymnastics skills work best when they match your natural coordination. Later, you can train both sides for balance, but start with the side that gives you the most control.
Step 4: Warm Up With Purpose
Aerial cartwheels demand warm muscles, mobile hips, strong ankles, and alert coordination. Begin with light cardio such as jogging, skipping, jumping jacks, or basic gymnastics movements. Then add dynamic stretches like leg swings, lunges, arm circles, hip circles, and gentle kicks.
A good warm-up should make you feel prepared, not exhausted. Think of it as waking up your body’s movement system. You are not trying to win a warm-up championship; you are preparing for safe, powerful practice.
Step 5: Strengthen the Legs and Core
Leg power helps lift the body. Core strength helps control the rotation. Helpful conditioning exercises include squats, lunges, calf raises, hollow holds, side planks, mountain climbers, and controlled jumping drills. Keep the focus on quality movement, not mindless repetition.
Your aerial cartwheel depends on a quick, coordinated push from the floor. Weak or tired legs make the skill harder and riskier. Train strength consistently, but do not attempt aerials when your body is already worn out.
Step 6: Practice the Aerial Entry Position
Start in a strong lunge. Your front knee should bend slightly, your back leg should be ready to drive, and your chest should stay lifted. Your arms may begin up or slightly forward depending on your coach’s preferred technique. The key is to avoid folding at the waist too early.
A common mistake is diving the chest down before the legs create lift. That turns the aerial into a low, rushed movement. A stronger entry keeps the body tall long enough to generate upward energy.
Step 7: Use a Hurdle or Step-In Approach
Many athletes learn aerials from a small step, chasse, or hurdle entry. The approach creates momentum, but it should be controlled. Too little speed makes the skill heavy; too much speed makes it messy. Your coach can help you find the right rhythm.
Imagine the approach as a launch setup, not a panic run. If your steps are loud, rushed, or uneven, slow down and rebuild the timing.
Step 8: Train the Leg Drive
The back leg must kick strongly while the lead leg pushes from the floor. This creates the lift and rotation needed for the aerial. In drills, focus on long legs, pointed toes if appropriate for your sport, and a quick split shape in the air.
Many beginners try to “jump sideways” without enough back-leg drive. The result is usually low and awkward. Strong aerials come from a fast kick, a powerful push, and a body line that travels up before it travels over.
Step 9: Keep the Chest Lifted
One of the biggest secrets to an aerial cartwheel is keeping the chest from dropping too soon. When the chest dives, the hips often stay low. When the chest stays lifted through the takeoff, the legs have more room to rise.
A helpful cue is “lift, then turn.” This reminds you that the aerial is not just a sideways fall. It is a lifted movement with rotation. Your coach may use different words, but the idea is the same: create height before completing the cartwheel action.
Step 10: Use Safe Progression Drills
Progression drills help you learn the aerial without gambling on a full attempt. Common coach-approved drills may include cartwheel step-ins, one-handed cartwheels, dive cartwheel shapes, cartwheel pop drills, aerial drills onto mats, and spotted aerial attempts.
Do not invent risky drills from random videos. What looks simple online may require years of coaching experience to spot correctly. A good drill should make the movement safer and clearer, not scarier and more chaotic.
Step 11: Work With a Coach or Spotter
A qualified coach can see details you cannot feel, such as whether your hips are lifting, whether your takeoff leg is bending too much, or whether your landing foot is turning out. They can also decide when you are ready to reduce assistance.
Spotting should be done only by someone trained to spot gymnastics or acro skills. A friend saying “I got you” is sweet, but it is not the same as proper spotting. In aerial training, good supervision is part of the skill.
Step 12: Land With Control
A safe landing is quiet, balanced, and controlled. The first foot should meet the floor with the knee slightly bent, followed by the second foot. Keep your chest lifted as you finish. Avoid twisting the ankle, collapsing the knee inward, or throwing the head around after landing.
If you cannot land consistently on mats with control, stay with progressions. A beautiful aerial is not just about getting upside down without hands; it is about finishing like you meant to do it.
Step 13: Repeat Smartly, Not Endlessly
Repetition is useful only when the repetitions are good. Practicing aerials while tired can create bad habits and increase injury risk. Keep training sessions focused, take breaks, and end on a controlled attempt or drill whenever possible.
Progress may take days, weeks, or months. That is normal. The aerial cartwheel is a skill of timing, power, courage, and patience. Trying to force it usually slows the process down. Train smart, and let the skill grow.
Common Aerial Cartwheel Mistakes
Diving the Chest Too Early
This is one of the most common problems. When the upper body drops too soon, the legs do not have time to lift. The aerial becomes low and rushed. Practice takeoff drills that encourage a tall chest and strong leg drive.
Bending the Legs
Bent legs can make the aerial look small and reduce momentum. Work on active flexibility, split shapes, and strong kicks. Long legs help the body rotate more cleanly and make the skill look more polished.
Training Without Enough Power
An aerial cartwheel is not only a flexibility skill. It also requires explosive strength. If you feel like you are muscling through every attempt, spend more time on jumps, lunges, core work, and one-handed cartwheel drills.
Practicing on Unsafe Surfaces
Hard floors, slippery grass, crowded rooms, and random backyard spaces are not ideal for aerial practice. Use proper mats and supervised training areas. The floor should help protect you, not audition for the role of villain.
Best Drills for Learning an Aerial Cartwheel
The best aerial drills depend on your current level, but most athletes benefit from a combination of cartwheel refinement, one-handed cartwheels, leg-drive drills, lunge jumps, and controlled landing practice. A coach may also use panel mats or raised surfaces to help you understand lift and rotation.
Another useful drill is the “cartwheel with late hands” progression. In this drill, the athlete delays placing the hands down as long as safely possible, which encourages stronger leg drive. This must be coached carefully because the goal is not to crash into a cartwheel, but to learn how the body creates lift before support.
Some athletes also practice aerial shapes on a tumble track or with a spotting belt in a properly equipped gym. These tools can build confidence while reducing impact. However, equipment should never replace good technique. Mats help, but they do not magically fix a crooked takeoff.
How Long Does It Take to Learn an Aerial Cartwheel?
There is no universal timeline. Some trained dancers or gymnasts learn the aerial cartwheel quickly because they already have strong cartwheels, flexibility, and body awareness. Others need months of consistent practice to develop the right combination of power and confidence.
Your progress depends on your starting skill level, strength, flexibility, coaching quality, practice consistency, and fear management. The safest approach is to measure progress by control, not speed. A low, uncontrolled aerial learned quickly is not better than a clean, safe aerial learned gradually.
Who Should Avoid Aerial Cartwheel Training?
You should avoid aerial cartwheel training if you have an untreated injury, pain during cartwheels, dizziness, recent concussion symptoms, ankle instability, wrist or shoulder pain that affects basic skills, or a medical condition that makes tumbling unsafe. When in doubt, ask a healthcare professional, coach, or athletic trainer before returning to acro training.
You should also pause if fear is causing you to bail out mid-skill. Fear is not weakness; it is information. A coach can help you return to drills that rebuild confidence without forcing the full aerial too soon.
Experience-Based Tips for Learning an Aerial Cartwheel
Learning an aerial cartwheel often feels like trying to convince your body to do something it has politely declined several times. The first big challenge is usually trust. You may understand the technique in your head, but the moment your hands are supposed to stay off the ground, your survival instincts start shouting, “Absolutely not, we invented hands for a reason.”
One helpful experience many athletes share is that the aerial improves when they stop treating it like a trick and start treating it like a progression. The best training sessions often do not involve dozens of full aerial attempts. Instead, they include warm-ups, strong cartwheels, one-handed cartwheels, leg-drive drills, and just a few carefully coached aerial efforts. This keeps the body fresh and the brain calm.
Another real-world lesson is that video feedback can be surprisingly useful. You may think your chest is lifted, but the video may reveal that you are folding forward like a lawn chair. You may think your legs are splitting wide, but the camera may say, “Cute theory.” Reviewing slow-motion clips with a coach can help you connect what you feel with what is actually happening.
Fear management is also part of the journey. Many athletes get close to the aerial, then suddenly start putting their hands down again. This is common. Rather than getting frustrated, go back to a drill where success feels possible. Confidence is built through repeated safe experiences. If every attempt feels like a dramatic movie scene, the progression is probably too advanced for that day.
Landing quality matters more than people think. A lot of beginners celebrate simply getting over, but a controlled landing is what turns the movement into a usable skill for dance, cheer, martial arts tricking, or gymnastics. Practice finishing tall, spotting the landing area, and absorbing impact through the legs. A clean landing makes the entire aerial look more confident.
It also helps to train both patience and consistency. Some days your aerial drills will feel floaty and powerful. Other days your body will act as if it has never heard of coordination. That does not mean you are going backward. Skill learning is rarely a straight line. Sleep, soreness, stress, growth, and fatigue can all affect performance. The smartest athletes adjust the practice instead of forcing the outcome.
Finally, remember that style comes after safety. Pointed toes, sharp arms, and a beautiful finish are wonderful, but they belong on top of solid mechanics. First build the safe aerial. Then polish the shape. The best performers make aerial cartwheels look effortless because they spent plenty of time making the basics boringly reliable. In gymnastics and acro, boringly reliable is secretly glamorous.
Conclusion
An aerial cartwheel is one of the most exciting skills to learn because it combines power, grace, timing, and bravery. But it is not a shortcut skill. To do an aerial cartwheel safely, you need a strong cartwheel foundation, a reliable one-handed cartwheel, proper warm-ups, leg and core strength, safe surfaces, smart drills, and qualified coaching.
The 13 steps above give you a clear learning path: master the basics, choose your side, prepare your body, build the takeoff, use progressions, work with a coach, and land with control. Keep the process patient and safety-first. When your aerial finally clicks, it will feel less like a wild leap and more like your body solving a very athletic puzzle.