Some holiday decorations quietly whisper, “Welcome.” A July 4th wreath, on the other hand, practically waves a tiny flag, lights a sparkler, and announces, “Come on inwe probably have potato salad.” The best part? You do not need a designer budget, a craft room the size of a garage, or a secret degree in ribbon engineering. You can make a simple, festive, front-door-ready July 4th wreath with affordable supplies from the dollar store and a little patience.
This guide walks you through how to make a simple dollar store July 4th wreath for your doorway using common materials like a wire wreath form, deco mesh, ribbon, faux flowers, mini flags, tinsel garland, pipe cleaners, and hot glue. The result is cheerful, patriotic, lightweight, and easy to customize for your porch, apartment door, classroom, office, or backyard party entrance.
Whether you are decorating for Independence Day, Memorial Day, Flag Day, Labor Day, or a summer cookout with suspiciously competitive cornhole energy, this DIY patriotic wreath is a budget-friendly project that looks far more expensive than it is. Your door gets a red, white, and blue glow-up, and your wallet gets to stay calm.
Why a Dollar Store July 4th Wreath Is the Perfect Summer DIY
A dollar store wreath is one of those rare crafts that checks almost every box. It is affordable, beginner-friendly, quick to make, and forgiving. If your ribbon is slightly crooked, congratulationsyou have achieved “handmade charm.” If your deco mesh puffs are not identical, call it texture. If you accidentally add too many stars, well, it is the Fourth of July. Stars are invited.
Many patriotic wreath ideas rely on the same basic design principles: a sturdy wreath base, strong color blocking, layered textures, and a focal point. Red, white, and blue supplies are widely available during late spring and early summer, especially at discount stores, craft stores, and party-supply aisles. That makes this project easy to plan without hunting for rare materials.
Dollar store supplies also allow you to experiment. Want a rustic farmhouse wreath? Use burlap ribbon, raffia, and wooden stars. Prefer sparkle? Add tinsel garland and metallic star picks. Love a full, fluffy wreath? Deco mesh is your best friend. Want something ultra-simple? A grapevine wreath with a bow and a few mini flags can look polished in under 30 minutes.
Supplies You Will Need
Before you start, gather your materials so you are not wandering around the house later looking for scissors while holding a half-attached ribbon bundle like a confused craft wizard.
Basic Supplies
- One wire wreath form, foam wreath form, or grapevine wreath base
- Red, white, and blue deco mesh, ribbon, tulle, or fabric strips
- Pipe cleaners, floral wire, twist ties, or zip ties
- Hot glue gun and glue sticks
- Scissors or wire cutters
- Patriotic ribbon for a bow
- Mini flags, foam stars, faux flowers, pinwheels, or wooden cutouts
- Ribbon, twine, or a wreath hanger for hanging
Optional Add-Ons
- Battery-operated mini lights
- Red, white, and blue berry picks
- Small “USA,” “Welcome,” or “Freedom” sign
- Glitter stars or metallic sprays
- Burlap ribbon for a rustic look
- Clear spray sealer for extra outdoor protection
For most doorway wreaths, a 14-inch wire wreath form is a good starting size. Once mesh, ribbon, and decorations are added, the finished wreath often looks closer to 18 to 22 inches wide. That is large enough to make a statement without making your front door look like it is wearing a parade float.
Choose Your Wreath Style
There are several easy styles you can make with dollar store supplies. Pick the one that best matches your time, patience, and tolerance for glitter mysteriously appearing on your face three hours later.
1. Deco Mesh July 4th Wreath
This is the fullest, most classic dollar store patriotic wreath style. Deco mesh creates big puffy loops, giving your wreath volume and movement. It works especially well on a wire wreath frame because you can twist pipe cleaners around the frame to hold each mesh bundle securely.
2. Ribbon Tie Wreath
A ribbon tie wreath is very beginner-friendly. Cut red, white, and blue ribbon or fabric into strips, tie them around the wreath form, and fluff. This style is great if you want a casual, homespun look. It also works well for kids or family crafting, as long as adults handle sharp tools and hot glue.
3. Grapevine Patriotic Wreath
A grapevine wreath looks more natural and rustic. You can decorate only one side with faux flowers, stars, a bow, and mini flags. It is quick, elegant, and perfect if your porch style leans farmhouse, cottage, or “I bought one galvanized bucket and now I have a theme.”
4. Tinsel or Garland Wreath
This is the fastest version. Wrap patriotic tinsel garland around a wreath base, secure it with wire or glue, and add a bow or sign. It is shiny, playful, and ideal for party decor. It may not be the most subtle wreath on the block, but subtlety was never really the point of fireworks season.
Step-by-Step: How to Make a Simple Dollar Store July 4th Wreath
The following tutorial uses a wire wreath form, deco mesh, ribbon, and small patriotic accents. It gives you a full, festive result while still staying simple enough for beginners.
Step 1: Prepare the Wreath Form
Place your wire wreath form flat on a table. If you are using pipe cleaners, twist them around the wreath frame at regular intervals. Space them about 3 to 4 inches apart around the outer and inner rings. These pipe cleaners will act like little craft seatbelts, holding the mesh and ribbon in place.
Use red, white, or blue pipe cleaners if you have them. If not, any color will work because the mesh and ribbon will hide most of them. Do not worry if it looks messy at this stage. Every wreath has an awkward teenage phase.
Step 2: Add the Deco Mesh
Start with one roll of deco mesh. Gather the end of the mesh into a small bunch and secure it with the first pipe cleaner. Then make a loose loop or “poof” about 8 to 10 inches long. Secure that loop with the next pipe cleaner. Continue around the wreath, making evenly sized loops as you go.
For a fuller look, repeat the same process with a second color. You might use red mesh first, then layer white mesh over it, and finish with blue ribbon accents. Another option is to alternate colors: red poof, white poof, blue poof, repeat. This creates a striped, firework-like effect.
Once the mesh is attached all the way around, fluff it with your hands. Pull the loops outward and separate the layers. This is the part where the wreath suddenly starts looking like something you would proudly hang instead of something your cat might question.
Step 3: Cut and Add Ribbon Tails
Cut pieces of patriotic ribbon into 10- to 12-inch strips. Use wired ribbon if possible because it holds its shape beautifully. Cut the ends into a V shape by folding each ribbon strip in half lengthwise and snipping diagonally from the folded edge toward the outer corners.
Group two or three ribbon strips together, pinch them in the center, and secure them into the same pipe cleaners used for the mesh. Angle the ribbon tails in different directions so they spread across the wreath. Try mixing patterns: stars, stripes, gingham, burlap, solid red, navy blue, and white with metallic accents.
The trick is balance. You do not need every ribbon pattern in America on one wreath. Choose two or three main patterns and repeat them around the frame. Repetition makes a homemade wreath look intentional instead of “the craft aisle sneezed.”
Step 4: Add a Patriotic Bow
A bow gives the wreath a clear focal point. You can place it at the bottom, top, side, or slightly off-center. For a simple bow, make several loops with wired ribbon, pinch the center, secure it with floral wire, and fluff the loops. Add two long ribbon tails for movement.
If bow-making makes you nervous, buy a premade bow from the dollar store or craft aisle. There is no medal for doing everything the hard way. A premade bow can still look fantastic once it is tucked into mesh and surrounded by stars or flowers.
Step 5: Attach Stars, Flags, Flowers, or a Sign
Now add your decorative pieces. Foam stars, wooden stars, mini pinwheels, small patriotic signs, faux hydrangeas, berry picks, and mini flags all work well. Place your largest item first, then fill in with smaller accents.
If you use actual small American flags, keep them clean, upright, and respectful. Many crafters prefer flag-inspired decorationsstars, stripes, bunting colors, and patriotic ribbonbecause they create the same festive feel without turning the flag itself into a disposable craft material.
Use hot glue for lightweight accents and floral wire for heavier pieces. If your wreath will hang outside, wire is usually more reliable than glue alone, especially in heat. Summer sunshine can soften hot glue faster than a popsicle on a driveway.
Step 6: Create a Hanger
Attach a loop of ribbon, twine, or floral wire to the back of the wreath. You can also use an over-the-door wreath hanger. Before hanging it outside, hold the wreath upright and give it a gentle shake. If anything wiggles too much, secure it again.
Finally, hang the wreath on your doorway and step back. Fluff the mesh, adjust the bow tails, and straighten any stars or flags. This last styling step makes a big difference. Think of it as giving your wreath a tiny hair appointment before its big debut.
Budget Breakdown: How Much Does It Cost?
A simple dollar store July 4th wreath can often be made for a modest cost, depending on how full you want it and what supplies you already own. A basic version may require a wreath form, two rolls of mesh, one or two rolls of ribbon, pipe cleaners, and a small decoration. A fuller version may use extra ribbon, faux flowers, lights, or a sign.
If you already have scissors, a glue gun, and leftover ribbon, your cost drops even more. One of the best budget tips is to shop your own home before buying supplies. Old bandanas, fabric scraps, gift-wrap ribbon, leftover Christmas red ribbon, and blue craft paint can all become part of a patriotic wreath.
Design Tips for a Wreath That Looks High-End
Use Odd Numbers
Decorating in groups of three or five often looks more natural. Try three large stars, five flower heads, or three ribbon patterns repeated evenly around the wreath.
Pick a Main Texture
If everything is shiny, the wreath can feel chaotic. If everything is matte, it can look flat. Combine one main texture with one or two accents. For example, use fluffy mesh as the base, wired ribbon for structure, and metallic stars for sparkle.
Limit the Color Palette
Red, white, and blue already create strong contrast. Choose one shade of blue and one shade of red if possible. Navy and deep red feel classic. Bright blue and cherry red feel playful. Mixing every shade can work, but it takes more careful balancing.
Make the Bow Big Enough
A tiny bow can disappear on a full mesh wreath. Use wired ribbon that is at least 1.5 to 2.5 inches wide. Bigger bows look more polished and help anchor the design.
Protect It From Weather
If your front door is uncovered, avoid paper decorations unless they are laminated or sealed. Mesh, plastic stars, faux flowers, and wired ribbon usually hold up better. A covered porch is ideal because it protects the wreath from rain, wind, and harsh sun.
Safety Tips Before You Start Crafting
Hot glue guns are useful, but they deserve respect. Use a low-temperature glue gun when possible, keep it upright on a heat-safe surface, and unplug it when you are finished. Children should be closely supervised and should not handle hot tools unless they are old enough, careful enough, and guided by an adult.
Wire cutters and floral wire can also be sharp, so trim ends neatly and tuck them toward the back of the wreath. If you add battery lights, make sure the battery pack is secure and easy to access. Do not overload the wreath with heavy pieces, especially if it will hang on a glass storm door or lightweight hook.
Where to Hang Your July 4th Wreath
The front door is the classic spot, but it is not the only option. You can hang your dollar store July 4th wreath on a porch wall, above a mantel, on an interior door, over a buffet table, on a garden gate, or near the entry to a backyard barbecue. Smaller wreaths also look cute on kitchen cabinet doors or the backs of dining chairs.
For outdoor hanging, choose a place that is visible but sheltered. Direct sun can fade ribbon, and summer storms can flatten mesh. If bad weather is coming, bring the wreath inside. Your wreath may be patriotic, but it does not need to prove itself in a thunderstorm.
Easy Variations to Try
Farmhouse July 4th Wreath
Use a grapevine base, burlap ribbon, navy gingham, cream flowers, and wooden stars. Keep the colors slightly muted for a cozy rustic look.
Firecracker Deco Mesh Wreath
Use bright red mesh, blue mesh, silver ribbon, and glittery star sprays. Add a small sign that says “Let Freedom Ring” or “Boom!” for extra personality.
Bandana Wreath
Cut red, white, and blue bandanas into strips and tie them around a wire or foam wreath. This is affordable, soft, and easy to store.
Pinwheel Wreath
Attach small red, white, and blue pinwheels around a foam wreath form. It is playful, fast, and great for a family party entrance.
Floral Patriotic Wreath
Use faux red geraniums, white daisies, and blue hydrangeas on a grapevine wreath. Add a simple striped bow and let the flowers do the heavy lifting.
Common Mistakes to Avoid
The first mistake is using too little material. Sparse wreaths can look unfinished, especially from the street. If your wreath looks thin, add more mesh, ribbon tails, or filler picks.
The second mistake is attaching decorations only with hot glue when the wreath will hang outdoors. Hot glue is convenient, but wire adds strength. For heavier decorations, use both.
The third mistake is skipping the fluffing step. Mesh and ribbon need shaping. Spend a few minutes pulling loops forward, curling ribbon tails, and spreading out decorations.
The fourth mistake is overcrowding the wreath. A full wreath is beautiful, but too many signs, flags, stars, flowers, bows, and pinwheels can compete. Choose one main focal point and let the rest support it.
Personal Experience: What I Learned Making a Dollar Store July 4th Wreath
The first time I made a dollar store July 4th wreath, I had a grand vision. In my mind, it was going to look like something from a boutique porch display: balanced, full, cheerful, and tastefully patriotic. In reality, the first ten minutes looked like I had challenged a roll of deco mesh to a wrestling match and lost. The mesh curled, the ribbon slipped, and one foam star attached itself to the glue gun cord like it had dreams of travel.
But that is exactly why this project is so satisfying. A wreath can look messy while you are building it, then suddenly come together near the end. Once the mesh is fluffed, the ribbon tails are spread out, and the bow is attached, the whole piece starts to make sense. It is a little like decorating a Christmas tree: halfway through, you may question your choices, but by the end, you are standing back with your hands on your hips like a proud holiday professional.
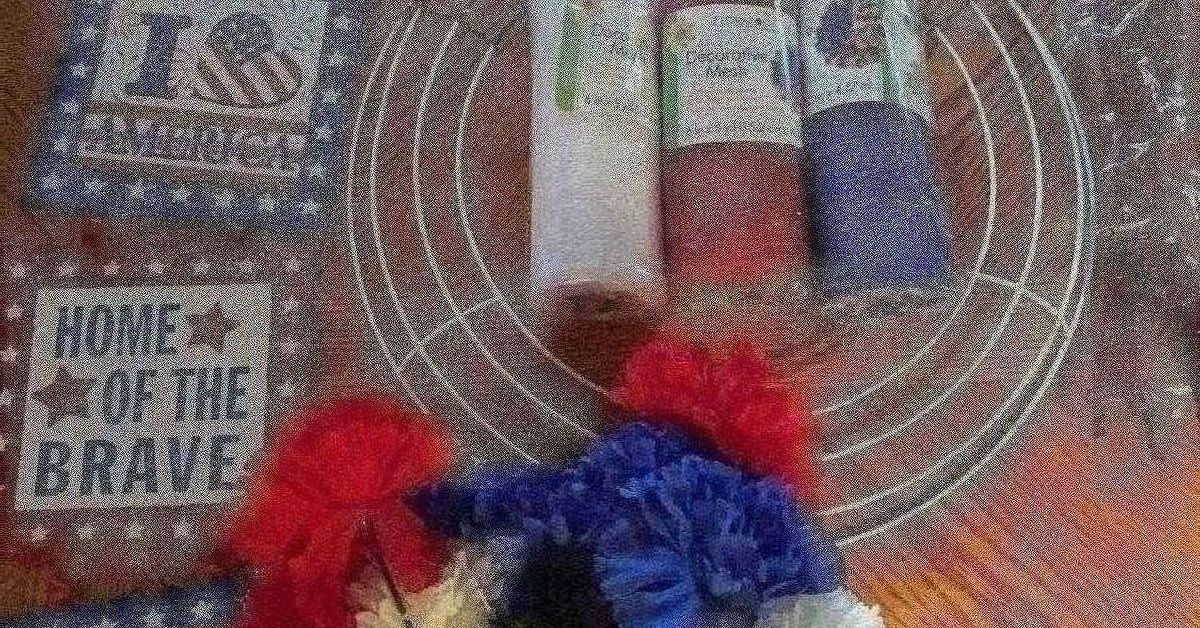
One experience that helped was laying everything out before attaching it. I placed the wreath form on the table, arranged the bow, stars, mini sign, and ribbon pieces around it, and took a quick photo with my phone. That photo became my map. Without it, I kept moving pieces around and forgetting the arrangement I liked best. It sounds simple, but it saves time and prevents the dreaded “why did this look better five minutes ago?” moment.
I also learned that wired ribbon is worth choosing whenever possible. Thin, floppy ribbon can still work, but wired ribbon gives the wreath structure. You can curl the ends around your finger, bend loops into shape, and refresh the wreath after storage. If the wreath gets slightly flattened in a closet, wired ribbon bounces back with a little finger styling. Non-wired ribbon tends to sulk.
Another lesson: do not underestimate the power of one strong focal point. My first version had stars everywhere, a sign, a bow, flowers, three flags, and enough sparkle to signal low-flying aircraft. It was festive, yes, but the eye had nowhere to rest. The improved version used one large bow, one small sign, and a few stars placed evenly around the wreath. It looked cleaner, more expensive, and less like it had eaten the seasonal aisle.
Storage matters too. After July 4th, I like to place the wreath in a large plastic bag or wreath storage box and hang it on a closet wall. Crushing it under heavier decorations is a bad idea unless your goal is a patriotic pancake. Before storing, remove batteries from any lights and check that glued pieces are secure. A little care means the wreath can return next summer with only minor fluffing.
Finally, the best experience-related tip is to make the wreath your own. Maybe your style is classic navy and cranberry red. Maybe it is bright, glittery, and louder than the fireworks finale. Maybe you add a family initial, a military tribute ribbon, or flowers that match your porch planters. The charm of a dollar store July 4th wreath is that it does not have to be perfect. It just has to feel welcoming, festive, and handmade in the best possible way.
Conclusion
Making a simple dollar store July 4th wreath for your doorway is one of the easiest ways to add patriotic charm to your home without overspending. With a basic wreath form, red, white, and blue mesh or ribbon, a few decorative accents, and a little creativity, you can create a front door wreath that looks festive, full, and personal.
The key is to build in layers: start with a sturdy base, add volume with mesh or fabric, bring in pattern with ribbon, and finish with a bow or focal decoration. Keep the colors balanced, secure outdoor pieces well, and protect your wreath from harsh weather when possible. Most importantly, have fun with it. Crafting should not feel like a test. It should feel like a tiny celebration with scissors.
Whether you hang it for Independence Day, Memorial Day, Labor Day, or the entire summer season, this DIY patriotic wreath is a cheerful way to welcome guests before they even ring the bell. And when someone asks where you bought it, you get the best answer of all: “I made it.”