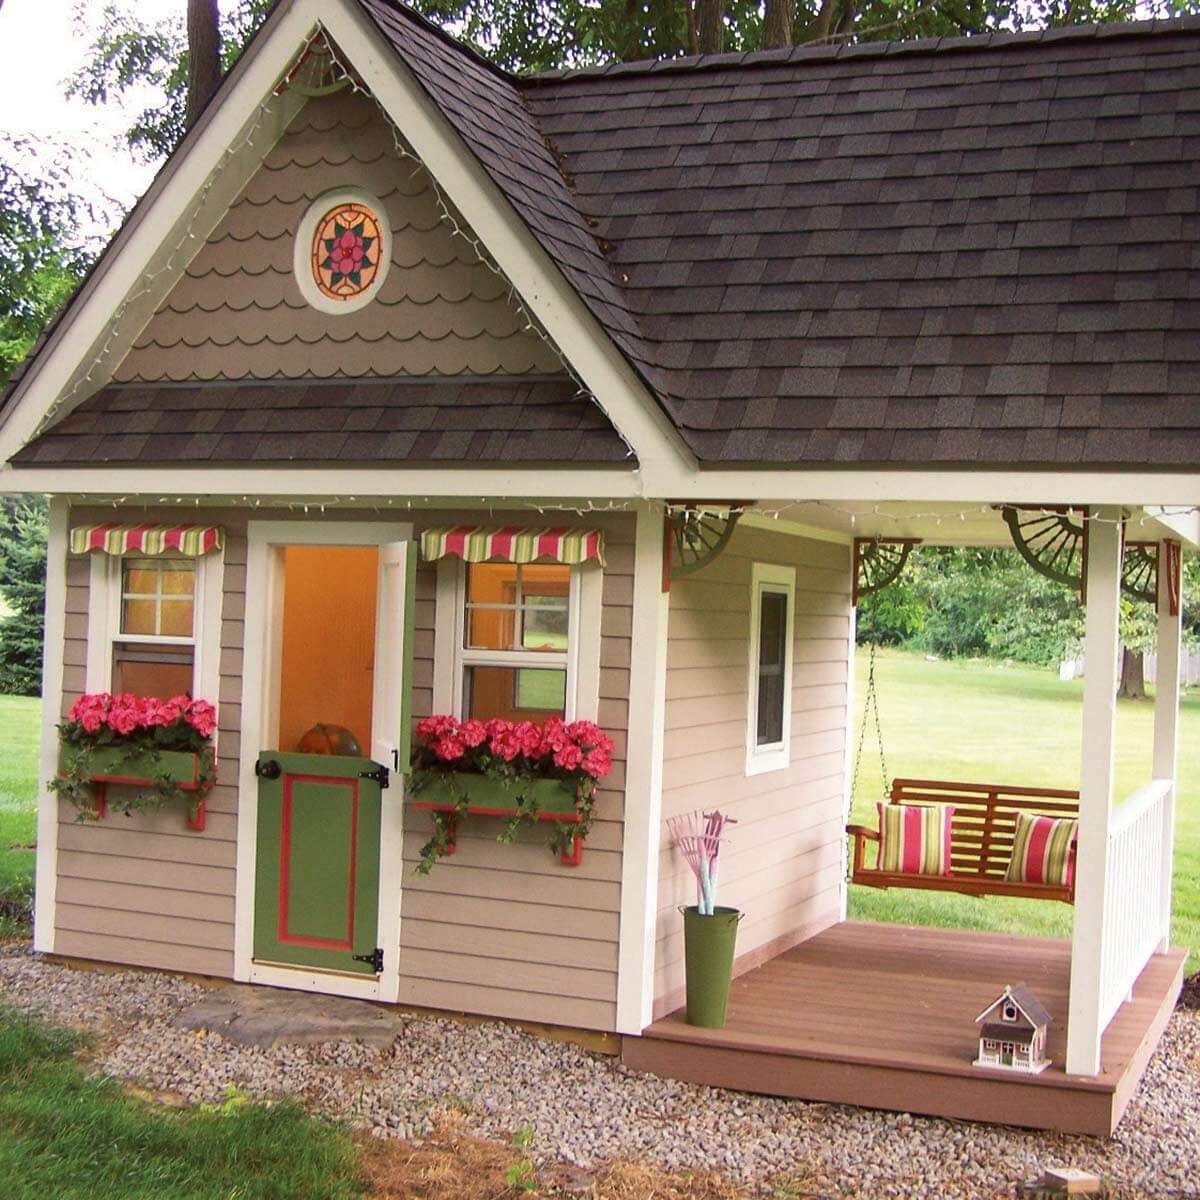
Most backyard playhouses fall into one of two categories: (1) adorable, (2) slowly dissolving like a cookie left in the rain.
A permanent playhouse is the third categorythe one that’s built like a “real” little building, so it can survive real weather,
real kids, and real life. Think less “temporary toy” and more “tiny backyard cabin that happens to be kid-sized.”
The spark for this idea is the kind of project Family Handyman readers love: a playhouse that’s insulated and powered, designed to evolve from
a kid hangout into a calm homework nook as children grow. It’s a simple premise with big payoff: build it right once, then let it level up for years.
What “Permanent” Really Means (Spoiler: Not Just “Heavy”)
“Permanent” doesn’t mean you need marble countertops and a tiny mortgage. It means you borrow the best habits from sheds, studios, and small accessory
buildings:
- A foundation that drains (water is the villain of every backyard structure).
- Framing that stays square (doors that close without shoulder-checking them).
- Weatherproof details (roofing, flashing, and paint that don’t quit after one summer).
- Comfort and usability upgrades (insulation, ventilation, lighting, and maybe power).
- Safety-first design (hardware, openings, surfacing, and finishes that respect how kids actually play).
Start With a Plan That Fits Your Yard, Your Kids, and Your Future
Pick a location that makes supervision easy
A permanent playhouse becomes a “destination,” which is greatuntil it’s hidden behind shrubs like a tiny secret nightclub.
Pick a spot you can see from common vantage points (kitchen window, patio, deck). Aim for:
- Moderate shade or room for an awning to reduce heat buildup.
- Good drainageavoid low spots where water collects.
- Buffer space around the playhouse (more on safety zones later).
Know your local rules before you buy lumber
Many places treat playhouses like small accessory structures. Some jurisdictions follow common code language that exempts
one-story detached accessory buildings (including playhouses) under a certain sizeoften 200 square feetfrom needing a building permit,
but zoning rules (setbacks, height limits, placement) can still apply. Translation: you might dodge one form and still need another.
If you’re adding electricity, that can trigger permits/inspections even when the structure itself is small. A quick call to your local building department
can save you from the most annoying DIY sentence in history: “We need you to open the walls back up.”
Foundation Options That Keep a Playhouse Level and Dry
If a playhouse is “permanent,” the foundation is where permanence actually happens. The goal is simple: keep wood from sitting in water and keep the
building from sinking or twisting.
1) Gravel pad (the drainage champ)
A compacted gravel base is popular for sheds because it drains well and reduces rot risk. It’s also forgiving on many sites. Pair it with pressure-treated
skids or a framed floor system and you’ve got a strong, practical start.
2) Skids (the “small building” classic)
Skids are essentially beefy runnersoften pressure-treated timbersthat support the floor framing. They’re a long-standing shed trick because they lift the
structure slightly and help distribute weight. For a playhouse, skids also make it possible (not easy, but possible) to relocate later.
3) Pavers or blocks (quick leveling)
For smaller builds on relatively flat ground, pavers or deck blocks can workespecially if you’re building a lighter playhouse and you’re meticulous about
leveling and drainage. This is where “measure twice” becomes “measure twelve times.”
4) Concrete slab (maximum permanence)
If you want the most “mini-house” feel, a slab can be a solid choice. It can also simplify keeping critters out. The tradeoff: it’s less forgiving, more
labor, and more likely to involve permits or code requirements depending on your area.
Practical tip: Whatever foundation you choose, design the area around the playhouse so rainwater flows away. Gutters and a small splash
zone of gravel can keep the lower walls from living in a permanent mud spa.
Framing and Materials That Survive Kids and Seasons
Framing: build it like a shed, not like furniture
A permanent playhouse benefits from standard wall framing logic: a flat, square floor; plumb walls; and a roof structure that can handle wind and snow
loads in your region. Even if the building is small, the forces on it aren’t “small” when a storm shows up.
Pressure-treated lumber: where it belongs (and where it doesn’t)
For anything touching the groundor close to itpressure-treated lumber is commonly used because it resists decay and insects. Modern residential
pressure-treated wood is typically preserved with copper-based systems (like ACQ or copper azole), which are widely used today.
For kid-contact surfaces (benches, railings, window ledges), many builders prefer naturally durable woods like cedar, or they use sealed/painted materials.
If you do use pressure-treated components where kids will touch them, good practices include sealing cut ends, using appropriate fasteners, and encouraging
handwashing after heavy play (especially before snacksbecause crackers find a way).
Fasteners and hardware: choose exterior-rated
Outdoor builds eat cheap screws for breakfast. Use exterior-rated fasteners and connectors that are compatible with pressure-treated lumber. Also, keep
hardware child-friendly:
- Trim or cap exposed bolt ends.
- Avoid snag points that can catch clothing strings.
- Skip “open” hooks and questionable DIY rope setups.
Weatherproofing: The Stuff That Makes It Last
Roofing: keep water out like it’s your full-time job
The roof does the hardest work, so don’t treat it like an afterthought. Use proper roof sheathing, underlayment, and a roofing material suited to your
climate (shingles are common; metal can be excellent too). Add flashing where roofs meet walls and around any penetrations.
Siding and trim: pretty is good, sealed is better
Use exterior-grade siding and trim, and pay attention to the bottom edgewhere splashback happens. Leave adequate clearance between siding and grade,
and protect vulnerable edges with paint, flashing, or trim details designed for outdoor exposure.
Paint and finishes: kid-safe and durable
Exterior paint (or solid stain) is not just for looks; it’s a moisture control system. Use quality exterior coatings and repaint before failure, not after.
If you’re using reclaimed materials, be cautious about lead-based paint risks on older woodespecially anything that kids might touch.
Comfort Upgrades: Insulation, Ventilation, and (Optional) Electricity
Insulation: the “homework nook” upgrade
Insulation is what turns a playhouse into a three-season hangout. But insulation only works if you manage moisture:
- Air sealing: Reduce drafts at gaps and penetrations (without trapping moisture).
- Ventilation: A small vent or operable windows help prevent stale, damp air.
- Smart interior finishes: Use materials that can handle temperature swings.
Windows and doors: light, airflow, and fewer “I can’t see!” arguments
Natural light makes the space feel bigger and safer. Operable windows boost comfort and ventilation. For doors, a simple latch that kids can operate from
inside is essential (no one wants a tiny accidental lock-in scenario).
Electricity: treat it like a real outbuilding
If you’re adding power (lights, outlets, maybe a tiny heater or fan), handle it like you would for a shed or studio:
- Use GFCI protection and weather-rated devices where required.
- Plan a safe cable route (often underground conduit) and proper burial depth per local code.
- Install a means of disconnect/shutoff where appropriate.
- Strongly consider a licensed electricianespecially for trenching, panel work, and inspections.
Electricity is the upgrade that can make a playhouse genuinely usable for older kidsreading lights, a charging station, a fan on hot dayswhile also being
the upgrade where “close enough” is not a vibe you want.
Safety Checklist: Build Fun, Not a Future ER Story
A permanent playhouse is still a play structure, and safety guidelines for home playground equipment are worth borrowingespecially if you add a loft,
slide, climbing wall, or elevated deck.
Entrapment and openings: mind the danger zone
Openings that are too small for a body but big enough for a head can be hazardous. Many safety references warn against openings in a midrange that can trap
a child’s head/neck. Design guardrails, ladder rungs, and cutouts thoughtfully.
Surfacing and fall zones: grass isn’t a magic cushion
If your playhouse includes any elevated platform, steps, swing attachments, or a slide, add proper protective surfacing and adequate clearance around
play features. Loose-fill materials (like wood chips) or safety-tested mats are common approaches. Keep the area clear of trip hazards (garden edging is
secretly a toe’s greatest enemy).
Hardware hazards: eliminate snag points
Watch for protruding bolt ends, open hooks, and any hardware that could catch clothing. Also encourage kids to remove bike helmets before playhouse or
playground playhelmet straps can create strangulation hazards on play structures.
Design Details That Make Kids Actually Use It
The most-loved playhouses aren’t the fanciest; they’re the ones that feel like a real “place.” A few high-impact ideas:
- A small covered porch: Adds shade, charm, and a “front door” feeling.
- Built-in bench with storage: For art supplies, blankets, and the mysterious collection of rocks kids insist are “important.”
- Chalkboard or magnetic wall: Easy creativity, easy cleanup.
- Window box or planter: Makes it feel alive and teaches responsibility (occasionally).
- Convertible interior: Hooks for backpacks later, a small desk surface, and lighting if you have power.
Maintenance: 30 Minutes Twice a Year Beats a Weekend of Repairs
Permanent doesn’t mean maintenance-free. It means your maintenance is predictable:
- Spring: Check roof edges, repaint touch-up spots, tighten hardware, confirm doors/windows operate smoothly.
- Fall: Clear leaves, inspect for water pooling, verify caulk/flashing, and look for insect activity.
If you keep water away from the structure and keep the protective coatings intact, a well-built playhouse can last long enough to become a teenage hangout,
a study shed, or even a quiet “parent hiding spot” (purely hypothetical, of course).
Conclusion
A permanent playhouse is a gift that scales: magical when kids are little, useful when they’re older, and still a charming backyard feature
when childhood moves on. Build it like a small buildingsolid foundation, weatherproof shell, safe detailsand you’ll get years of memories without the
annual “why is the floor squishy?” mystery.
Bonus: of Real-World Playhouse Experience (What Builders Learn After It’s “Done”)
Here’s the funny thing about a permanent playhouse: the day you finish is not the day it becomes “complete.” It’s the day the playhouse starts collecting
opinions from its toughest criticskidswho will immediately turn it into something you didn’t plan, didn’t predict, and somehow absolutely love.
Lesson #1: The first upgrade is always shade. Many builders report that their playhouse looks perfect on a cool Saturday morningand then
becomes a toaster oven by 2 p.m. The fix is usually simple: a small porch roof, an awning, a shade sail nearby, or strategic landscaping. Once you add
shade, kids stay longer, and the playhouse becomes a true “hangout” instead of a quick stop between sprinkler sessions.
Lesson #2: Storage saves your sanity. A tiny bench with a lift-up lid doesn’t sound glamorous, but it prevents the playhouse from turning
into a chaotic pile of dolls, markers, and sticky treasure. Builders often end up adding hooks, cubbies, or a narrow shelf because kids love “setting up”
their spacedecorating it, organizing it, re-organizing it, and then declaring they’ve been “working” in there all afternoon.
Lesson #3: The door gets used like a drum. Even gentle kids will slam a playhouse door like they’re auditioning for an action movie.
That’s why real-world builds benefit from sturdy hinges, a forgiving latch, and a door stop. A small detaillike soft-close hardware or a rubber bumper
can eliminate the daily soundtrack of BANG! that echoes through the neighborhood.
Lesson #4: Electricity changes how the space is used. When builders add a light and an outlet (done safely and to code), the playhouse
often shifts from “daytime play” to “year-round space.” A lamp for reading, a fan in summer, or a small heater (used responsibly) can extend comfort.
Families also mention that older kids use the space differently: not for pretend kitchens, but for drawing, crafting, building Lego cities, or quietly
doing homeworkexactly the kind of evolution a permanent playhouse is built for.
Lesson #5: The playhouse becomes a family project magnet. Once the structure exists, everyone wants to personalize it. One weekend it’s a
flower box. Next it’s a mailbox with “official” letters. Then it’s a tiny house number, a “no grown-ups allowed” sign, and a curtain that looks suspiciously
like it came from your living room. The best builds embrace this: they’re sturdy enough to handle add-ons, and flexible enough to let kids make it theirs.
Lesson #6: The best ROI is emotional. Builders often expect their payoff to be “a cute backyard feature.” What they get is bigger:
independent play, sibling bonding, a quiet retreat after a tough day, and a place where stories happen. That’s why building it rightsolid, safe, and
weather-readymatters. You’re not just building a tiny structure. You’re building a tiny chapter of childhood that can last for years.